Table of Contents
Advertisement
Quick Links
Your safety, and the safety of others, is very important. To help you make informed decisions about safety, we have provided installation and operating instructions and other information on labels and
in this guide. This information alerts you to potential hazards that could hurt you or others. It is not possible to warn you about all potential hazards associated with this product, you must use your own
good judgment.
CARELESS INSTALLATION AND OPERATION CAN RESULT IN SERIOUS INJURY OR EQUIPMENT DAMAGE. READ AND UNDERSTAND ALL SAFETY PRECAUTIONS AND OPERATING INSTRUCTIONS BEFORE
INSTALLING AND OPERATING THIS PRODUCT.
This guide identifies potential hazards and has important safety messages that help you and others avoid personal injury or death. WARNING and CAUTION are signal words that identify the level of hazard.
These signal words mean:
WARNING signals a hazard that could cause serious injury or death, if you do not follow recommendations.
recommendations.
This guide uses NOTICE to call attention to important mechanical information and NOTE to emphasize general information worthy of special attention.
IMPACT AND MOVING PARTS ENTANGLEMENT HAZARD
Failure to observe these instructions could lead to severe injury or death
• Always take time to fully read the Instructions and/or Operations Guide, and/or Basic Guide to Winching Techniques, in order to understand your winch
and its operations.
• Always use extreme caution when drilling on any vehicle. Make sure that all fuel lines, brake lines, electrical wires, and other objects are not punctured or
damaged when/if drilling on the vehicle. Thoroughly inspect the area to be drilled (on both sides of material) prior to drilling, and relocate any objects that may
be damaged. Failure to inspect the area to be drilled may result in vehicle damage, electrical shock, fire or personal injury.
• Always wear safety glasses when installing this kit. A drilling operation will cause flying metal chips. Flying chips can cause eye injury.
• Always remove jewelry and wear eye protection.
• Never lean over battery while making connections.
• Never route electrical cables:
o Across any sharp edges.
o Through or near moving parts.
o Near parts that become hot.
• Always insulate and protect all exposed wiring and electrical terminals.
• Always install terminal boots as directed in installation instructions.
• Always use appropriate and adequate care in lifting components into place.
• Always insure components will remain secure during installation and operation.
• Always tighten all nuts and bolts securely, per the installation instructions.
• Always replace all worn or damaged parts before operating.
• Never operate this WARN product with damaged or missing parts.
Read installation and operating instructions thoroughly.
G E N E R A L S A F E T Y P R E C A U T I O N S
W A R N I N G
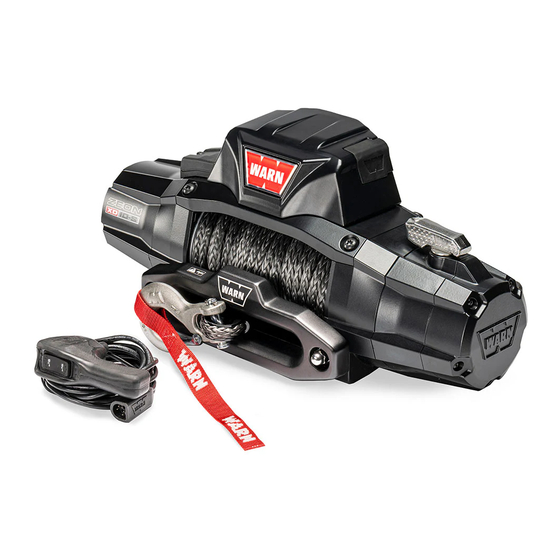
ZEON® XD
Winch Service Manual
CAUTION signals a hazard that may cause minor to moderate injury, if you do not follow
Failure to observe these instructions could lead to minor or moderate injury
• Always use proper tools when making repairs.
• Always utilize a qualified WARN service technician when specialized tools are required.
• Always disconnect all wires from the positive battery terminal or disconnect hydraulic hoses from the winch motor before beginning any work on the winch.
C A U T I O N
MOVING PARTS ENTANGLEMENT HAZARD
Read installation and operating instructions thoroughly.
Advertisement
Table of Contents

Related Manuals for Warn ZEON XD


Summary of Contents for Warn ZEON XD
- Page 1 Your safety, and the safety of others, is very important. To help you make informed decisions about safety, we have provided installation and operating instructions and other information on labels and in this guide. This information alerts you to potential hazards that could hurt you or others. It is not possible to warn you about all potential hazards associated with this product, you must use your own good judgment.
-
Page 2: Table Of Contents
TABLE OF CONTENTS SECTION 1 - GETTING STARTED SECTION 6 - SERVICE KITS AND DIAGRAMS Identification Replacement Parts List Definitions Replacement Parts Diagram Winch Operation SECTION 2 - DISASSEMBLY & ASSEMBLY Suggested Tools Winch Disassembly Winch Reassembly Motor Disassembly Motor Reassembly Geartrain Dissembly Geartrain Reassembly Control Pack Disassembly... -
Page 3: Identification
B E F O R E Y O U B E G I N This manual is intended for use by a WARN authorized service technician. It is important to make repairs with the proper tools and equipment. WARNING Read all instructions and safety information provided. Failure to do so, may cause the winch to fail, leading to personal injury. For full winch operation and techniques, as well as other product specific literature, visit www.warn.com. -
Page 4: Definitions
ZEON® XD 1.2.1 Definitions Control Pack Operation and service of a Warn planetary winch can be explained easier by defining a few major structural components. Refer to Figure 1.2 for the following definitions: Motor MOTOR: The electric winch is driven by a high speed, low torque electric motor. A 12-volt DC vehicle battery generally powers the electric motor. -
Page 5: Winch Operation
• Assortment of Torx Bits 1.3 Winch Operation A Warn winch is a compact device used to pull heavy loads over short distances. The vehicle battery and charging system generates the power for pulling the load. Power feeds from the battery power source into the winch control pack. At the push of a remote control switch the power flows to the winch motor. -
Page 6: Winch Disassembly
2.1 Winch Disassembly... - Page 7 Remove tie plate and ground cable bolts Remove tie plate and bus bar cover bolts Head: T47 Head: T47 M8x1.25x25mm Plastite – 6mmx25mm Torque: 15-17Nm Torque: 3-5Nm (133-150inlb) (27-44inlb) Head: T47 M8x1.25x25mm Head: 13mm Hex Torque: 15-17Nm M8x1.25x14mm (133-150inlb) Torque: 10.6-13Nm (94-115inlb) Remove terminal bolts Remove upper bus bar cover...
- Page 8 Remove control pack and lower bus bar cover Separate geartrain and motor assemblies...
-
Page 9: Winch Reassembly
2.2 Winch Reassembly... - Page 10 Install geartrain assembly, motor assembly, and brake coupler Install control pack cover assembly Install lower bus bar cover...
- Page 11 Install terminal bolts Install bus bar cover bolt Head: 13mm Hex M8x1.25x35mm Head: T25 Torque: 10.6-13Nm Plastite – 6mmx25mm (94-115inlb) Torque: 3-5Nm (27-44inlb) Install tie plate bolts and ground cable bolt Install tie plate bolts Head: T47 M8x1.25x25mm Torque: 15-17Nm (133-150inlb) Head: T47 M8x1.25x25mm...
-
Page 12: Motor Disassembly
2.4 Motor Disassembly... - Page 13 Remove motor cover Remove motor (Section 2.1, steps 1-6) Head: 4mm Hex M5x0.8x60mm Torque: 10.6-13Nm (94-115inlb) Remove motor bolts Head: T30 Remove motor M6x1mmx60mm Torque: 10.6-13Nm (94-115inlb)
- Page 14 Do NOT hold or place motor with shaft UP. The motor may disassemble. Flip motor drum support Remove motor O-ring...
- Page 15 Bushing may be Remove motor bushing stuck to either part Remove motor drum seal...
-
Page 16: Motor Reassembly
2.5 Motor Reassembly... - Page 17 Press in motor drum seal Install motor bushing Verify seal does not sit above pocket wall Press seal until fully seated...
- Page 18 Install motor O-ring Flip motor drum support Do NOT hold or place motor with shaft Install motor UP. The motor may disassemble.
- Page 19 Install motor bolts Install motor cover Head: T30 M6x1mmx60mm Torque: 10.6-13Nm (94-115inlb) Grease motor drum seal Install motor cover bolts Head: 4mm Hex Shell Gadus M5x0.8x60mm S5 V220 2 Torque: 10.6-13Nm (7-11g) (94-115inlb)
-
Page 20: Geartrain Dissembly
2.6 Geartrain Disassembly... - Page 21 Remove drum driver assembly Remove Geartrain (Section 2.1, steps 1-6) Remove geartrain drum support Remove geartrain bolts Head: 4mm Hex M5x0.8x60mm Torque: 10.6-13Nm (94-115inlb)
- Page 22 O-ring may be Remove 3 stage ring gear and o-rings stuck to either part Remove 1 stage carrier and input gear Remove 3 stage carrier, thrust washer, and 2 stage carrier assemblies...
- Page 23 Remove 2 stage ring gear Remove 2 stage ring gear snap ring Remove end cap and end cap gasket Remove end cap bolts Head: T25 Torx M5x0.8x35mm Torque: 5-7Nm (44-62inlb)
- Page 24 Remove clutch lever bolt Remove clutch lever and X-ring seal Head: 4mm Hex 10-24, Custom Tip Torque: 3-5Nm (27-44inlb) Remove geartrain drum seal Remove geartrain drum bushing...
-
Page 25: Geartrain Reassembly
2.7 Geartrain Reassembly... - Page 26 Grease X-ring seal Install clutch lever and X-ring seal Shell Gadus S5 V150XKD (light coat) Install clutch lever bolt Install end cap gasket and end cap Head: 4mm Hex 10-24, Custom Tip Torque: 3-5Nm (27-44inlb)
- Page 27 Grease and install 2 stage ring gear and snap ring Install end cap bolts Aeroshell Fluid 4 Mineral Oil Head: T25 Torx (light coat) M5x0.8x35mm Torque: 5-7Nm (44-62inlb) Verify snap ring is seated and pushed into snap ring groove Seat 2 stage ring gear snap ring...
- Page 28 Inspect 2 stage snap ring Verify turning the clutch handle engages and disengages the 2 stage ring gear...
- Page 29 Press in geartrain drum seal Install geartrain drum bushing and seal Verify seal does not sit above pocket wall Press seal until fully seated...
- Page 30 Install lower 3 stage ring gear O-ring Install 3 stage ring gear Verify the dimple on the 3 stage ring gear is visible and in the 12’o-clock position...
- Page 31 Grease the 3 stage ring gear, filling each tooth completely Install the upper 3 stage ring gear o-ring Shell Gadus S5 V150XKD (8.5-36g) Grease 2 stage sun gear, filling each tooth completely. Install the Install the 3 stage carrier thrust washer and 2 stage carrier.
- Page 32 Grease and install the input sun gear, filling each tooth completely. Grease and install the 1st stage sun gear, filling each tooth completely. Shell Gadus Shell Gadus S5 V150XKD S5 V150XKD (0.5-2g) (1.5-10g) Grease the 1st and 2 stage ring gears inside of the end housing, filling Install the end housing each tooth completely.
- Page 33 Apply light pressure to the end cap while spinning the driveshaft to seat Install the driveshaft the end housing Hold end housing and drum support together and flip upside down Inspect the end housing gap to verify the end housing is seated...
- Page 34 Install the geartrain bolts Install the drum driver assembly Head: 4mm Hex M5x0.8x60mm Torque: 10.6-13Nm (94-115inlb) Grease the geartrain drum seal Shell Gadus S5 V220 2 (7-11g)
-
Page 35: Control Pack Disassembly
2.8 Control Pack Disassembly... - Page 36 Remove D-plug screws (OPTIONAL) Remove Control Pack (Section 2.1, steps 1-5) Head: T15 Torx Plastite 8-16x0.5” Torque: Until Seated Remove control pack cover Remove control pack cover bolts Head: 8mm Hex M5x0.8x16mm Torque: 4-5Nm (35-44inlb)
- Page 37 Remove dust cover from control pack cover (OPTIONAL) Separate control pack cover and tie plate from contactor Remove Power In cable Remove Power In bus bar bolt Head: 13mm Hex M8x1.25x14mm Torque: 8-9.5Nm (71-84inlb)
- Page 38 Remove bus bar nuts Remove red D-plug wire Head: 13mm Hex M8x1.25 Torque: 8-9.5Nm (71-84inlb) Remove bus bars and bus bar separator Remove contactor screws 8mm Hex M6x13mm 8-9.5Nm (71-84inlb)
- Page 39 Remove baseplate Remove D-plug spade connectors...
-
Page 40: Control Pack Reassembly
2.9 Control Pack Reassembly... - Page 41 Install D-plug spade connectors Install bus bar separator Install baseplate...
- Page 42 Install contactor screws Verify red wire is not pinched behind bus bar separator Head: 8mm Hex M6x13mm Torque: 8-9.5Nm (71-84inlb) Install red wire and power in bus bar Install bus bars...
- Page 43 Install power in cable Install bus bar nuts Head: 13mm Hex M8x1.25 Torque: 8-9.5Nm (71-84inlb) Install power in bus bar bolt Route black D-plug wire through separator Head: 13mm Hex M8x1.25x14mm Torque: 8-9.5Nm (71-84inlb)
- Page 44 Install dust cover Pull dust cover tail through control pack cover Install control pack cover and tie plate to baseplate...
- Page 45 Install control pack cover bolts Open dust cover Head: 8mm Hex M5x0.8x16mm Torque: 4-5Nm (35-44inlb) Install D-plug screws Head: T15 Torx Plastite 8-16x0.5” Torque: Until seated...
-
Page 46: Control Pack Relocation (31")
2.10 Control Pack Relocation (31”) - Page 47 Disassemble control pack (section 2.8 steps 1-7) Remove bus bar nuts Head: 13mm Hex M8x1.25 Torque: 8-9.5Nm (71-84inlb) Remove A, F1, and F2 bus bars, NOT power in bus bar Loosen, but do not remove Head: 8mm Hex M6x13mm Torque: 8-9.5Nm (71-84inlb)
- Page 48 Install A, F1, and F2 cables to contactor Install A, F1, and F2 bus bar nuts Head: 13mm Hex M8x1.25 Torque: 8-9.5Nm (71-84inlb) Install control pack cover and relocation bracket Tighten Head: 8mm Hex M6x13mm Torque: 8-9.5Nm (71-84inlb)
- Page 49 Head: 8mm Hex Head: 10mm Hex M5x16mm M6x16mm Torque: 4-5Nm Torque: 4-5Nm (35-44inlb) ZEON XD Configuration (35-44inlb) ZEON Configuration Install A, F1, and F2 cables WITHOUT spacer Install A, F1, and F2 cables WITH spacer Head: T20 Torx Head: T20 Torx...
- Page 50 Extend black D-plug wire Bolt relocation bracket to mounting surface Head: 13mm Hex 5/16”-18x1” Torque: 10.6-13Nm (94-115inlb) Head: 13mm Hex Cut and splice 5/16-18 Lock Nut extension with Torque:10.6-13Nm (94-115inlb) butt connectors M6 Lock Washer 5/16” Washer (OPTIONAL for Zeon Platinum) Remote controlled clutch harness...
-
Page 51: Control Pack Relocation (78")
2.11 Control Pack Relocation (78”) - Page 52 DETERMINE CONTACTOR MOUNTING LOCATION AND CABLE Disassemble control pack (section 2.8 steps 1-15) ROUTING PATH To determine the contactor mounting location it is recommended that the contactor be mounted on a solid mounting surface and easily accessible. Contactor should be in a location that is as clean and dry as possible.
- Page 53 Head: 13mm Hex M8x1.25 Torque:8-9.5Nm (71-84inlb) Install Battery (-) cable and black D-plug wire Mount securely to vehicle. If you require greater socket location flexibility, order Warn PN 86605 Head:13mm Hex Black M8x1.25x14mm Torque: 10.6-13Nm (To Motor Ground) Green (94-115inlb) Brown...
- Page 54 Head: T20 Torx Head: T20 Torx M4x16mm M4x16mm Torque: Until Seated Spacer Torque: Until Seated Head: 13mm Hex M8x35mm Head: 13mm Hex Torque: 10.6-13Nm M8x1.25 (94-115inlb) Torque: 8-9.5Nm ZEON XD Configuration (71-84inlb) ZEON Configuration Cut and splice extension with butt connectors...
-
Page 55: Power In/Out
SECTION 4 – WINCH TROUBLE SHOOTING GENERAL WINCH TROUBLESHOOTING This section covers general troubleshooting. NOTICE You must use a 12VDC battery to perform any analysis on the AXON and Motactor. Using any other type of power supply could result in an incorrect diagnosis. -
Page 56: Pull Capacity
Incorrectly sized power cables Any deviation from factory power cables will used modify performance. Install Warn factory Brake spring is damaged Replace brake spring. Inspect brake couplers power cables. for damage or excess wear. Replace couplers 4.3 Brake... -
Page 57: Electrical
Seals are dry. Power winch in and out a short distance and Incorrect fairlead used Make sure a Warn fairlead is used and is then try to freespool. Service winch and correctly sized for the winch. WARNING: USING grease seals. -
Page 58: Noise
4.6.2 Drum bushing not lubricated. Grease drum bushings. Electrical sparks Loose connection of wires to Secure the motor terminal and wires to the Excessive wear on clutch plate. Inspect clutch plate. If excessive wear is appear around motor terminals. terminal. present (or the drive shaft has worn a hole in motor. -
Page 59: Section 5 - Maintenance
SECTION 5 - MAINTENANCE General Winch Maintenance • Keep winch free of dirt, oil, grease, water and other substances. Remove any overflow grease from bearings. • Check all mounting bolts and make sure they are tightened to proper torque. Replace any damaged fasteners. •... -
Page 60: Winch Rope Maintenance
Winch Rope Maintenance Cleaning: Rope should be replaced when: • Use low pressure water to clean synthetic rope. Do not use any chemicals. • Rope bulk anywhere along the length is reduced by 10% or more by abrasion. • Do not direct high pressure water (pressure washers, car washes, etc.) directly between the drum support •... - Page 62 34 35 43 44 45 989716A0...
Need help?
Do you have a question about the ZEON XD and is the answer not in the manual?
Questions and answers