Table of Contents
Advertisement
Quick Links
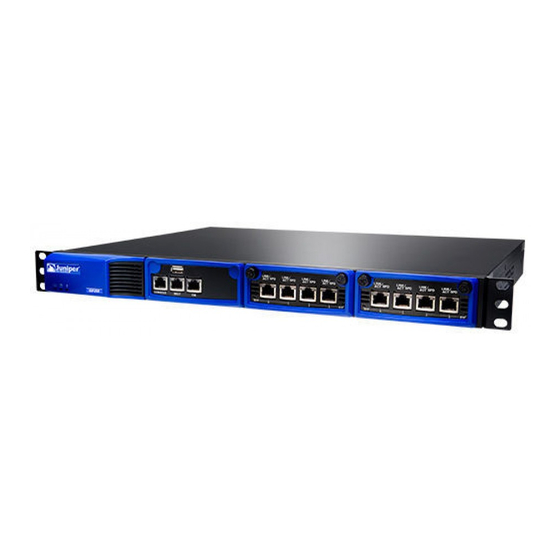
IDP Series Intrusion Detection and Prevention Appliances
IDP250 Installation Guide
Release 5.0
Juniper Networks, Inc.
1194 North Mathilda Avenue
Sunnyvale, California 94089
USA
408-745-2000
www.juniper.net
Part Number: 530-029729-01, Revision 01
Download from Www.Somanuals.com. All Manuals Search And Download.
Advertisement
Table of Contents

Related Manuals for Juniper IDP Series


Summary of Contents for Juniper IDP Series
- Page 1 IDP Series Intrusion Detection and Prevention Appliances IDP250 Installation Guide Release 5.0 Juniper Networks, Inc. 1194 North Mathilda Avenue Sunnyvale, California 94089 408-745-2000 www.juniper.net Part Number: 530-029729-01, Revision 01 Download from Www.Somanuals.com. All Manuals Search And Download.
- Page 2 Products made or sold by Juniper Networks or components thereof might be covered by one or more of the following patents that are owned by or licensed to Juniper Networks: U.S. Patent Nos. 5,473,599, 5,905,725, 5,909,440, 6,192,051, 6,333,650, 6,359,479, 6,406,312, 6,429,706, 6,459,579, 6,493,347, 6,538,518, 6,538,899, 6,552,918, 6,567,902, 6,578,186, and 6,590,785.
- Page 3 (g) distribute any key for the Software provided by Juniper to any third party; (h) use the Software in any manner that extends or is broader than the uses purchased by Customer from Juniper or an authorized Juniper reseller;...
- Page 4 (or services are accessed by) the Software shall be a third party beneficiary with respect to this Agreement, and such licensor or vendor shall have the right to enforce this Agreement in its own name as if it were Juniper. In addition, certain third party software may be provided with the Software and is subject to the accompanying license(s), if any, of its respective owner(s).
- Page 5 Software, whether oral or written (including any inconsistent terms contained in a purchase order), except that the terms of a separate written agreement executed by an authorized Juniper representative and Customer shall govern to the extent such terms are inconsistent or conflict with terms contained herein.
- Page 6 Download from Www.Somanuals.com. All Manuals Search And Download.
-
Page 7: Table Of Contents
Table of Contents Preface Objectives ......................xi Audience ......................xi Documentation Conventions ................xi Related Documentation ................xiii Requesting Technical Support ...............xiv Self-Help Online Tools and Resources ............xiv Opening a Case with JTAC ...............xv Part 1 Hardware and Software Overview Chapter 1 Hardware Overview IDP250 Overview ....................3 Power Supply ....................4 Hard Drive ......................4... - Page 8 IDP250 Installation Guide Part 2 Performing the Installation Chapter 3 Installation Overview Before You Begin ...................21 Basic Steps ....................22 Chapter 4 Installing the Appliance to Your Equipment Rack and Connecting Power Rack Mounting Kits and Required Tools ............23 Mounting to Midmount Brackets ..............24 Mounting to Rack Rails ..................25 Connecting Power ..................25 Chapter 5...
- Page 9 Table of Contents Part 4 Upgrading Software and Installing Field Replaceable Units Chapter 8 Upgrading Software Updating Software (NSM Procedure) .............49 Upgrading Software (CLI Procedure) ..............51 Chapter 9 Installing Field Replaceable Units Replacing a Power Supply ................53 Chapter 10 Reimaging the Appliance Reimaging and Relicensing an Appliance ............55 Part 5 Technical Specifications and Compliance Statements...
- Page 10 IDP250 Installation Guide Table of Contents Download from Www.Somanuals.com. All Manuals Search And Download.
-
Page 11: Preface
Related Documentation on page xiii Requesting Technical Support on page xiv Objectives This guide explains how to install, configure, update, and service an IDP Series Intrusion Detection and Prevention appliance. Audience This guide is intended for experienced system and network specialists. - Page 12 IDP250 Installation Guide Table 2 on page xii defines text conventions used in this guide. Table 2: Text Conventions Convention Description Examples Bold typeface like this Represents commands and keywords Issue the clock source command. in text. Specify the keyword exp-msg. Represents keywords Click User Objects Represents UI elements...
- Page 13 QuickStart and ACM Wizard pages to configure network settings, network interfaces, and NIC features. IDP Series Installation Guide: IDP200, Provides instructions for installing, configuring, updating, and servicing the IDP600, IDP1100 IDP Series appliances.
-
Page 14: Self-Help Online Tools And Resources
7 days a week, 365 days a year. Self-Help Online Tools and Resources For quick and easy problem resolution, Juniper Networks has designed an online self-service portal called the Customer Support Center (CSC) that provides you with the following features: Find CSC offerings: http://www.juniper.net/customers/support/... -
Page 15: Opening A Case With Jtac
Download the latest versions of software and review release notes: http://www.juniper.net/customers/csc/software/ Search technical bulletins for relevant hardware and software notifications: https://www.juniper.net/alerts/ Join and participate in the Juniper Networks Community Forum: http://www.juniper.net/company/communities/ Open a case online in the CSC Case Management tool: http://www.juniper.net/cm/... - Page 16 IDP250 Installation Guide Requesting Technical Support Download from Www.Somanuals.com. All Manuals Search And Download.
-
Page 17: Hardware And Software Overview
Part 1 Hardware and Software Overview Hardware Overview on page 3 Software Overview on page 15 Hardware and Software Overview Download from Www.Somanuals.com. All Manuals Search And Download. - Page 18 IDP250 Installation Guide Hardware and Software Overview Download from Www.Somanuals.com. All Manuals Search And Download.
-
Page 19: Hardware Overview
Chapter 1 Hardware Overview This chapter includes the following topics: IDP250 Overview on page 3 Power Supply on page 4 Hard Drive on page 4 Fans on page 4 System Status LEDs on page 4 USB Port on page 5 Serial Console Port on page 5 Management Interface Port on page 5 High Availability Interface Port on page 6... -
Page 20: Fans
IDP250 Installation Guide Traffic Interface Ports on page 7 IDP250 Technical Specifications on page 59 Power Supply The appliance has one power supply. It is a field replaceable unit (FRU). Replacing a Power Supply on page 53 Related Topics Hard Drive The appliance has one 80 GB hard drive. -
Page 21: Usb Port
Chapter 1: Hardware Overview USB Port The appliance has a USB port you can use to reimage the appliance, if necessary. Serial Console Port The console serial port provides access, using an RJ-45 connector, to the command-line interface (CLI). NOTE: Although both the console serial port and the management port use RJ-45 connectors, do not plug the network cable into the console serial port. -
Page 22: High Availability Interface Port
IDP250 Installation Guide Table 7: Management Port LEDs (continued) State Description TX/RX Orange Connection is 1000 Mbps. Green Connection is 100 Mbps. If LINK indicates activity, TX/RX off indicates connection is 10 Mbps. If LINK indicates no activity, TX/RX off indicates no activity as well. -
Page 23: Traffic Interface Ports
Chapter 1: Hardware Overview Table 8: High Availability Port LEDs (continued) State Description TX/RX Orange Connection is 1000 Mbps. Green Connection is 100 Mbps. If LINK indicates activity, TX/RX off indicates connection is 10 Mbps. If LINK indicates no activity, TX/RX off indicates no activity as well. - Page 24 IDP250 Installation Guide Table 9: Copper Port LEDs State Description LINK ACT Glows green Link is present. Blinks green Activity. No link present. LINK SPD Green Connection is 100 Mbps. Yellow Connection is 1 Gbps. If LINK ACT is on, the connection is 10 Mbps. If LINK ACT is off, LINK SPD off indicates no link is present as well.
-
Page 25: Deployment Mode
Chapter 1: Hardware Overview Table 10: Fiber Port LEDs State Description LINK ACT Glows green Link is present. Flashes green Activity. No link present. LINK SPD Green Connection is 100 Mbps. Yellow Connection is 1 Gbps. Orange Connection is 10 Gbps. If LINK ACT is on, the connection is 10 Mbps. - Page 26 IDP250 Installation Guide Deployment Mode For each virtual router, you select the deployment mode: Sniffer–In an out-of-path, sniffer mode deployment, the IDP appliance can detect attacks but can take only limited action. You connect the IDP traffic interfaces to a mirrored port of a network hub or switch. Transparent–In an in-path, transparent mode deployment, traffic arrives in one interface and is forwarded through the other.
-
Page 27: Nics Off
Chapter 1: Hardware Overview Figure 6: Internal Bypass When the IDP operating system resumes healthy operations, it sends a reset signal to the traffic interfaces, and the interfaces resume normal operation. NOTE: All copper port traffic interfaces support internal bypass. Some, but not all, fiber port traffic interfaces support internal bypass. -
Page 28: External Bypass
IDP250 Installation Guide External Bypass The External Bypass setting supports third-party external bypass units. When the IDP appliance is turned on and available, it sends NetScreen Redundancy Protocol (NSRP) heartbeats to the external bypass unit. When the NSRP packets flow, the external bypass unit allows connections to proceed through the IDP appliance. -
Page 29: Layer 2 Bypass
Chapter 1: Hardware Overview When PPM is enabled, a PPM daemon monitors the health of IDP traffic interfaces belonging to the same virtual router. If a traffic interface loses link, the PPM process turns off any associated network interfaces in the same virtual router so that other network devices detect that the virtual router is down and route around it. - Page 30 IDP250 Installation Guide If you enable Layer 2 bypass, the interfaces pass through IPv6, internetwork packet exchange (IPX), Cisco Discovery Protocol (CDP), and interior gateway routing protocol (IGRP). If you enable internal bypass, the interfaces do not pass through NetScreen Redundancy Protocol (NSRP) packets even if Layer 2 bypass is enabled.
-
Page 31: Software Overview
Chapter 2 Software Overview This chapter includes the following topics: On-Box Software Overview on page 15 Centralized Management with NSM Overview on page 16 J-Security Center Updates Overview on page 17 On-Box Software Overview You use on-box software to get the appliance up and running in the desired deployment mode, to configure appliance interfaces, and to establish communication with Network and Security Manager (NSM). - Page 32 Centralized Management with NSM Overview Juniper Networks Network and Security Manager (NSM) is a central management server capable of managing hundreds of IDP appliances and other Juniper Networks devices, such as ScreenOS firewalls, SA Series appliances, and IC Series appliances.
- Page 33 60 protocols and more than 500 service contexts. You should update IDP detector engine when you first install IDP, whenever you upgrade, and whenever alerted to do so by Juniper Networks. You can view release notes for detector engine updates at http://www.juniper.net/techpubs/software/management/idp/de/...
-
Page 34: J-Security Center Updates Overview
IDP250 Installation Guide J-Security Center Updates Overview Download from Www.Somanuals.com. All Manuals Search And Download. - Page 35 Part 2 Performing the Installation Installation Overview on page 21 Installing the Appliance to Your Equipment Rack and Connecting Power on page 23 Performing the Initial Network Configuration and Licensing Tasks on page 27 Connecting the IDP Traffic Interfaces to Your Network and Verifying Traffic Flow on page 35 Performing the Installation Download from Www.Somanuals.com.
- Page 36 IDP250 Installation Guide Performing the Installation Download from Www.Somanuals.com. All Manuals Search And Download.
-
Page 37: Installation Overview
For a comprehensive presentation on the precautions you must take to prevent personal injury and damage to the equipment, see the Juniper Networks Security Products Safety Guide. Before You Begin... -
Page 38: Basic Steps
Read the release notes for your release. Release notes make you aware of supported and unsupported features, known issues, and fixed issues. Go to and download the http://www.juniper.net/techpubs/software/management/idp/ release notes for your release. Become familiar with the safety and security guidelines that pertain to your installation. -
Page 39: Installing The Appliance To Your Equipment Rack And Connecting Power
Chapter 4 Installing the Appliance to Your Equipment Rack and Connecting Power This chapter includes the following topics: Rack Mounting Kits and Required Tools on page 23 Mounting to Midmount Brackets on page 24 Mounting to Rack Rails on page 25 Connecting Power on page 25 Rack Mounting Kits and Required Tools Table 12 on page 23 describes the rack mounting hardware included in a standard... - Page 40 IDP250 Installation Guide Mounting to Midmount Brackets To mount the appliance using the midmount brackets: Attach one rack-mounting bracket to each side of the chassis with the bracket screws. Figure 10: 1-RU Midmount Bracket With another person, place the chassis into position between rack posts in the equipment rack and align the rack-mounting bracket holes with the rack post holes.
-
Page 41: Connecting Power
Chapter 4: Installing the Appliance to Your Equipment Rack and Connecting Power Rack Mounting Kits and Required Tools on page 23 Related Topics Mounting to Rack Rails To mount the device to equipment rack rails: Attach the rails to each side of the chassis with the bracket screws. Make sure the hinged brackets are at the back of the device. - Page 42 IDP250 Installation Guide Connect the other end of the power cable to the electrical outlet. Connecting Power Download from Www.Somanuals.com. All Manuals Search And Download.
-
Page 43: Performing The Initial Network Configuration And Licensing Tasks
Chapter 5 Performing the Initial Network Configuration and Licensing Tasks This chapter includes the following topics: Performing the Initial Configuration on page 27 Getting Started with the EasyConfig Wizard (Serial Console Port) on page 29 Getting Started with the QuickStart Wizard (Management Port) on page 30 Getting Started with the ACM Wizard (Management Port) on page 31 Installing the Product License Key on page 32 Performing the Initial Configuration... - Page 44 SSH) ACM access NSM connection information One-time password (OTP) for interoperability with Juniper Networks SA Series or UAC devices Getting Started with the EasyConfig Wizard (Serial Console Port) on page 29 Related Topics Getting Started with the QuickStart Wizard (Management Port) on page 30...
- Page 45 Chapter 5: Performing the Initial Network Configuration and Licensing Tasks Getting Started with the EasyConfig Wizard (Serial Console Port) We recommend you get started by running the EasyConfig wizard to assign an IP address to the management interface. Then, you can access the ACM Wizard from a remote location to complete the appliance configuration.
- Page 46 IDP250 Installation Guide Mask: 255.255.255.0 What IP address do you want to configure for the management interface? [192.168.1.1] Type an IP address and press Enter. The following text appears: What netmask do you want to configure for the management interface? [255.255.255.0] Type your netmask and press Enter.
- Page 47 Chapter 5: Performing the Initial Network Configuration and Licensing Tasks To get started with the QuickStart wizard: Connect one end of an Ethernet cable to the management interface port and the other end to the Ethernet port of your laptop. On your laptop, open a Web browser.
-
Page 48: Installing The Product License Key
Installing the Product License Key IDP 4.1 and later releases require you to install a permanent license key. To install the permanent license key: Open a Web browser and navigate to the Juniper Networks License Management System Tool (LMS tool): https://www.juniper.net/lcrs/license.do Authenticate with your Juniper Networks customer username and password. - Page 49 Chapter 5: Performing the Initial Network Configuration and Licensing Tasks [root@localhost ~] scio lic add lic.txt Run the following scio command to verify you have successfully added the license key: [root@localhost ~] scio lic list [root@localhost ~]# scio lic list ID Machine ID Issue Date Expiration...
- Page 50 IDP250 Installation Guide Installing the Product License Key Download from Www.Somanuals.com. All Manuals Search And Download.
-
Page 51: Connecting The Idp Traffic Interfaces To Your Network And Verifying Traffic Flow
Chapter 6 Connecting the IDP Traffic Interfaces to Your Network and Verifying Traffic Flow This chapter includes the following topics: Guidelines for Connecting IDP Interfaces to Your Network Devices on page 35 Choosing Cables for Traffic Interfaces (Copper Ports) on page 36 Connecting and Disconnecting Fiber Cables on page 37 Verifying Traffic Flow on page 38 Guidelines for Connecting IDP Interfaces to Your Network Devices... -
Page 52: Connecting Devices That Support Auto-Mdix
IDP250 Installation Guide Table 14: Interface Connection Guidelines (continued) Port Cable Connection Guidelines Traffic interface ports Sniffer Mode Copper Ports Connect one end of a CAT-5 straight-through cable to a traffic interface port located at the front of the chassis. Connect the other end to the Switched Port Analyzer (SPAN) port of a switch or a hub. -
Page 53: Connecting And Disconnecting Fiber Cables
Chapter 6: Connecting the IDP Traffic Interfaces to Your Network and Verifying Traffic Flow NOTE: IDP75, IDP250, IDP800, and IDP8200 support auto-MDIX. Connecting Devices That Do Not Support Auto-MDIX For connections to a firewall or server, use a crossover cable. For connections to a switch or hub, use a straight-through cable. -
Page 54: Verifying Traffic Flow
IDP250 Installation Guide Slide the clip into the transceiver port until it clicks into place. Because the fit is close, you may have to apply some pressure to seat the clip. Apply pressure evenly and gently to avoid clip breakage. To remove a Gigabit Ethernet cable from a transceiver: Hold the cable clip firmly but gently between your thumb and forefinger with your thumb on top of the clip and your finger under the clip. -
Page 55: Adding The Idp Appliance To Nsm
Part 3 Adding the IDP Appliance to NSM Adding the IDP Appliance to NSM on page 41 Adding the IDP Appliance to NSM Download from Www.Somanuals.com. All Manuals Search And Download. - Page 56 IDP250 Installation Guide Adding the IDP Appliance to NSM Download from Www.Somanuals.com. All Manuals Search And Download.
-
Page 57: Reviewing Compatibility With Nsm
Series release and NSM release. In some cases, you might be required to install a schema update on NSM to support the IDP Series release. If so, follow the instructions in the release notes to install the schema update. NOTE: The schema update is also known as the forward support update. - Page 58 IDP250 Installation Guide To import an IDP device with a known IP address: In the NSM navigation tree, select Device Manager > Devices. Figure 12: NSM Add Device Wizard: Add Device Click the + icon and select Device to display the Add Device wizard. Select Device Is Reachable (default) and click Next to display the page where you configure connection settings.
- Page 59 Chapter 7: Adding the IDP Appliance to NSM Enter the password for the device admin user. You set the password for admin when you ran the ACM Wizard. Enter the password for the device root user. You set the password for root when you ran the ACM Wizard.
- Page 60 IDP250 Installation Guide Log into the IDP command-line interface and verify the SSH key fingerprint. Comparing the SSH key fingerprint information enables you to detect man-in-the-middle attacks: Connect to the IDP command-line interface: Use SSH to connect to the IP address or hostname for the management interface.
- Page 61 Chapter 7: Adding the IDP Appliance to NSM Figure 16: NSM Add Device Wizard: Add Device Confirmation Click Next to import the configuration from the IDP device. Upon success, NSM displays the following message: Figure 17: NSM Add Device Wizard: Configuration Import Confirmation Click Finish.
- Page 62 IDP250 Installation Guide Figure 18: NSM Device Manager: Viewing Device Status Reviewing Compatibility with NSM on page 41 Related Topics Basic Steps on page 22 Adding a Reachable IDP Device to NSM Download from Www.Somanuals.com. All Manuals Search And Download.
- Page 63 Part 4 Upgrading Software and Installing Field Replaceable Units Upgrading Software on page 49 Installing Field Replaceable Units on page 53 Reimaging the Appliance on page 55 Upgrading Software and Installing Field Replaceable Units Download from Www.Somanuals.com. All Manuals Search And Download.
- Page 64 IDP250 Installation Guide Upgrading Software and Installing Field Replaceable Units Download from Www.Somanuals.com. All Manuals Search And Download.
-
Page 65: Chapter 8 Upgrading Software
To add an IDP software image to the NSM GUI server: Download the software image: Go to and log in with your https://www.juniper.net/customers/csc/software/ customer username and password. Enter the IDP device serial number to display a view of applicable software releases available for download. - Page 66 IDP250 Installation Guide From the Select Software Image list, select the image file you just added to the NSM GUI server. In the Select Devices list, select the IDP devices on which to install the software update. Click Next and complete the wizard steps. Select Automate ADM Transformation to automatically update the Abstract Data Model (ADM) for the device after NSM installs the update.
- Page 67 Download the software image to a host that runs an FTP server. Follow these steps: Go to and log in with your https://www.juniper.net/customers/csc/software/ customer username and password. Navigate to IDP > ScreenOS Software Downloads (including NSM/Global Pro, STRM, IDP and NetScreen-Remote). In the row for IDP, click 5.0.
- Page 68 IDP250 Installation Guide Download the IDP detector engine and NSM attack database updates to the NSM Next Steps: GUI server: From the NSM main menu, select Tools > View/Update NSM attack database and complete the wizard steps. Push the updated IDP detector engine to IDP devices: From the NSM main menu, select Devices >...
-
Page 69: Installing Field Replaceable Units
Replacing a Power Supply on page 53 Replacing a Power Supply The following procedure applies to models for which the power supply is a field replaceable unit (FRU). For information on obtaining spares, contact your Juniper Networks sales representative. To remove a power supply: Go to the back of the device and locate the power supply you want to remove. - Page 70 IDP250 Installation Guide The power supply LED turns amber to indicate that the power supply is receiving power. The LED turns green to indicate that it is receiving power and is giving power to the appliance (only occurs if appliance is on). The high-pitched whine stops and the PS FAIL light on the front of the appliance turns off.
-
Page 71: Reimaging The Appliance
Insert the USB flash memory stick that shipped with the appliance into the USB port on the front of the appliance. If you have misplaced your USB flash memory stick, contact Juniper Networks Technical Assistance Center (JTAC). Power on the appliance. - Page 72 IDP250 Installation Guide Reimaging and Relicensing an Appliance Download from Www.Somanuals.com. All Manuals Search And Download.
- Page 73 Part 5 Technical Specifications and Compliance Statements Technical Specifications on page 59 Compliance Statements on page 61 Common Criteria EAL2 Compliance on page 63 Technical Specifications and Compliance Statements Download from Www.Somanuals.com. All Manuals Search And Download.
- Page 74 IDP250 Installation Guide Technical Specifications and Compliance Statements Download from Www.Somanuals.com. All Manuals Search And Download.
-
Page 75: Technical Specifications
Chapter 11 Technical Specifications This chapter includes the following topics: IDP250 Technical Specifications on page 59 IDP250 Technical Specifications Table 15 on page 59 lists physical specifications. Table 15: Physical Specifications Specification Value Form Factor 1 RU Height 1.69 in. (4.3 cm) Width 17 in. - Page 76 IDP250 Installation Guide Table 17: Power Cord Specifications Country Specifications United States and Canada UL-approved and CSA-certified Flexible cord minimum spec: No. 18 (1.5 mm2SVT or SJT, 3-conductor Current capacity of 10A minimum Earth-grounding attachment plug with NEMA 5-15P (10A, 125V) configuration Table 18 on page 60 list environmental specifications.
-
Page 77: Compliance Statements
Chapter 12 Compliance Statements This chapter includes the following topic: Standards Compliance on page 61 Standards Compliance Table 20: Category Standards Compliance Safety UL 60950, Third Edition — Safety of Information Technology Equipment CSA C2.22 No. 60950, Third Edition — Safety of Information Technology Equipment EN 60950, 2000 —... - Page 78 IDP250 Installation Guide Standards Compliance Download from Www.Somanuals.com. All Manuals Search And Download.
-
Page 79: Chapter 13 Common Criteria Eal2 Compliance
Chapter 13 Common Criteria EAL2 Compliance This chapter includes the following topics: Common Criteria EAL2 Compliance on page 63 Common Criteria EAL2 Compliance Table 21 on page 63Table 21 on page 63 provides guidelines you must observe to deploy and use the IDP appliance in compliance with the Common Criteria EAL2. In addition, you must observe compliance guidelines for Network and Security Manager (NSM), listed in the Network and Security Manager Administration Guide. - Page 80 IDP250 Installation Guide Common Criteria EAL2 Compliance Download from Www.Somanuals.com. All Manuals Search And Download.
-
Page 81: Part 6 Index
Part 6 Index Index on page 67 Index Download from Www.Somanuals.com. All Manuals Search And Download. - Page 82 IDP250 Installation Guide Index Download from Www.Somanuals.com. All Manuals Search And Download.
- Page 83 IDP Custom Attack Objects Reference and Examples copper ports Guide...............xiii cable guidelines............36 IDP Reporter..............16 CSA C2.22 No. 60950 compliance.......61 IDP Reporter User s Guide...........xiii customer support............xiv IDP Series Installation Guide: IDP200, IDP600, contacting JTAC............xiv IDP1100..............xiii idp.sh utility..............16 IDP250................3 IDP250 Installation Guide..........xiii DNS, setting..............28 IDP75 Installation Guide..........xiii IDP800 Installation Guide..........xiii...
- Page 84 IDP250 Installation Guide LEDs safety guidelines............21 fault................4 scio utility..............15 HA port..............6 sctop utility............16, 38 hard drive...............4 security guidelines............21 IDP250..............3 serial port console............5 power..............4 sniffer mode traffic interface...........7, 8 setting..............28 specifications...............59 EMI compliance............61 immunity..............61 management interface, choosing cable for....35 SSH-access, configuring..........28 MDIX................36 standards Common Criteria EAL2.........63...
- Page 85 Free Manuals Download Website h p://myh66.com h p://usermanuals.us h p://www.somanuals.com h p://www.4manuals.cc h p://www.manual-lib.com h p://www.404manual.com h p://www.luxmanual.com h p://aubethermostatmanual.com Golf course search by state h p://golfingnear.com Email search by domain h p://emailbydomain.com Auto manuals search h p://auto.somanuals.com TV manuals search h p://tv.somanuals.com...
Need help?
Do you have a question about the IDP Series and is the answer not in the manual?
Questions and answers