
Related Manuals for Keysight E7515P UXM


Summary of Contents for Keysight E7515P UXM
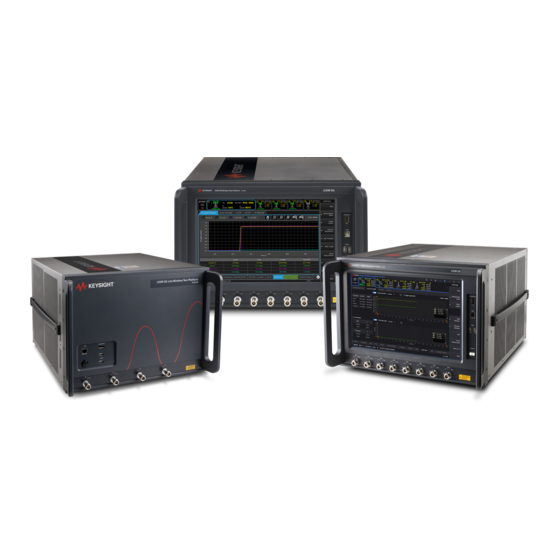
- Page 1 K eysight Wi reless Test Platform E7515P UXM 5G Wireless Test Platform Getting Started Guide...
- Page 2 FAR and the DFARS and are set http://www.keysight.com/go/conformity forth specifically in writing elsewhere in and click on “Declarations of Conformity.” the EULA. Keysight shall be under no You can then search by product number obligation to update, revise or otherwise to find the latest Declaration of A WARNING notice denotes a hazard.
- Page 3 URLs, according to the name of your product: http://www.keysight.com/find/UXM5G-P To receive the latest updates by email, subscribe to Keysight Email Updates at the following URL: http://www.keysight.com/find/MyKeysight Information on preventing instrument damage can be found at: www.keysight.com/find/PreventingInstrumentRepair...
-
Page 4: Table Of Contents
CONTENTS SAFETY AND ENVIRONMENTAL INFORMATION ..................... 5 Warning Statement and Symbols ......................6 Safety………………………………………………………………………………………………………………………………………..6 Safety Compliance ........................6 Acoustic Statement (European Machinery Directive) ..............6 General Safety Notice ........................7 Electrical Safety ........................... 7 Environmental Conditions (Operating) ..................... 8 Environmental Information ......................8 EMC (Electromagnetic Compatibility) ...................... - Page 5 AC Power ............................ 45 Front and Rear Panel Symbols ....................... 46 TROUBLESHOOTING .............................. 48 Identifying Problems ..........................49 Returning Your Test Set for Service ....................... 49 Calling Keysight Technologies ....................49 Locations for Keysight Technologies ..................50 E7515P Getting Started Guide Page 4...
-
Page 6: Safety And Environmental Information
SAFETY AND ENVIRONMENTAL INFORMATION The following topics can be found in this section: WARNING STATEMENT AND SYMBOLS ........................6 SAFETY……………………………………………………………………………………………………………………………………………………6 ENVIRONMENTAL CONDITIONS (OPERATING) ....................... 8 EMC (ELECTROMAGNETIC COMPATIBILITY) ......................9 INSTRUMENT LOCATION AND RACK MOUNTING REQUIREMENTS ..............9 VENTILATION ................................10 POWER REQUIREMENTS ............................ -
Page 7: Warning Statement And Symbols
Warning Statement and Symbols Caution and Warning notices are used in this document as described below. A CAUTION notice denotes a hazard. It calls attention to an operating procedure, practice, or the like that, if not performed correctly or adhered to, could result in damage to the product or loss of important data. -
Page 8: General Safety Notice
General Safety Notice If this product is not used as specified, the protection provided by the equipment could be impaired. This product must be used in a normal condition (in which all means for protection are intact) only. All external inputs connected to ports shall provide reinforced or voltages below 30 ����... -
Page 9: Environmental Conditions (Operating)
Environmental Information Samples of this product have been type tested in accordance with the Keysight Environmental Test Manual and verified to be robust against the environmental stresses of Storage, Transportation and End-use; those stresses include but are not limited to temperature, humidity, shock, vibration, altitude, and power line conditions. -
Page 10: Emc (Electromagnetic Compatibility)
This equipment has been conformity assessed for use in business environments. In a residential environment this equipment may cause radio interference. Declaration of Conformity The Declaration of Conformity for any Keysight product can be found on the website: http://www.keysight.com/go/conformity Instrument Location and Rack Mounting Requirements Locating the Test Platform Make sure that the left-side panel fan inlet and right-side panel exhaust vent areas are not obstructed. -
Page 11: Tabletop Ambient Temperature
If you choose to locate your test platform in a rack, follow the guidelines provided in this section. Based on the type of equipment rack, you must determine what rack rails you need. If you are using a Keysight System Test Rack, you can find information on what to order by referring to the Rack Mounting Flange Kit (Option E7515P-1CM) Installation Note. -
Page 12: Power Requirements
AC inputs to a single wall plug. Make sure the circuit breaker for the line is properly sized, with margin to provide the required power. If a Y-adapter is used, a ground cable (not provided by Keysight) must be connected from the ground stud (at the lower left corner of the E7515P rear panel) to a proper ground socket of the building. -
Page 13: Using Accessories
5 seconds after disconnecting the plugs from their power supply. Using Accessories Only Keysight approved accessories shall be used. Proper ergonomics should be considered when using accessories such as a keyboard or a mouse. E7515P Getting Started Guide... -
Page 14: Weight And Dimensions
Weight and Dimensions The weight and dimensions of the E7515P are as follows: Weight: E7515P-00A: 45.0 kg Height: 309 mm (323 mm with feet) Width: 436 mm (452.5 mm with lateral handles) Depth: 554 mm Lifting As indicated by the "TWO PERSON LIFT" label, safety precautions must be taken in lifting or carrying the instrument. -
Page 15: Additional Information About Esd
• Always handle printed circuit board assemblies by the edges. This reduces the possibility of ESD damage to components and prevent contamination of exposed plating. Additional information about ESD For more information about ESD and how to prevent ESD damage, contact the Electrostatic Discharge Association (http://www.esda.org). -
Page 16: Quick Start
This section describes how to set up your UXM 5G, install product licenses, and provide test platform maintenance. You can also contact your Keysight representative to obtain on-site start-up assistance to help you with all steps outlined in this section, which is included with your UXM 5G purchase. -
Page 17: Overview
Overview The purpose of this guide is to provide you with the basic steps for getting started with the Keysight E7515P UXM 5G Wireless Test Platform, and to tell you where you can go to get additional information. It also provides first-time power on instructions, licensing information, operating system information, and general hardware information. -
Page 18: Initial Inspection
Inspect the shipping container and the cushioning material for signs of stress. Retain undamaged shipping materials for future use, as you may wish to ship the test platform to another location or to Keysight Technologies for service. Verify the contents of the container against the table below. -
Page 19: Shipping Problems
Contact the nearest Keysight Technologies office. — Keep the shipping materials for the carrier’s inspection. — If you must return a test platform to Keysight Technologies, use the undamaged original or comparable shipping materials. See “Returning Your Test Set for Service”. - Page 20 DSP extensions: These modules increase the signal processing capabilities of the 5G UXM. CPU modules: These computing modules host different applications for the variety of software solutions and licenses offered by the 5G UXM. LO modules: These modules provide a set of local oscillators that enable easy interface with RRHs, which allow increasing the operating frequency of the 5G UXM.
-
Page 21: Uxm 5G Product Configuration Details
UXM 5G Product Configuration Details Each product configuration is formed by hardware and software. The below tables list the hardware codes and software license codes for each product configuration series. These tables show: The base configuration of the series, that is, the minimum hardware and software items that compose the most basic product configuration of the series, and The options that can be added to the base configuration, expressed in terms of additional hardware and/or software codes. - Page 22 E7515P-00A series Support for 1 or 2 of E7515P- E7515P-529 frequency range from 24.25 GHz to 29.5 Add DC power cables: E7515P-CM0: for Note: requires M1740A external RRH E7515P-CM9: for M1749A/B Support for 1 or 2 of E7515P- E7515P-540 frequency range from 37 GHz to 40 GHz Add DC power cables:...
-
Page 23: Uxm 5G Hardware Upgrade Options
UXM 5G Upgrade Options The following table shows the possible product upgrades to expand the capabilities of the UXM 5G: Original Transforms Order Code HW Module included Notes Configuration to… E7515B- E7515P- E7515PK-B28 Upgrades aggregated R82/002 00A base bandwidth from 200 MHz to 800 MHz E7515P- E7515PK-B2C... -
Page 24: Millimeter-Wave Accessory Instruments
LO Aux 4 LO I n 2 Upconversion IF Out B DUT IF In/Out B Downconversion IF In B Switching (<6 GHz) (<6 GHz) E7515P UXM Figure 6: Functional Block Diagram of E7515P and E7770A E7515P Getting Started Guide Page 23... - Page 25 LO I n 2 LO/Pwr/Ctrl/IF In Ch. 1 LO In LO/CTRL/PWR Ch 1A, LO/CTRL/PWR <6 GHz <6 GHz Ch. 1 LO Out 1 E7515P UXM Figure 7: Functional Block Diagram of E7515P, M1740A, and E7770A E7515P Getting Started Guide Page 24...
-
Page 26: Turning On The Test Platform For The First Time
Turning On the Test Platform for the First Time DO NOT remove the AC power during boot-up/shutdown of the operating system or during the process of initializing the software. This can cause damage to the system files and prevent proper operation of the instrument. - Page 27 Action Notes After you agree to the EULA, the operating system boots-up and you see a black background with Keysight Technologies logo displayed on the screen. The E7515P Control Panel (shown below) is overlaid on top of this Keysight screen and remains visible while the internal hardware boards of the UXM 5G are booted-up.
-
Page 28: Shutting Down The Test Platform
To redeem a license unique to your UXM 5G, you will need to enter the “Host ID”. To determine the Host ID of your UXM 5G, select the License Manager icon located on the E7515P Control Panel (see “Control Panel Icons”.) The Keysight License Manager (KLM) window opens and displays your Host ID: E7515P Getting Started Guide Page 27... -
Page 29: Transportable Licenses
30 times within the previous 10 days. You can also save a transportable license to Keysight Software Manager (KSM) for later assignment to a host. To do so, review the Transporting Licenses section (found as described above) in the Keysight License Manager Help. -
Page 30: Lan Connectivity
LAN Connectivity The UXM 5G has two network interface cards (NICs) that connect the instrument Host PC (embedded PC module) to external LAN outputs. If your site network supports Dynamic Host Configuration Protocol (DHCP), these front and rear LAN ports are assigned IP addresses automatically when they are connected to the LAN. -
Page 31: Corporate Domains
If this occurs, it is not sufficient to remove the PC from the domain – a system recovery is required, to fully restore the settings to a known working condition. Reference Documents More detailed information about the test platform is available on the Document Library tab of this web page: http://www.keysight.com/find/UXM5G-P E7515P Getting Started Guide Page 30... -
Page 32: Control Panel Functions
CONTROL PANEL FUNCTIONS The following topics can be found in this section: VIEWING THE CONTROL PANEL ..........................32 CONTROL PANEL ICONS ............................33 E7515P Getting Started Guide Page 31... -
Page 33: The Control Panel
If the E7515P Control Panel icon is not present in the task bar or on the desktop, it can be opened by selecting the Windows Start Menu, All Programs, Keysight E7515P Platform, E7515P Control Panel. E7515P Getting Started Guide Page 32... -
Page 34: Control Panel Icons
These files can be used to assist Keysight with remote diagnosis of instrument problems. The .zip file is password-protected; the password... -
Page 35: Front And Rear Panel Functions
FRONT AND REAR PANEL FUNCTIONS The following topics can be found in this section: FRONT PANEL FEATURES ............................35 REAR PANEL FEATURES ............................37 E7515P Getting Started Guide Page 34... -
Page 36: Front Panel Features
Front Panel Features Begin using the UXM 5G by becoming familiar with the layout of the Front Panel and the displayed user interface. Figure 10: UXM 5G Front Panel Number Item Name Description Touchscreen LCD Flat-Panel Display with single touch 15” capactive touchscreen. DisplayPort This is a DisplayPort output, which transfers uncompressed video and audio data to an external display, such as a PC monitor or projector. -
Page 37: Power Status Indicator
Number Item Name Description 2-USB Inputs Universal Serial Bus inputs for peripheral devices (mouse, keyboard, flash drives). These are USB version 2.0. (See the rear panel for USB 3.0 ports.) Power button The power button is the On/Off button for AC power. Pressing this button when the instrument is powered off turns it on. -
Page 38: Rear Panel Features
Rear Panel Features Figure 11: Slot Numbers The slot numbers for the different sections of the rear panel that are marked in the illustration above; they are described in the following sections. Mains supply voltage fluctuates up to +/- 10% of the nominal voltage. Transient over-voltages are typically present on the mains supply. -
Page 39: Slot 0: Icm Connectors
UXM 5G units. I/O 2 STATUS 1 LEDs (Reserved for future use.) STATUS 2 AUX 1 (Reserved for future use.) GbE1 Ethernet GbE1, GbE2, and GbE3 Used only by Keysight during production or maintenance. GbE2 GbE3 E7515P Getting Started Guide Page 38... -
Page 40: Slot 1: Empty
Slot 1: Empty Slot 2: AMC753 Module Figure 13: UXM 5G Rear Panel - VDTAMC Card Connectors These connectors relate to the VDTAMC card within the UXM 5G. The VDTAMC card (also known as the Vadatech AMC 753) handles processing of the PHY and PDCP layers in the simulated 5G NR stack. -
Page 41: Slot 4: Cpu - Amc705 Module
These connectors relate to the AMC-LO module, which is in both slot 3 and 6. Name Description Notes CLK 1 Fixed LO for RRH SMA - RF output CLK 2 Fixed LO for RRH SMA - RF output +36V IN Externa supply input Male jack connector Debug... -
Page 42: Slot 5, Slot 7: Cpu - Cctamc Modules
Slot 5, Slot 7: CPU – CCTAMC Modules Figure 16: UXM 5G Rear Panel - CCTAMC Card Connectors These connectors relate to the CCTAMC card within the UXM5G. The CCTAMC card (also known as the Concurrent Technologies AMC86) handles processing of the RLC and MAC layers in the simulated 5G NR stack. -
Page 43: Slot 8 And 9: Sfm Connectors
Slot 8 and 9: SFM Connectors Figure 17: UXM 5G Rear Panel - SFM Panel Connectors These connectors relate to the SFM panel control. Name Description Notes Maintenance/Service Micro-USB TRIG_B1 General purpose I/O trigger VB indicator Internal FPGA processor status TRIG_B2 General purpose I/O trigger ZQ indicator... -
Page 44: Slot 10: Auxm Connectors
Slot 10: AUXM Connectors Figure 18: UXM 5G Rear Panel - AUXM Connectors These connectors relate to the AUXM circuit board within the UXM 5G. Name Description Notes I/O 1 SMA connectors (Reserved for future use.) I/O 2 AUX 1 SMA connectors (Reserved for future use.) AUX 2... -
Page 45: Slot 11 And 12: Rfm Module
Slot 11 and 12: RFM Module Figure 19: UXM 5G Rear Panel - RFM Connectors These connectors relate to the RFM circuit board within the UXM 5G. Name Description Notes RX 8 (Reserved for future use.) TX 8 (Reserved for future use.) TX 7 (Reserved for future use.) RX 7... -
Page 46: Slot 13: Pcm
Slot 13: PCM Figure 20: UXM 5G Rear Panel - PCM Connectors These connectors relate to the SFM circuit board within the UXM 5G. Name Description Notes SS USB Four USB 3.0 ports. (The front-panel USB ports are USB 2.0.) Audio In 3.5 mm stereo Audio jack connector for input... -
Page 47: Front And Rear Panel Symbols
Front and Rear Panel Symbols Symbol Description This symbol is used to indicate power ON. This symbol is used to indicate power OFF. This symbol mis used to indicate power STANDBY mode (yellow in standby, green when instrument is ON). This symbol indicates the input power required is AC. - Page 48 This symbol on all primary and secondary packaging indicates compliance to China standard GB 18455- 2001. The Keysight email address is required by EU directives applicable to our products. E7515P Getting Started Guide Page 47...
-
Page 49: Troubleshooting
TROUBLESHOOTING The following topics can be found in this section: IDENTIFYING PROBLEMS ............................49 RETURNING YOUR TEST SET FOR SERVICE ......................49 E7515P Getting Started Guide Page 48... -
Page 50: Identifying Problems
Note that the Restart and Shutdown affect the test set and Windows. If you need to refer the problem to your Keysight representative, use the Export Logs feature on the System tab of the HCCU, and send the resulting file to Keysight for reference. -
Page 51: Locations For Keysight Technologies
Locations for Keysight Technologies For online assistance: http://www.keysight.com/find/assist To contact Keysight Technologies: http://www.keysight.com/find/contactus Alternately, contact the nearest Keysight sales office: Americas Canada Brazil Mexico (877) 894 4414 55 11 3351 7010 001 800 254 2440 United States (800) 829 4444 Asia &... - Page 52 This information is subject to change without notice. © Keysight Technologies 2024 Edition 1, May 2024 E7515-90045 www.keysight.com...
Need help?
Do you have a question about the E7515P UXM and is the answer not in the manual?
Questions and answers