DISCOBED SINGLE XLT Assembly Instructions Manual
Hide thumbs
Also See for SINGLE XLT:
- Assembly instructions manual (25 pages) ,
- Assembly instructions manual (25 pages)
Advertisement
Quick Links
Advertisement

Subscribe to Our Youtube Channel
Related Manuals for DISCOBED SINGLE XLT


Summary of Contents for DISCOBED SINGLE XLT
- Page 1 Assembly Instructions Istruzioni per il montaggio Montageanleitung discobed.de AI30013DE-IT...
- Page 2 IMPORTANT INFORMATION CONCERNING THIS PRODUCT TO PREVENT SERIOUS OR FATAL INJURIES Keep these instructions for future reference 1. Read carefully and fully understand the manufacturer’s assembly. 2. Care and special attention should be used where a warning is indicated. 3. One person only per cot. 4.
- Page 3 PARTS COMPONENTI TEILE 1x Sleeping Mat 1x Materasso 1x Matte 2x Stack Adapters 2x Straight End Frames 2x Accessori 2x Zusatzstücke 2x Telai diritti 2x gerader Rahmen 1x Locking Straps 1x Cinghie di sicurezza 1x Sicherheitsriemen 4x Discs 4x Dischi 4x Discs 2x Straight Side Rails / 2x Barre laterali diritte / 2x gerade Seitenstangen...
- Page 5 Assembly Instructions Istruzioni per il montaggio Montageanleitung discobed.de...
- Page 6 STEP 1. SECURING DISC TO SWAGED SIDE RAIL PUNTO 1. INSERIMENTO DEL DISCO SULLA BARRA LATERALE IMBUTITA SCHRITT 1. EINRASTEN DER DISC AN DER GESTAUCHTEN SEITENSTANGE 1.1. Holding swaged rail, press pin (A) down and hold. 1.1. Trattenere la barra laterale imbutita e tenere premuto il perno (A). 1.1 Halten Sie die gestauchte Seitenstange, drücken Sie auf Pin (A) und halten ihn gedrückt.
- Page 7 STEP 2. CONNECTING SWAGED SIDE RAIL TO STRAIGHT SIDE RAIL PUNTO 2. COLLEGAMENTO DELLE BARRE LATERALI IMBUTITE E DIRITTE SCHRITT 2. VERBINDEN DER GESTAUCHTEN UND GERADEN SEITENSTANGEN 2.1. Attach a swaged side rail (completed in step 1) to a straight rail. 2.1.
- Page 8 Make sure that the rails slide into one another completely. Do this by running your ngers over the side rails where the connections are. It should feel smooth to the touch. Accertarsi di innestare le barre laterali completamente l’una nell’altra. Eseguire un controllo facendo scorrere le dita sulla gi- unzione senza riuscire a percepire eventuali fessure.
- Page 9 Stellen Sie sicher, dass Pin A und C nach innen zeigen und nicht von der Matte verdeckt sind. THE ASSEMBLY OF YOUR SINGLE XLT IS NOW COMPLETE. MONTAGGIO COMPLETATO DEL LETTO SINGLE XLT. DIE MONTAGE IHRES SINGLE XLT BETTS IST NUN KOMPLETT.
- Page 11 Montaggio del letto a castello Montage des Etagenbetts If you have purchased two Single XLT cots, you may use them in the bunk con guration. Acquistando 2 Disc-O-Bed® XLT, è possibile utilizzare questi articoli come un letto a castello. Sollten Sie 2 Disc-O-Bed® XLT gekauft haben, können Sie diese als Etagenbett nutzen.
- Page 12 STEP 1. REMOVE FOOT PLUGS PUNTO 1. RIMOZIONE DEI TAPPI PER PIEDINI SCHRITT 1. ENTFERNEN SIE DIE FUSSPFROPFEN 1.1. Remove the 4 foot plugs from the straight bed end frame. 1.1. Rimuovere i 4 tappi per piedini dal telaio diritto. 1.1 Entfernen Sie die 4 Fußpfropfen vom geraden Rahmen.
- Page 13 STEP 3. STACK END FRAMES OF ONE BED ONTO END FRAMES OF THE SECOND BED PUNTO 3. DISPOSIZIONE DI UN LETTO SULL’ALTRO SCHRITT 3. EIN BETT AUF DAS ANDERE SETZEN 3.1. Place straight end frame ( tted with stack adapters completed in step 2) onto second end frame. 3.1.
- Page 14 Ziehen Sie den Sicherheitsriemen fest und stra . YOU HAVE NOW SUCCESSFULLY COMPLETED THE ASSEMBLY OF YOUR SINGLE XLT. MONTATO COMPLETATO CORRETTAMENTE DEL LETTO A CASTELLO DISC-O-BED® XLT. SIE HABEN NUN ERFOLGREICH DAS DISC-O-BED XLT ETAGENBETT AUFGEBAUT. We hope that you are completely happy with our product and it is exactly what you expected.
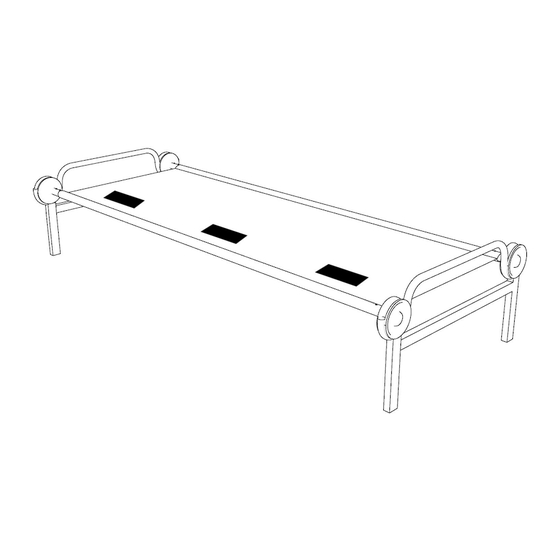
- Page 15 Bench Setup Montaggio della panca Montage der Sitzbank discobed.de...
- Page 16 STEP 1. SETTING UP BACK REST PUNTO 1. MONTAGGIO DELLO SCHIENALE SCHRITT 1. RÜCKENLEHNE MONTIEREN 1.1. Lift discs 1 and 2 out of bed end frame of top cot. 1.1. Sollevare i dischi 1 e 2 dal telaio del letto superiore. 1.1 Heben Sie die Discs 1 und 2 aus dem Rahmen des oberen Betts.
- Page 17 1.3 Let disc rest between bed end rail and stack adapter. The disc should not be able to roll forward. 1.3 Disporre i dischi tra il telaio e l’accessorio del letto inferiore. I dischi non devono riuscire a spostarsi in avanti. 1.3 Platzieren Sie die Discs zwischen Rahmen und Zusatzstück des unteren Betts.
- Page 18 IMPORTANT TO NOTE WHEN CONVERTING YOUR XTL BENCH BACK TO A BUNK CONFIGURATION Make sure pin (A) is facing inwards and not covered by sleeping mat. INFORMAZIONI IMPORTANTI PER LA CONVERSIONE DELLA PANCA DISC-O-BED® XLT NEL LETTO A CASTELLO Accertarsi di rivolgere il perno A verso l’interno e di non coprirlo con il materasso. WICHTIGE INFORMATION, WENN SIE IHRE DISC-O-BED XLT SITZBANK ZU- RÜCK IN EIN ETAGENBETT UMBAUEN: Stellen Sie sicher, dass Pin A nach innen zeigt und nicht von der Matte verdeckt wird.
- Page 19 Side Organizer Assembly Instructions Istruzioni per il montaggio della tasca laterale Montageanleitung Seitentasche discobed.de...
- Page 20 STEP 1. SETTING UP SIDE-ORGANIZER PUNTO 1. FISSAGGIO DELLA TASCA LATERALE AL MATERASSO SCHRITT 1. BEFESTIGEN SIE DIE SEITENTASCHE AN DER MATTE...
- Page 21 Package Instructions Istruzioni per l’imballaggio Verpackungsanleitung Straight frame / Telai diritti / gerader Rahmen discobed.de...
- Page 22 5 POINT CHECK LIST Make sure that these simple checks are followed PRIOR TO EACH use of your Disc-O-Bed® XLT. 1. The pin (B) is securely locked in to the disc. STEP 1 page 5. 2. Side rails t into one another completely. Should feel smooth to the touch. STEP 3 page 6-7. 3.
- Page 23 WARRANTY CONDITIONS Our products are subject to strict quality controls. If a DISC-O-BED® product purchased from us does not work properly, we regret this very much and ask you to contact us at the contact address below at www.discobed.de. In addition to the statutory warranty, we grant you a guarantee on all DISC-O-BED products purchased from us, in accordance with the following provisions: YOUR LEGAL RIGHTS ARE NOT RESTRICTED BY THIS.
- Page 24 Disc-O-Bed EU GmbH Lustgartenstraße 103 79576 Weil am Rhein PATENT AND DESIGN PROTECTED – SEE DISCOBED.COM/PATENTS © 2021 Disc-O-Bed EU GmbH. All rights reserved © 2021 Disc-O-Bed EU GmbH. Tutti i diritti riservati © 2021 Disc-O-Bed EU GmbH. Alle Rechte vorbehalten...
-
Page 25: Important Safety Warning
If you have any questions, comments or concerns, please don’t hesitate to contact us: Disc-O-Bed EU GmbH, Lustgartenstraße 103, 79576 Weil am Rhein, Germany Tel: +49 (0)7621 1630260 Monday – Friday 8:30 to 5:00pm info@discobed.de www.discobed.de INDICAZIONI DI SICUREZZA 1. Prima di utilizzare il prodotto, prestare attenzione alla check-list da 5 punti riportata nelle istruzioni per il montaggio. Pre- stare attenzione a tutte le indicazioni.
Need help?
Do you have a question about the SINGLE XLT and is the answer not in the manual?
Questions and answers