Subscribe to Our Youtube Channel
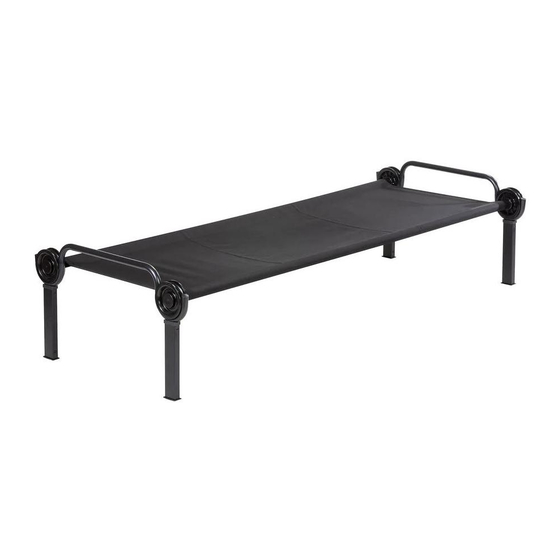
Summary of Contents for DISCOBED ONE 30531
- Page 1 Assembly Instructions Instructions de montage Montageanleitung discobed.de AI30531DE-FR...
- Page 2 IMPORTANT INFORMATION CONCERNING THIS PRODUCT TO PREVENT SERIOUS OR FATAL INJURIES Keep these instructions for future reference 1. Read carefully and fully understand the manufacturer’s assembly. 2. Care and special attention should be used where a warning is indicated. 3. One person only per cot. 4.
- Page 3 Scannez le Code QR avant le montage Scannen Sie den Code vor der Montage or visit http://www.discobed.com/v/c/ and watch assembly video Ou visitez http://www.discobed.com/v/c et regardez la vidéo le montage Oder besuchen Sie http://www.discobed.com/v/c/ und sehen Sie sich das Montagevideo an.
- Page 4 PARTS PIÈCES TEILE 1x Sleeping Mat 1x Matelas 1x Matte 4x Leg Extensions ONE 4x Rallonges des jambes ONE 2x End Frames 4x Beinverlängerungen ONE 2x Cadres d’extrémité 2x Rahmen 4x Discs 4x Disques 4x Discs 2x Straight Side Rails / 2x Barres latérales droites 2x gerade Seitenstangen 4x Foot Plugs 4x Bouchons de pied...
- Page 5 STEP 1. SECURING DISC TO SWAGED SIDE RAIL ÉTAPE 1. FIXEZ LE DISQUE À LA BARRE LATÉRALE EMBOUTIE SCHRITT 1. EINRASTEN DER DISC AN DER GESTAUCHTEN SEITENSTANGE 1.1. Holding swaged rail, press pin (A) down and hold. 1.1. En tenant la barre emboutie, appuyez et maintenez la tige. (A) 1.1.
- Page 6 STEP 2. CONNECTING SWAGED SIDE RAIL TO STRAIGHT SIDE RAIL ÉTAPE 2. RACCORDEZ LA BARRE LATÉRALE EMBOUTIE À LA BARRE LATÉRALE DROITE SCHRITT 2. VERBINDEN DER GESTAUCHTEN UND GERADEN SEITENSTANGEN 2.1. Attach a swaged side rail (completed in step 1) to a straight rail. 2.1.
- Page 7 STEP 3. ATTACHING SLEEPING MAT TO SIDE RAILS ÉTAPE 3. ATTACHEZ LE MATELAS AUX BARRES LATÉRALES SCHRITT 3. DIE MATTE AUF DIE SEITENSTANGE AUFZIEHEN 3.1. Open out sleeping mat with the correct (logo) side up. 3.2. At one end, slide the 2 rails (completed in step 2) into the sleeves of the mat. 3.3.
- Page 8 STEP 4. SECURING EACH DISC INTO THE END FRAME ÉTAPE 4. FIXEZ CHAQUE DISQUE DANS LE CADRE D’EXTRÉMITÉ SCHRITT 4. DIE DISC IN DEN RAHMEN SICHERN 4.1. Make sure pin (A) is visible, is not covered by the sleeping mat and is facing inwards. Check all four bed posts (see diag.
- Page 9 Diagram 4.2 Schéma 4.2 Diag. 4.2 Diagram 4.3 Schéma 4.3 Diag. 4.3 Pinch hazard Danger de se faire pincer Quetschgefahr!
- Page 10 STEP 5. ATTACH LEG EXTENSIONS TO BED END FRAME ÉTAPE 5. ATTACHEZ LES RALLONGES DES JAMBES À L’EXTRÉMITÉ DU CADRE SCHRITT 5. BEFESTIGEN SIE DIE BEINVERLÄNGERUNGEN AN DEN BEINEN DES RAHMENS 5.1. Press pin (A) down on leg extension and hold. 5.2.
- Page 11 THE ASSEMBLY OF YOUR DISC-O-BED® ONE IS NOW COMPLETE. LE MONTAGE DE VOTRE DISC-O-BED® EST MAINTENANT TERMINÉ. DIE MONTAGE IHRES DISC-O-BED® ONE IST NUN ABGESCHLOSSEN. We hope that you are completely happy with our product and that it is exactly what you expected. Nous espérons quevous êtes entièrement satisfait de notre produit et qu’il répond parfaitement à...
- Page 12 Package Instructions Instructions de rangement Verpackungsanleitung LARGE: 5 POINT CHECK LIST Make sure that these simple checks are followed PRIOR TO EACH use of your DISC-O-BED® ONE. 1. The pin (B) is securely locked in to the disc. STEP 1 page 4. 2.
-
Page 13: Garantie De Satisfaction
Disc-O-Bed EU GmbH Lustgartenstraße 103 79576 Weil am Rhein PATENT AND DESIGN PROTECTED – SEE DISCOBED.COM/PATENTS © 2023 DISC-O-BED® EU GmbH. All rights reserved © 2023 DISC-O-BED® EU GmbH. Tous droits réservés © 2023 DISC-O-BED® EU GmbH. Alle Rechte vorbehalten... -
Page 14: Important Safety Warning
If you have any questions, comments or concerns, please don’t hesitate to contact us: Disc-O-Bed EU GmbH, Lustgartenstraße 103, 79576 Weil am Rhein, Germany Tel: +49 (0)7621 1630260 Monday through Friday 8:30am to 5pm info@discobed.de www.discobed.de IMPORTANT - AVERTISSEMENT DE SÉCURITÉ... -
Page 15: Warranty Conditions
WARRANTY CONDITIONS Our products are subject to strict quality controls. If a DISC-O-BED® product purchased from us does not work properly, we regret this very much and ask you to contact us at the contact address below at www.discobed.de. In addition to the statutory warranty, we grant you a guarantee on all DISC-O-BED products purchased from us, in accordance with the following provisions: YOUR LEGAL RIGHTS ARE NOT RESTRICTED BY THIS.


Need help?
Do you have a question about the ONE 30531 and is the answer not in the manual?
Questions and answers