Sign In
Upload
Download
Table of Contents
Contents
Add to my manuals
Delete from my manuals
Share
URL of this page:
HTML Link:
Bookmark this page
Add
Manual will be automatically added to "My Manuals"
Print this page
×
Bookmark added
×
Added to my manuals
Manuals
Brands
Oricom Manuals
Baby Monitor
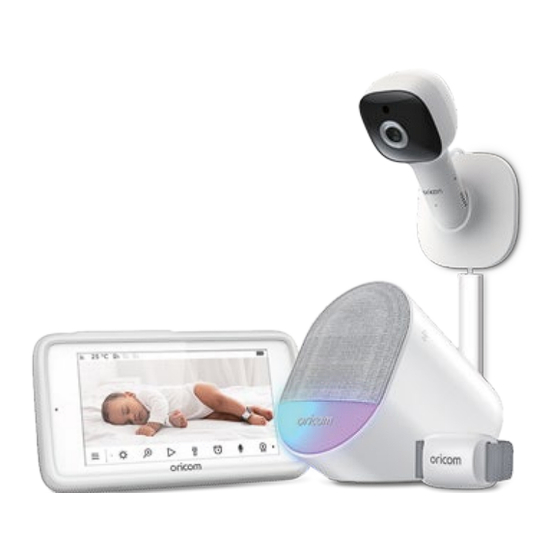
GUARDIAN PRO
User manual
Oricom GUARDIAN PRO User Manual
Sleep tracker and video monitor
Hide thumbs
1
2
3
4
5
6
Table Of Contents
7
8
9
10
11
12
13
14
15
16
17
18
19
20
21
22
23
24
25
26
27
28
29
30
31
32
33
34
page
of
34
Go
/
34
Contents
Table of Contents
Troubleshooting
Bookmarks
Table of Contents
Table of Contents
Safety Instructions
System Requirements of Smart Device
Getting Started
Power on Base Station
Connecting the Power Supply of the Parent Unit
Connecting the Power Supply for the Baby Unit
Optional) Fixing Magnetic Mount on the Wall
Setting up Guardian Pro to Hubbleclub for Partners App
Install Hubbleclub for Partners App
View on Compatible Smartphones and Tablets
Connect Base Station to Hubbleclub for Partners App
Operation of Base Station
Control Night Light
Control Soothing Sound
Connectchat
Use Base Station as a BT Speaker
Using of Smart Sensor
Device Power and Charging
Device Placement
Using the Baby Monitor
Setting up
Touch Screen Operation
Brightness
Zoom
Audio Media
Personal Recording Playback
Lullaby/Soothing Sounds Playback
Audio Book Playback
Volume Level of Audio Playback
Flashlight
Alarm
Talk Mode
Camera Control
Add (Pair) a Camera
View a Camera
Delete a Camera
Scan Cameras
Temperature
Power Saving Mode
Games and Videos
Disposal of the Device (Environment)
Troubleshooting
General Information
Technical Specifications
Advertisement
Quick Links
Download this manual
USER'S GUIDE
GUARDIAN PRO
Sleep Tracker and Video Monitor
Tracks Blood Oxygen Levels, Sleep Quality, Heart Rate and Body
Temperature Changes
OBHGPRO
The features described in this user's guide are subject to modifications without prior notice.
Table of
Contents
Previous
Page
Next
Page
1
2
3
4
5
Advertisement
Table of Contents
Need help?
Do you have a question about the GUARDIAN PRO and is the answer not in the manual?
Ask a question
Questions and answers
Related Manuals for Oricom GUARDIAN PRO
Baby Monitor Oricom OBH500-2 Quick Start Manual
(10 pages)
Baby Monitor Oricom Secure 720 User Manual
(20 pages)
Baby Monitor Oricom secure55 User Manual
(22 pages)
Baby Monitor Oricom Babysense2 User Manual
(19 pages)
Baby Monitor Oricom Secure 530 User Manual
Audio baby monitor with lightshow (36 pages)
Baby Monitor Oricom Secure 710 User Manual
(22 pages)
Baby Monitor Oricom Secure 850 User Manual
(24 pages)
Baby Monitor Oricom babysense 2 User Manual
(20 pages)
Baby Monitor Oricom Secure895 User Manual
Video baby monitor (41 pages)
Baby Monitor Oricom OBH36T User Manual
5" smart hd baby monitor with touch screen (38 pages)
Baby Monitor Oricom Secure745 User Manual
Video baby monitor (41 pages)
Baby Monitor Oricom 870 User Manual
(44 pages)
Baby Monitor Oricom Secure 50 User Manual
(16 pages)
Baby Monitor Oricom Secure 510 User Manual
Premium dect digital baby monitor (47 pages)
Baby Monitor Oricom 08BUN User Manual
(2 pages)
This manual is also suitable for:
Obhgpro
Table of Contents
Print
Rename the bookmark
Delete bookmark?
Delete from my manuals?
Login
Sign In
OR
Sign in with Facebook
Sign in with Google
Upload manual
Upload from disk
Upload from URL


Need help?
Do you have a question about the GUARDIAN PRO and is the answer not in the manual?
Questions and answers