Advertisement
Quick Links
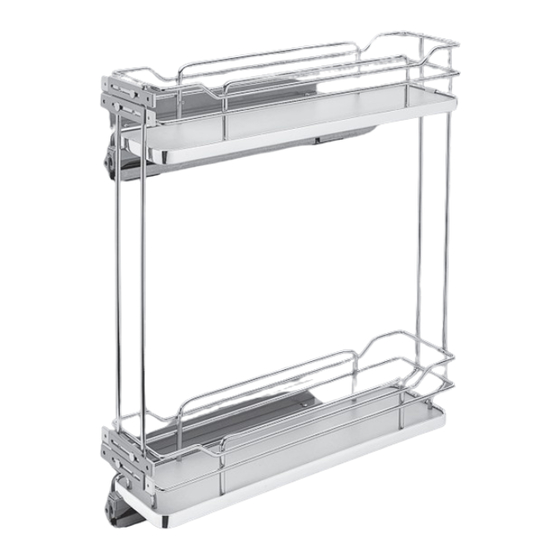
5322 SERIES BASE ORGANIZER
TOOLS REQUIRED:
ESTIMATED ASSEMBLY TIME:
15 MIN
CARE AND MAINTENANCE:
Clean with a damp cloth and
wipe parts dry.
4)
If attaching a door to the front of the unit, install the
door mounting brackets to the back of the door using
the dimensions in the following diagram. Note: Be sure
to install the screws into a portion of the door that is full
material thickness.
Parts List
5)
The door can now be attached and adjusted according
No.
Description
to the following images. (Fig 6-8)
1
Chassis
2
Slide Set
3
Shelf Support
4
Side Mount Brackets
5
Template
6
Double-Sided Tape
7
M4 x 10MM Screws
8
#6 x 1/2" Screws
9
#8 x 1/2" Screws
10
Euro Screws
1
2
3
INSTALLATION INSTRUCTIONS: 5322 SERIES BASE ORGANIZER
Unscrew the nuts and
12400 Earl Jones Way
Louisville, KY 40299
rev-a-shelf.com
Customer Service: 800-626-1126
4
Qty
1
2
2
2
5
1
Pre-Drill with a 3/32" Drill Bit
Pre taladre con una cabeza de taladro de 3/32"
Pré-percez avec une mèche de 3/32"
4
T-532205-TRI-1016
12400 Earl Jones Way
Louisville, KY 40299
6
rev-a-shelf.com
Installation Template
Customer Service: 800-626-1126
Modelo de instrucción T-532205-TRI-1016
Modèle pour l'Installation T-532205-TRI-1016
5322 5" SIDE MOUNT TEMPLATE
PLANTILLA LATERAL DE MONTAJE 5322 5"
MODÈLE POUR LE MONTAGE SUR LE CÔTÉ 5" (12.7CM) DE 5322
MOUNTING INSTRUCTIONS
INSTRUCCIONES DE MONTAJE/
6
INSTRUCTIONS DE MONTAGE
Create Pilot Holes
Haga Orificios Piloto/Créer les trous pilotes
1. Use your awl to pre-punch the slide hole locations at the top and bottom of the template as shown
1. Use la lezna para pre perforar las ubicaciones de los orificios del deslizante en la parte superior e inferior de la plantilla como aquí se muestra.
1. Utilisez votre poinçon pour pré perforer les emplacements des trous de la coulisse en haut et en bas du modèle, comme indiqué
2. Pre-drill all 8 pilot holes using a 3/32" drill bit
2. Pre taladre todos los ocho orificios piloto, usando una cabeza de taladro de 3/32"
2. Pré-percez les 8 trous pilotes à l'aide d'un foret de 3/32"
6
Attaching Side Mount Brackets
Sujetando los Soportes de Montaje Lateral/Attacher les supports de Montage latéraux
Secure the left handed slides to the side mount brackets using the provided M4 x 10MM screws
Asegure los deslizantes zurdos a los soportes de montaje laterales usando los tornillos que aquí se proveen M4 x 10MM
Fixez les coulisses gauches sur les supports de montage latéraux avec les vis M4 x 10mm fournies
Attaching Slides
Sujetando los Deslizantes/Attacher les Coulisses
Attach the slide set to the upper and lower side of your cabinet using the #8 x 1/2" flat head screws
Sujete el juego del deslizante a los lados superiores e inferiores de su gabinete usando los tornillos de cabeza plana del #8 x 1/2"
6
Attachez l'ensemble de coulisses sur le côté haut et bas de votre armoire avec les vis à tête plate #8 x 1/2"
For face frame cabinets with overlay doors, fold on this line and align with the inside of the face frame
Para gabinetes con marco con puertas sobre puestas, doble en esta línea y alinee con la parte interior del marco de la puerta
Pour les armoires avec cadrage avant, pliez sur cette ligne et alignez avec l'intérieur du cadrage avant
For frameless cabinets with overlay doors, line up with front of cabinet
Para gabinetes sin marco con puertas sobre puestas, alinee con el frente del gabinete
Pour les armoires sans cadre avec portes avec appliqué, alignez avec l'avant de l'armoire
For face frame cabinets with inset doors, align with the inside of the face frame
Para gabinetes con Marco con recuadros en la puerta, alinee con la parte interior del marco
Pour les armoires avec cadrage avant et portes encastrées, alignez avec l'intérieur du cadrage avant
Pre-Drill with a 3/32" Drill Bit
Pre taladre con una cabeza de taladro de 3/32"
Pré-percez avec une mèche de 3/32"
T-532205-TRI-1116
T-532205-TRI-0416
T-532205-TRI-0416
6
7
T-532205-TRI-0416
8
9
10
I-5322-SM-0424
Advertisement

Related Manuals for Rev-A-Shelf 5322 Series


Summary of Contents for Rev-A-Shelf 5322 Series
- Page 1 Note: Be sure to install the screws into a portion of the door that is full material thickness. INSTALLATION INSTRUCTIONS: 5322 SERIES BASE ORGANIZER I-5322-SM-0424 Unscrew the nuts and...
- Page 2 Euro screws, as shown in Figure 2.1. NOTE: the plastic clips must be attached as shown in Figure 2.2; The orientation of the number “18” is critical. Customer Service: 800-626-1126 | rev-a-shelf.com...
- Page 3 Top Bracket Bottom Bracket outside of wire. Height Difference ________ Top Measurement ________ Top Measurement ________ Divide Difference by 2 ________ Bottom Measurement ________ Bottom Measurement ________ t a l t , i INSTALLATION INSTRUCTIONS: 5322 SERIES BASE ORGANIZER...
- Page 4 NUT LOCATIONS LOOSEN THE 2 NUTS ON BOTH DOOR MOUNT LOCATIONS (4 NUTS TOTAL) TO ADJUST HORIZONTALLY Unscrew the nuts and adjust the door 12400 Earl Jones Way Louisville, KY 40299 rev-a-shelf.com Customer Service: 800-626-1126 Customer Service: 800-626-1126 | rev-a-shelf.com...
Need help?
Do you have a question about the 5322 Series and is the answer not in the manual?
Questions and answers