Advertisement
Quick Links
Lock Nut
Lock Nut
Fig 5
Fig 5
Fig 6
Fig 6
Fig 7A
Fig 7B
T-532211-TRI-0416
T-5322-0416
T-5322-0416
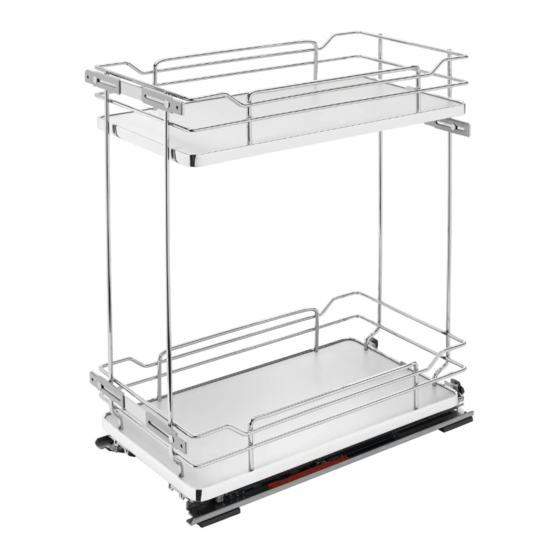
For 11" Wide Pullout
Fig 4
Fig 5
D
D
Assemble the slide assembly to the oor of cabinet using the (8) #6 x 1" Phillips Flat Head Screw (Screw Pack 308 - F1606-22-1).
Assemble the slide assembly to the oor of cabinet using the (8) #6 x 1" Phillips Flat Head Screw (Screw Pack 308 - F1606-22-1).
Note that the screws use the inner set of holes on the plastic feet. (See Fig 2)
Note that the screws use the inner set of holes on the plastic feet. (See Fig 2)
Assemble the release levers and the rear slide catch (See Fig 3).
Assemble the release levers and the rear slide catch (See Fig 3).
(Note: Be sure that the rear slide catch is assembly in the right position, when it is installed you have to see the plastic part with
(Note: Be sure that the rear slide catch is assembly in the right position, when it is installed you have to see the plastic part with
number 18(See Fig 3a))
number 18(See Fig 3a))
Fig 6A
Fig 7A
Note: Approximately 2" from the fully closed position, there will be a slight bump. It is best to tilt the unit forward just a bit to aid in engagement.
Note: Approximately 2" from the fully closed position, there will be a slight bump. It is best to tilt the unit forward just a bit to aid in engagement.
Loosen the (2) lock nuts at the back of the unit to allow the rear stop to oat freely (See Fig 4). Move the rear stop until it catches the
Loosen the (2) lock nuts at the back of the unit to allow the rear stop to oat freely (See Fig 4). Move the rear stop until it catches the
rear of the face frame (if frameless application, a block may need to be added to allow the stop work properly). Once the stop is at the
rear of the face frame (if frameless application, a block may need to be added to allow the stop work properly). Once the stop is at the
right position, the lock nuts can be tightened and bumpers can be added to the front of the stops.
right position, the lock nuts can be tightened and bumpers can be added to the front of the stops.
Fig 6B
Fig 7B
If the door needs to be adjusted sideways, loosen the (4) lock nuts and adjust the door . (See Fig 6)
If the door needs to be adjusted sideways, loosen the (4) lock nuts and adjust the door . (See Fig 6)
5)
5)
See Fig. 7A and 7B for tilt and hight adjustment
See Fig. 7A and 7B for tilt and hight adjustment
Note: if inset application,
Note: if inset application,
move the template back
move the template back
the thickness of the door
the thickness of the door
3/32"
3/32"
A- SLIDES
A- SLIDES
B- SLIDE STRAPS
B- SLIDE STRAPS
C- RELEASE LEVERS
C- RELEASE LEVERS
D- PULLOUT CHASSIS
D- PULLOUT CHASSIS
E- REAR SLIDE CATCH
E- REAR SLIDE CATCH
F- PLASTIC SPACER
F- PLASTIC SPACER
G- (4) #6 X 1/2" EURO SCREWS
G- (4) #6 X 1/2" EURO SCREWS
G- (4) #6 X 1/2" EURO SCREWS
G- (4) #6 X 1/2" EURO SCREWS
H- (4) #3 X 1/2" COUNTERSUNK HEAD SCREWS
H- (4) #3 X 1/2" COUNTERSUNK HEAD SCREWS
I - SCREW PACK 308
I - SCREW PACK 308
B
B
F
C
C
A
A
E
E
12400 Earl Jones Way
Louisville, KY 40299
rev-a-shelf.com
Customer Service: 800-626-1126
PART LIST
PART LIST
G
G
F
H
H
I
I
Fig 3a
Fig 3a
Lock Nut
Lock Nut
Advertisement

Related Manuals for Rev-A-Shelf 5322BCSC11GR


Summary of Contents for Rev-A-Shelf 5322BCSC11GR
- Page 1 12400 Earl Jones Way Louisville, KY 40299 rev-a-shelf.com Customer Service: 800-626-1126 For 11” Wide Pullout 3/32” 3/32” PART LIST PART LIST A- SLIDES A- SLIDES B- SLIDE STRAPS B- SLIDE STRAPS C- RELEASE LEVERS C- RELEASE LEVERS D- PULLOUT CHASSIS...
- Page 2 12400 Earl Jones Way Louisville, KY 40299 rev-a-shelf.com Customer Service: 800-626-1126 *Use este lado para profundidad *Use este lado para profundidad *Use este lado para profundidad del especiero 11” del especiero 11” del especiero 11” *Utiliser ce côté pour largeur *Utiliser ce côté...
Need help?
Do you have a question about the 5322BCSC11GR and is the answer not in the manual?
Questions and answers