
Subscribe to Our Youtube Channel
Related Manuals for Yale GP20-30MX


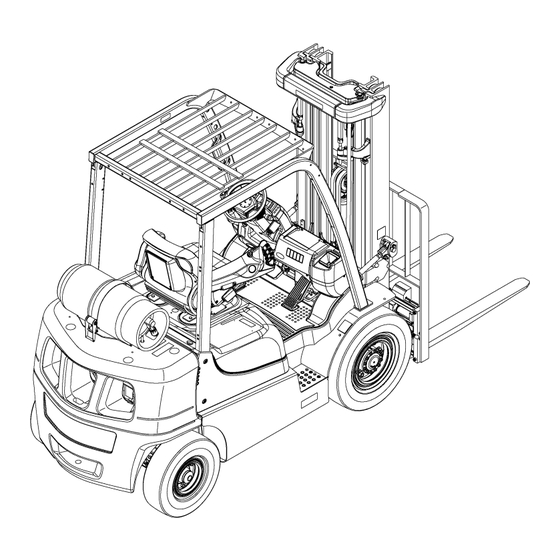
Summary of Contents for Yale GP20-30MX
- Page 1 Maintenance PERIODIC MAINTENANCE GP20-30MX [A390] PART NO. 550141725 8000 YRM 2000...
- Page 2 • Keep the tools clean and in good condition. • Always use YALE APPROVED parts when making repairs. Replacement parts must meet or exceed the specifications of the original equipment manufacturer. • Make sure all nuts, bolts, snap rings, and other fastening devices are removed before using force to remove parts.
-
Page 3: Table Of Contents
PSI Engine Oil and Oil Filter..........................33 Yanmar Engine Oil and Oil Filter........................34 Maintenance Procedures Every 300 Hours......................34 Tie Rod Lubrication............................34 King Pin Lubrication............................34 Maintenance Procedures Every 500 Hours or 1 Year................... 35 ©2019 Yale Materials Handling Corp. - Page 4 Table of Contents TABLE OF CONTENTS (Continued) Hydraulic System Oil............................35 Battery................................36 Yanmar Engine Oil and Oil Filter Change......................36 Drive Belt................................36 Yanmar Diesel Engine........................... 36 Fan and Alternator Drive Belt........................36 Clean Debris From Radiator Core........................37 Transmission Oil Level.............................38 Forks................................38 Mast Lubrication...............................39 Header Hose Checks............................41 Lift Chain Lubrication............................
- Page 5 Table of Contents TABLE OF CONTENTS (Continued) Transmission Oil and Filter, Replace....................... 64 Brake Fluid Change, Master Cylinder......................65 Brake Fluid, Remove............................65 Maintenance Procedures Every 4000 Hours or 2 Years..................66 Hydraulic Oil, Replace............................66 Cooling System..............................67 Replace Throttle (Accelerator) Cable, Yanmar Diesel Engine................. 68 Maintenance Procedures Every 5000 Hours......................
-
Page 7: General
8000 YRM 2000 General General from your dealer for Yale lift trucks to help users who do their own maintenance. WARNING DO NOT make repairs or adjustments unless you SERIAL NUMBER DATA have both authorization and training. Repairs and adjustments that are not correct can make a Serial number for lift truck is on Nameplate. -
Page 8: How To Put Lift Truck On Blocks
General 8000 YRM 2000 Using a lift truck or a lifting device that could be attached to mast (I.E. come-a-long), raise CAUTION carriage and forks approximately 30 cm (12 in.) These lift trucks are equipped with cowl lifting from surface. Install chain around a mast eyes. -
Page 9: How To Clean A Lift Truck
8000 YRM 2000 General 1. DRIVE TIRES 2. STEERING TIRES Figure 1. Put Lift Truck on Blocks HOW TO CLEAN A LIFT TRUCK NOTE: Lift trucks used in paper applications may need cleaning beyond what is described here. Please refer to Paper Application section in the applicable WARNING Operating Manual and to available Service Gram/ Engine, exhaust system components and other... -
Page 10: Maintenance Schedule
Maintenance Schedule 8000 YRM 2000 Be sure to avoid directing the spray into electrical moisture at a minimum as some units have a panel compartment. Ensure overspray does not traction or hydraulic motor directly below the come in contact with electrical components; do battery compartment. - Page 11 8000 YRM 2000 Maintenance Schedule Figure 2. Maintenance and Lubrication Points, PSI 2.4L LPG Trucks...
- Page 12 Maintenance Schedule 8000 YRM 2000 Figure 3. Maintenance and Lubrication Points, Yanmar Diesel Trucks...
- Page 13 8000 YRM 2000 Maintenance Schedule Figure 4. Maintenance and Lubrications Points, PSI 2.4L Bi-Fuel Trucks...
- Page 14 Maintenance Schedule 8000 YRM 2000 Table 1. Maintenance Schedule Item Item 8 hr/ 1000 2000 4000 hr/ Procedure or Specification 1 day 2 yr Quantity 1 yr 1 yr 1 yr Tires and Wheels Check Condition See Nameplate Safety Labels Replace as See Parts Manual Necessary...
- Page 15 8000 YRM 2000 Maintenance Schedule Table 1. Maintenance Schedule (Continued) Item Item 8 hr/ 1000 2000 4000 hr/ Procedure or Specification 1 day 2 yr Quantity 1 yr 1 yr 1 yr Drive Axle Check for Leaks. Check Operation. Differential and 6.5 liter (6.9 qt) 80W-90 Drive Axle Oil...
- Page 16 Maintenance Schedule 8000 YRM 2000 Table 1. Maintenance Schedule (Continued) Item Item 8 hr/ 1000 2000 4000 hr/ Procedure or Specification 1 day 2 yr Quantity 1 yr 1 yr 1 yr Engine Oil Filter 1 Filter See Parts Manual See NOTE 4, 2.4L NOTE 5, and...
- Page 17 8000 YRM 2000 Maintenance Schedule Table 1. Maintenance Schedule (Continued) Item Item 8 hr/ 1000 2000 4000 hr/ Procedure or Specification 1 day 2 yr Quantity 1 yr 1 yr 1 yr Engine Governed 2700 ± 25 rpm Speed PSI Engine Engine Idle Speed 850 ±...
- Page 18 Maintenance Schedule 8000 YRM 2000 Table 1. Maintenance Schedule (Continued) Item Item 8 hr/ 1000 2000 4000 hr/ Procedure or Specification 1 day 2 yr Quantity 1 yr 1 yr 1 yr In-Line Fuel 1 Filter See Parts Manual Strainer Yanmar Diesel Engine...
- Page 19 Positioner and Lower Hook Capscrews Tilt Cylinder Ends 4 Fittings Multipurpose Grease See NOTE 8. Brake Master Use Silicon Spray Yale Cylinder Rod End Part No. 504236201 Manual Hydraulic API SM Hand Levers ILSAC GF4 SAE J2362 Brake Fluid 0.2 liter (0.21 pt)
- Page 20 1 yr 1 yr Steering Axle Check Grease. Multipurpose Grease See NOTE 8. Wheel Bearings Pedals, Levers, Lubricate as Use Yale Part No. Seat Rails, Necessary 504236201 Cables, Hinges, Linkages Parking Brake Adjust as Necessary Must Hold a Full Adjustment...
- Page 21 (dust and waste paper); chemical or abrasive compounds; poor ground conditions; intensive usage at high performance levels; or other abnormal conditions will require more frequent servicing. At your request your Yale dealer will advise you of the appropriate service intervals based on an application survey.
-
Page 22: Maintenance Procedures Every 8 Hours Or Daily
Maintenance Procedures Every 8 Hours or Daily 8000 YRM 2000 Maintenance Procedures Every 8 Hours or Daily HOW TO MAKE CHECKS WITH ENGINE hood and check for leaks and conditions that are not normal. Clean any oil or fuel spills. Ensure all surfaces STOPPED are free of oils, lubricants, fuel, and organic dust or fibers (paper, wood, cotton, agricultural grass/grain,... -
Page 23: Operator Restraint System
8000 YRM 2000 Maintenance Procedures Every 8 Hours or Daily made special steel using special procedures. If either fork is damaged, replace the forks as a set. Inspect welds on mast and carriage for cracks. Make sure that capscrews and nuts are tight. Inspect channels for wear in areas where the rollers travel. -
Page 24: Emergency Locking Retractor (Elr)
Maintenance Procedures Every 8 Hours or Daily 8000 YRM 2000 Emergency Locking Retractor (ELR) With the hood closed and in the locked position, • pull the seat belt slowly from the retractor When the ELR style seat belt is properly buckled assembly. -
Page 25: Adjust Seat - Semi-Suspension
8000 YRM 2000 Maintenance Procedures Every 8 Hours or Daily Adjust Seat - Semi-Suspension NOTE: It is important to adjust the weight setting for each operator. Seat Position Adjustment NOTE: The seat is designed for maximum weight of Fore and aft adjustment - It is recommended •... -
Page 26: Hood And Seat Latches
Maintenance Procedures Every 8 Hours or Daily 8000 YRM 2000 A. STANDARD NON-SUSPENSION SEAT C. SEMI-SUSPENSION SEAT B. PREMIUM FULL SUSPENSION SEAT D. STANDARD FULL SUSPENSION SEAT 1. SEAT BELT 4. FORWARD/BACKWARD ADJUSTMENT LEVER 2. WEIGHT ADJUSTMENT KNOB 5. BACKREST ANGLE ADJUSTMENT LEVER 3. -
Page 27: Engine Compartment
8000 YRM 2000 Maintenance Procedures Every 8 Hours or Daily Engine Compartment Check for the presence of any combustible material such as paper, leaves, etc. Remove any combustible materials. Fuel, Oil, and Coolant Leaks, Check WARNING All fuels are very flammable and can burn or cause an explosion. -
Page 28: Engine Oil
Maintenance Procedures Every 8 Hours or Daily 8000 YRM 2000 Engine Oil After engine has stopped, wait one minute before checking oil level. Keep oil at correct level as indicated on the dipstick. Use the correct oil as shown in Maintenance Schedule. - Page 29 8000 YRM 2000 Maintenance Procedures Every 8 Hours or Daily 1. BATTERY 2. AUXILIARY COOLANT RESERVOIR 1. BATTERY 3. DRIVE BELT 2. DRIVE BELT 4. RADIATOR CAP 3. RADIATOR CAP 5. AIR FILTER 4. AUXILIARY COOLANT RESERVOIR 6. FUEL FILTER 5.
-
Page 30: Air Filter
Maintenance Procedures Every 8 Hours or Daily 8000 YRM 2000 • The specified number of hours has passed since the last filter element replacement. DO NOT operate lift truck until the air filter • element has been replaced. Forks NOTE: Forks must be removed or installed by trained personnel only. - Page 31 8000 YRM 2000 Maintenance Procedures Every 8 Hours or Daily 1. OUTER FORK CARRIER 5. FOR POSITIONER 2. FORKS 6. CAPSCREWS 3. INNER FORK CARRIER 7. FORK REMOVAL NOTCH 4. OUTER FRAME Figure 14. Fork Removal, Lift Trucks Equipped With Fork Positioner Attachment A fork can be removed from carriage for replacement of fork or other maintenance.
-
Page 32: Inspect
10% of original thickness. If fork wear is more than 10%, fork must be replaced or rerated. Perform fork wear inspection using a BOL256N1 caliper ruler Yale P/N 550088603 as follows. See Fork Tip Alignment Figure 17. Length of Forks 3% Dimension Determine normal thickness of "N"... -
Page 33: Install
8000 YRM 2000 Maintenance Procedures Every 8 Hours or Daily If lift truck is equipped with a fork positioner attachment, install inner fork carriers using four capscrews. Tighten capscrews to 35 N•m (25 lbf ft). See Figure 14. 1. FORK 2. -
Page 34: Brake Fluid
Maintenance Procedures Every 8 Hours or Daily 8000 YRM 2000 Brake Fluid Replace the brake fluid in the system if there is dirt or water in the system. On lift trucks with dry brake axles, only use SAE WARNING J-1703 (DOT 3) brake fluid in the master cylinder. Small amounts of water in the brake system can cause reduced braking performance if the water Open cover to brake fluid reservoir. -
Page 35: Indicator Lights, Horn, Fuses, And Relays
8000 YRM 2000 Maintenance Procedures Every 8 Hours or Daily brake and put the transmission in NEUTRAL. Make correct operation as described in the Operating the checks carefully. Manual. Check the operation of the horn. Start the engine by turning the key switch to the Start position, Indicator Lights, Horn, Fuses, and Relays if truck is equipped with a key switch, or press the engine start button, if lift truck is equipped with this... -
Page 36: Service Brakes
Maintenance Procedures Every 8 Hours or Daily 8000 YRM 2000 NOTE: HOOD REMOVED FOR CLARITY. 1. BATTERY 12. REAR WORK LIGHT (20 AMP) 2. POWER DISTRIBUTION MODULE (PDM) 13. FRONT WORK LIGHT RELAY 3. START RELAY 14. BACKUP RELAY 4. STARTER (30 AMP) 15. -
Page 37: Engine Oil Pressure
CAUTION Additives may damage the cooling system. Before Figure 22. Parking Brake using additives, contact your local Yale dealer. Engine Oil Pressure If coolant is added, see Maintenance Schedule for There is an indicator light for the engine oil pressure correct solution. -
Page 38: Steering System
Maintenance Procedures Every 8 Hours or Daily 8000 YRM 2000 Table 2. Coolant Temperature Gauge Display and warning tone of coolant temperature gauge Bar level indicator Warning condition Warning display Warning tone 5 blinking Major warning [ ! ] + [ Hi ] Beep 5 lighted Minor warning... -
Page 39: First Service After First 100 Hours Of Operation
8000 YRM 2000 First Service After First 100 Hours of Operation Slowly raise and lower mast several times without Lower the load to approximately 0.3 m (1 ft). Tilt a load. Raise mast to its full height at least once. mast forward and backward. -
Page 40: Yanmar Engine Oil And Oil Filter
Maintenance Procedures Every 300 Hours 8000 YRM 2000 YANMAR ENGINE OIL AND OIL FILTER NOTE: The engine oil and oil filter must also be changed after the first 100 hours of operation for a newly installed engine. Turn engine OFF and change engine oil and oil filter. Apply clean oil to gasket of new filter. -
Page 41: Maintenance Procedures Every 500 Hours Or 1 Year
CAUTION Additives may damage the hydraulic system. Before using additives, contact your local Yale dealer. Check hydraulic oil level when oil is at operating temperature with mast in a vertical position, carriage... -
Page 42: Battery
Maintenance Procedures Every 500 Hours or 1 Year 8000 YRM 2000 Connect negative and positive cables to their respective terminals. YANMAR ENGINE OIL AND OIL FILTER CHANGE NOTE: Change oil and oil filter for engine at first 100 hours of operation on new lift trucks. Change engine oil and engine oil filter. -
Page 43: Clean Debris From Radiator Core
8000 YRM 2000 Maintenance Procedures Every 500 Hours or 1 Year Table 3. V-Belt Deflection Table Used V-Belt Tension New V-Belt Tension 10-13 mm 7-10 mm 8-13 mm 8-11 mm 5-8 mm 7-11 mm (0.375-0.5 in.) (0.250-0.375 in.) (0.3125-0.5 in.) (0.3125-0.4375 in.) (0.1875-0.3125 in.) (0.250-0.4375 in.) -
Page 44: Transmission Oil Level
Maintenance Procedures Every 500 Hours or 1 Year 8000 YRM 2000 TRANSMISSION OIL LEVEL NOTE: Transmission oil temperature should be at least 50°C (120°F) when checking oil level. If engine has been running, engine must be shut down WARNING for one minute or longer prior to checking oil level. See At operating temperature, the transmission oil is Figure 32. -
Page 45: Mast Lubrication
10% of original thickness. If fork wear is more than 10%, fork must be replaced or rerated. Perform fork wear inspection using a BOL256N1 caliper ruler Yale P/N 550088603 as follows. See Figure 17. Determine normal thickness of "N" of fork using scale or ruler portion of caliper ruler. - Page 46 Maintenance Procedures Every 500 Hours or 1 Year 8000 YRM 2000 1. MAST PIVOT PIN 2. CAPSCREW 3. BUSHING (BRONZE) 4. LUBRICATION FITTING 5. OUTER MAST Figure 35. Pivot Pin Lubrication Tilt mast fully back. Remove blocks from under channels. If a integral sideshift carriage is installed, lubricate sliding surfaces at grease fittings with multipurpose grease shown in the Maintenance...
-
Page 47: Header Hose Checks
8000 YRM 2000 Maintenance Procedures Every 500 Hours or 1 Year slippage; proper hose tensioning. Adjust/repair/replace hose/components as necessary. For quick disconnect procedures, see Mast Repair (S/N A387, A389, A397, A399) 4000YRM1999. LIFT CHAIN LUBRICATION WARNING When working on or near the mast, see Safety Procedures When Working Near Mast in this section. - Page 48 Maintenance Procedures Every 500 Hours or 1 Year 8000 YRM 2000 NOTE: HYDRAULIC HOSES ARE NOT SHOWN FOR CLARITY. 1. LUBRICATION FITTING 6. RETAINING PLATE 2. ROD END WITH BUSHING AND SNAP RING 7. NUT 3. TILT ANCHOR 8. WASHER 4.
-
Page 49: Master Brake Cylinder Rod End Pin Lubrication
8000 YRM 2000 Maintenance Procedures Every 500 Hours or 1 Year MASTER BRAKE CYLINDER ROD END PIN LUBRICATION Lubricate master brake cylinder rod end pin. Use engine oil as shown in the Maintenance Schedule. See Figure 38. 1. ROD END PIN NOTE: FOUR FUNCTION LEVERS WITH RTST 2. -
Page 50: Differential And Drive Axle Oil
Maintenance Procedures Every 500 Hours or 1 Year 8000 YRM 2000 brake fluid, as necessary. Use brake fluid shown in Maintenance Schedule. See Figure 40. A. COVER CLOSED B. COVER OPEN 1. COVER 4. BRAKE FLUID RESERVOIR 2. CAPSCREW 5. MOUNTING BRACKET 3. -
Page 51: Maintenance Procedures Every 1000 Hours Or 1 Year
8000 YRM 2000 Maintenance Procedures Every 1000 Hours or 1 Year 1. DRIVE AXLE 3. DRAIN PLUG 2. CHECK/FILL PLUG 4. FILL LINE (OIL LEVEL) Figure 41. Drive Axle Fluid Fill Maintenance Procedures Every 1000 Hours or 1 Year NOTE: Perform Maintenance Procedures Every 8 See Figure 13 for lift trucks equipped with PSI Bi-Fuel Hours or Daily and Maintenance Procedures Every engine. -
Page 52: Clean/Inspect
Maintenance Procedures Every 1000 Hours or 1 Year 8000 YRM 2000 Remove the bolt and seal washer from the fuel WARNING Filter housing top section. Discard seal washer. A small amount of fuel may still be present in the See Figure 42. fuel line. -
Page 53: Gasoline Fuel System, Psi 2.4L Bi-Fuel Engine
8000 YRM 2000 Maintenance Procedures Every 1000 Hours or 1 Year NOTE: Opening fuel valve too quickly can cause 11. Disconnect supply fitting (6) form fitting (7). internal excess flow valve to close, restricting flow of Remove fitting (7) from fuel return tube (8). fuel. - Page 54 Maintenance Procedures Every 1000 Hours or 1 Year 8000 YRM 2000 Figure 43. Gasoline Fuel System - PSI 2.4L Bi-Fuel...
- Page 55 8000 YRM 2000 Maintenance Procedures Every 1000 Hours or 1 Year Legend for Figure 43. 1. FITTING 11. TUBE ASSEMBLY 2. CAPSCREW 12. FITTING 3. INSULATED CLAMP 13. FUEL FILTER 4. FITTING 14. FILTER CLAMP 5. MANIFOLD ASSEMBLY 15. FUEL SUPPLY TUBE 6.
- Page 56 Maintenance Procedures Every 1000 Hours or 1 Year 8000 YRM 2000 Figure 44. Fuel pump and Attaching Parts - PSI 2.4L Bi-Fuel...
-
Page 57: Assembly And Install
8000 YRM 2000 Maintenance Procedures Every 1000 Hours or 1 Year Legend for Figure 44. 1. FUEL PUMP HARNESS JUMPER 10. ISOLATOR 2. SWIVEL CLAMP 11. HOSE 3. PUMP JUMPER CONNECTOR 12. STRAINER 4. O-RING 13. FUEL PUMP 5. NUT 14. -
Page 58: Fuel Filter Replacement, Yanmar Engines
Maintenance Procedures Every 1000 Hours or 1 Year 8000 YRM 2000 1. SEALANT PATTERN 2. FRAME OPENING Figure 45. Sealant Pattern for Fuel Tank Cover FUEL FILTER REPLACEMENT, YANMAR ENGINES CAUTION Disposal of lubricants and fluids must meet local environmental regulations. Replace fuel filter at specified intervals to prevent contaminants from adversely affecting the diesel fuel flow. -
Page 59: Priming The Fuel System, Yanmar
8000 YRM 2000 Maintenance Procedures Every 1000 Hours or 1 Year NOTE: Tag connectors prior to disconnecting to aid in 14. Clean fuel filter head mounting surface and apply reconnecting. a small amount of diesel fuel to gasket on new fuel filter element. -
Page 60: Ignition System
Wear protective goggles or a face Measure chain for wear where it moves over sheaves. shield to prevent injury to the eyes. Using a chain scale, (Yale P/N 518096869 ) check lift chains as shown in Figure 49. -
Page 61: Integral Sideshift Carriage, Check Bearings
8000 YRM 2000 Maintenance Procedures Every 1000 Hours or 1 Year Remove lift chains. Clean lift chains by soaking them in a solvent that has a petroleum base for at least 30 minutes. Use compressed air, adjusted to a maximum output of 103 kPa (15 psi), to completely dry chains when they are clean. -
Page 62: Control Levers, Pedals, And Parking Brake
PARKING BRAKE Lubricate linkages, pedal shafts, control cables (throttle, hood, parking brake), and seat rails. Use a silicone spray lubricant, Yale Part No. 504236201 . Figure 51. Lower Mounting Hooks Wear Limit and Clearance Adjustment Maintenance Procedures Every 2000 Hours or 1 Year... - Page 63 17. Start lift truck and allow it to run for 30 seconds. Check for leaks. Stop engine and check hydraulic CAUTION oil level. Add oil, if necessary. Additives may damage the hydraulic system. Before using additives, contact your local Yale dealer.
-
Page 64: Air Filter Element, Replace
Maintenance Procedures Every 2000 Hours or 1 Year 8000 YRM 2000 1. DIPSTICK 8. SUCTION PIPE 2. HOSE CLAMP 9. SUCTION FILTER 3. RETURN HOSE 10. SUCTION HOSE 4. NUT 11. BREATHER/FILL NECK 5. HYDRAULIC TANK COVER 12. RIGHT FRAME CHANNEL 6. -
Page 65: Air Filter With Silencer
Never install a damaged element. Always correctly. use a Yale approved filter element. Fasten latches to secure cover to canister. Make Install new filter element into canister. sure latches penetrate slots in both canister and cover. - Page 66 NOTE: Proper element installation is required to allow cover to be installed correctly. Never reinstall a used element. Never install a damaged element. Always use a Yale approved filter element. Install new filter element into canister. Press and rotate filter element ⅛ turn clockwise until fully engaged in canister.
-
Page 67: Pcv Valve
8000 YRM 2000 Maintenance Procedures Every 2000 Hours or 1 Year 1. PLUG 4. COVER 2. DUST EVACUATION VALVE 5. OUTER FILTER ELEMENT 3. INNER FILTER ELEMENT 6. CANISTER Figure 56. Air Filter With Silencer PCV VALVE PSI LPG and Bi-Fuel Engines NOTE: Turn engine OFF before installing new PCV valve. -
Page 68: Forks, Inspect
10%, fork must be replaced or rerated. removed, DO NOT create dust. Perform fork wear inspection using a BOL256N1 caliper ruler Yale P/N 550088603 as follows. See DO NOT sand, grind, chisel, hammer, or change Figure 17. linings in any way that will create dust. Any changes to brake linings must be done in a Determine normal thickness of "N"... -
Page 69: Differential
8000 YRM 2000 Maintenance Procedures Every 2000 Hours or 1 Year When brake lining dust is wet, clean parts. Put any cloth or towels in a plastic bag or an airtight container while they are still wet. Put a DANGEROUS FIBERS warning label on plastic bag or airtight container. -
Page 70: Transmission Oil And Filter, Replace
Maintenance Procedures Every 2000 Hours or 1 Year 8000 YRM 2000 TRANSMISSION OIL AND FILTER, Remove and discard transmission breather. Install new transmission breather and hand REPLACE tighten. WARNING Remove and discard old transmission oil filter. Apply clean oil to gasket of new transmission oil At operating temperature, the transmission oil is filter. -
Page 71: Brake Fluid Change, Master Cylinder
8000 YRM 2000 Maintenance Procedures Every 2000 Hours or 1 Year BRAKE FLUID CHANGE, MASTER Remove brake fluid reservoir cap. Pour fluid into a suitable container with a 0.2 liter (0.42 pt) CYLINDER minimum capacity. Refill reservoir with clean oil Open brake reservoir cover. -
Page 72: Maintenance Procedures Every 4000 Hours Or 2 Years
The operation of the CAUTION hydraulic pump without oil will damage the pump. Additives may damage the hydraulic system. Before using additives, contact your local Yale CAUTION dealer. Disposal of lubricants and fluids must meet local Fill hydraulic tank with oil specified in environmental regulations. -
Page 73: Cooling System
Additives may damage the cooling system. Before DO NOT remove the radiator cap from the radiator using additives, contact your local Yale dealer. when the engine is hot. When the radiator cap is removed, the pressure is released from the Close drain valve. -
Page 74: Replace Throttle (Accelerator) Cable, Yanmar Diesel Engine
Maintenance Procedures Every 5000 Hours 8000 YRM 2000 REPLACE THROTTLE (ACCELERATOR) Install throttle cable, pin, washer, and cotter pin on bellcrank. See Figure 63. CABLE, YANMAR DIESEL ENGINE Remove floor plate. Install throttle cable, pin, washer, and cotter pin on accelerator lever. See Figure 63. Remove cotter pin, washer, pin, and throttle cable from accelerator lever. -
Page 75: Maintenance Procedures Every 6000 Hours
8000 YRM 2000 Maintenance Procedures Every 6000 Hours Maintenance Procedures Every 6000 Hours TIMING BELT CHANGE, PSI ENGINE To change timing belt, use Kit-Service 6000 hours specified in the Parts Manual for your lift truck. See NOTE: When changing timing belt make sure ALL PSI 2.4L Engine 0600YRM1755 for belt check components from service kit are used and not just the instructions and replacement procedures. -
Page 76: Hood Lock Assembly Check
Hood Lock Assembly Check 8000 YRM 2000 A. TWO-STAGE LFL MAST B. THREE-STAGE FFL MAST 1. OUTER MAST 5. FREE-LIFT CYLINDER 2. INNER MAST 6. CROSSMEMBER 3. INTERMEDIATE MAST 7. CROSSMEMBER 4. HOOK Figure 64. Two-Stage Limited Free-Lift and Three-Stage Full Free-Lift Masts Hood Lock Assembly Check Push down until hood just touches rubber WARNING... - Page 77 8000 YRM 2000 Hood Lock Assembly Check 1. HOOD 5. BRACKET 2. CAPSCREW 6. LEVER 3. HOOD LOCK ASSEMBLY 7. SPRING 4. HOOD LOCK COVER Figure 65. Hood Lock Assembly Check...
-
Page 78: Lift Chain Adjustments
Lift Chain Adjustments 8000 YRM 2000 Lift Chain Adjustments WARNING When working on or near the mast, see Safety Procedures When Working Near Mast in this section. During test procedures for the hydraulic system, fasten the load to the carriage with chains to prevent it from falling. -
Page 79: Jump-Starting The Lift Truck
8000 YRM 2000 Jump-Starting the Lift Truck Legend for Figure 67. 1. MAST 2. CARRIAGE 3. DISTANCE FROM FLOOR TO LOWER CARRIAGE BAR Figure 67. Lift Chain Adjustment, Hook-Type Carriage Jump-Starting the Lift Truck JUMP-STARTING USING A BATTERY JUMP-STARTING A LIFT TRUCK USING CHARGER ANOTHER LIFT TRUCK WARNING... -
Page 80: Welding Repairs
Get information from your battery. dealer for Yale lift trucks before welding on a Connect the ground clamp for the arc welder as mast. close as possible to the weld area. This action will... -
Page 81: Remove Tire From Wheel
Check with your Yale dealer whether a specific Figure 68. There are several types of wheels used on radial tire is approved for use on Yale trucks. this series of lift trucks. Put lift truck on blocks as described in How to Put Lift Truck on Blocks at the beginning of this section. -
Page 82: Remove Tire From Three- And Four-Piece Wheels
Wheel and Tire Replacement 8000 YRM 2000 STEP 1. Remove nuts that fasten wheel rims together. STEP 2. Loosen tire bead from wheel rim. STEP 3. Remove wheel rims from tire. Remove inner tube and flap. Remove Tire From Three- and Four-Piece Wheels WARNING Make sure all the air pressure is removed from the tire before a wheel is disassembled. -
Page 83: Install Wheel In Tire
8000 YRM 2000 Wheel and Tire Replacement STEP 1. Loosen tire bead from side flange. STEP 2. Put tire tool into slot between lock ring and wheel rim. Remove lock ring and side flange. If there is a flange seat, remove it. STEP 3. -
Page 84: Install Three-Piece Or Four-Piece Wheel In Tire
Wheel and Tire Replacement 8000 YRM 2000 • DO NOT mix types of tires, type of tire tread, Apply a rubber lubricant or a soap solution to the wheel assemblies different tire bead and tube. manufacturers on any one lift truck. DO NOT use a steel hammer on the wheel. -
Page 85: Install Tire On Two-Piece Wheel
8000 YRM 2000 Wheel and Tire Replacement STEP 1. Install inner tube and rubber flap in tire. STEP 2. Install wheel rim in tire. Make sure stem of inner tube is aligned with slot in rim. STEP 3. Turn over rim and tire. Put blocks under rim so rim is 8 to 10 cm (3 to 4 in.) above floor. -
Page 86: Install Two-Piece Wheel In Tire
Wheel and Tire Replacement 8000 YRM 2000 DO NOT use a steel hammer on the wheel. Use a Install new inner tube in tire. Used tubes and flaps rubber, lead, plastic, or brass hammer to put parts can cause tire failure. together. -
Page 87: Install The Wheels
8000 YRM 2000 Wheel and Tire Replacement If installation is correct, add air pressure to tire to rotated. Loosen castle nut until hub turns freely with no the specified pressure. end play. Tighten castle nut to 3.0 to 6.0 N•m (425 to 850 lbf in). Install cotter pin in Check that all wheel parts are correctly installed. -
Page 88: Remove Tire From Wheel
Wheel and Tire Replacement 8000 YRM 2000 Remove Tire From Wheel WARNING Make sure all of the air pressure is removed from the tire before a wheel is disassembled. Air pressure in the tires can cause the tire and rim parts to explode causing serious injury or death. Keep tire tools in firm contact with the wheel parts. -
Page 89: Install Tire On Wheel
8000 YRM 2000 Wheel and Tire Replacement STEP 4. Remove the press and remove the loose flange locking ring and the advance band (four-piece wheel only) from the tire and wheel assembly. STEP 5. Push the TBS toward the inside of the tire to remove it. - Page 90 Wheel and Tire Replacement 8000 YRM 2000 STEP 1. Clean interior and exterior bead of tire. Lubricate tire beads and inside of tire, up to tire shoulders. Apply lubricant to entire underside of the TBS. NOTE: If the wheel rim width is less than 152 mm (6 in.), the TBS will contain one valve hole to accommodate the needle valve.
- Page 91 8000 YRM 2000 Wheel and Tire Replacement STEP 4. Apply lubricant to the rim. If a four-piece wheel is being used, lubricate the advance band. Slide the tire and the TBS onto the wheel. Line up the valve hole in the TBS with the valve slot in the wheel.
-
Page 92: Add Air To Pneumatic Tubeless Tire
Wheel and Tire Replacement 8000 YRM 2000 STEP 7. Position the advance band. Ensure that it does not go in too far and damage the valve. Position the arms of the press onto the loose flange. CAUTION DO NOT compress the bead too far and cause the rubber sealing ring to become dislocated and damage the valve stem. -
Page 93: Wheels, Install
8000 YRM 2000 Wheel and Tire Replacement Wheels, Install loosen castle nut to first position where cotter pin can be installed. Install cap for bearings. WARNING SOLID RUBBER TIRES ON PNEUMATIC WHEELS, CHANGE Lift truck tires and wheels are heavy. Use caution when removing and installing lift truck tires and wheels or personal injury can occur. - Page 94 Wheel and Tire Replacement 8000 YRM 2000 STEP 1. Put wheel rim on bed of press. Put cage in position on tire. Use press to push tire away from side flange. STEP 2. Put tire tool into slot between lock ring and wheel rim.
-
Page 95: Install Tire On Wheel
8000 YRM 2000 Wheel and Tire Replacement STEP 4. Put cage in position on tire. Use press to push tire from wheel rim. Install Tire on Wheel NOTE: When you assemble the wheels, see Figure 68. There are several types of wheels used on these series of lift trucks. - Page 96 Wheel and Tire Replacement 8000 YRM 2000 STEP 1. Lubricate wheel rim and inner surface of tire with tire lubricant or soap. STEP 2. Put wheel rim on bed of press. Put tire over wheel rim. Put cage in position on tire. Use press to install tire on wheel rim.
-
Page 97: Snap-On-Tire, Change
8000 YRM 2000 Wheel and Tire Replacement STEP 4. While the cage is holding the tire on the wheel rim, install lock ring. Use a tire tool to make sure lock ring is in the correct position. SNAP-ON-TIRE, CHANGE Remove wheel nuts and remove wheel and tire from lift truck. -
Page 98: Remove Easy Mounting Tire From Wheel
Wheel and Tire Replacement 8000 YRM 2000 1. TIRE 4. COMPRESSION PLATE 2. ADAPTER 5. TIRE BRACKET 3. WHEEL RIM Figure 72. Easy Mounting Style Solid Rubber Tire Components Remove Easy Mounting Tire From Wheel WARNING Be sure lift truck is secured and on level ground. If jacks are used, be sure they meet the load requirements of the lift truck. - Page 99 8000 YRM 2000 Wheel and Tire Replacement WARNING When removing bolts and washers from tire, be sure tire does not slip off rim and cause an injury. WARNING Wear safety glasses and protect your hands and feet when removing and installing Easy Mounting Style solid rubber...
-
Page 100: Install Easy Mounting Tire On Wheel
Wheel and Tire Replacement 8000 YRM 2000 STEP 5. Pull the adapter off the wheel rim. If adapter is difficult to remove, insert a suitable tool into adapter slots and pry off wheel rim. Install Easy Mounting Tire on Wheel WARNING Damage to the tire and wheel assembly and injury or death can occur if you do not do the following procedures:... - Page 101 8000 YRM 2000 Wheel and Tire Replacement STEP 1. Before installing the adapter onto the wheel assembly, check the recommended service life date on the adapter to ensure it has not expired. If date has expired, replace with new adapter. See Parts Manual.
- Page 102 Wheel and Tire Replacement 8000 YRM 2000 STEP 3. Place tire onto adapter and wheel rim. STEP 4. Insert six bolts and washers into tire and hand tighten. STEP 5. Tighten bolts in a cross pattern to 85 N•m (63 lbf ft) for the drive wheels and 49 N•m (36 lbf ft) for the steer wheels.
-
Page 103: Overhead Guard Changes
8000 YRM 2000 Overhead Guard Changes Overhead Guard Changes See your dealer for Yale lift trucks BEFORE performing any changes to the overhead guard. WARNING DO NOT weld mounts for lights or accessories to No welding or drilling on legs of overhead guard is the legs of the overhead guard. - Page 104 8000 YRM 2000 10/19 (11/18)(1/18)(12/17)(9/17)(5/17)
Need help?
Do you have a question about the GP20-30MX and is the answer not in the manual?
Questions and answers