
Related Manuals for Elegoo OrangeStorm Giga


Summary of Contents for Elegoo OrangeStorm Giga
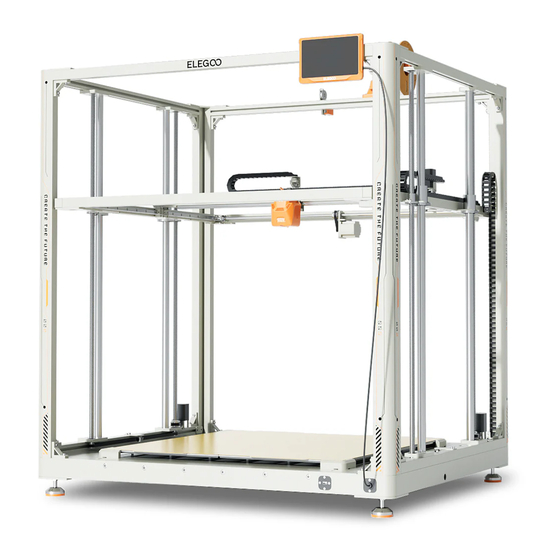
- Page 1 Oran Giga User Manual Pictures are only for illustration purposes. Actual production products may vary from images. V1.0...
- Page 2 For any questions or issues not covered in this manual, please directly contact us at 3dp@elegoo.com. The ELEGOO team is always ready to provide you with quality service. To provide you with the best product experience, in addition to this manual, you can find supplemental information for the operation of your new printer via: 1.
- Page 3 Cautions 1. Do not place the printer in vibrating or other unstable environments, as the shaking of the machine will affect the print quality. 2. Do not touch the nozzle and heated bed when the printer is working to prevent high-temperature burn and personal injury. 3.
- Page 4 Troubleshooting Guide A stepper motor of the X/Y/Z axis is not moving or making a noise when returning to home ① The stepper motor cable could be loose. Please recheck the wiring connection. ② The corresponding limit switch may not be triggering properly, please check whether there is any interference in the movement of the corresponding shafts and ensure the limit switch wiring is not loose.
- Page 5 Contents Machine Parameters ------------------------------------------------------------------------------ Machine Component Diagrams ---------------------------------------------------------------- Packing List ------------------------------------------------------------------------------------------ Machine Setup & Installation -------------------------------------------------------------------- Leveling Procedure -------------------------------------------------------------------------------- Model Testing --------------------------------------------------------------------------------------- Display Screen Operation Introduction ---------------------------------------------------- Software Installation ------------------------------------------------------------------------------ LAN(Network) Printing ---------------------------------------------------------------------------- Mainboard Circuit Wiring Diagram-------------------------------------------------------------...
- Page 6 Machine Parameters Software Specifications Printer Specifications Slicer Software:Cura Printer Type: FDM(Fused Deposition Modeling) Input File Format: STL、OBJ Build Volume:800X800X1000 (mm³) Output File Format: Gcode Print Precision:±0.1mm Interface: USB Drive, LAN (Network), WiFi Nozzle Diameter:0.6mm Print Speed:30~300mm/s (default 150mm/s) Power Supply Specifications Operating Temperature Specifications Input Power :100-120V/220-240V;50/60Hz...
- Page 7 Machine Component Diagram Filament Guide Assembly Mounted Spool Holder Kit Touch Screen LAN(Network) Port AC Power Socket Power Switch Printhead Camera Port USB Drive Port Screen Port E-Stop Switch...
- Page 8 Packing List List 1: X/Y-axis Assembly Base Kit OrangeStorm Giga 3D打印机 The above accessories shall be subject to actual products, and the pictures are for reference only. Z-axis Left Assembly Z-axis Right Assembly...
- Page 9 Packing List List 2: Z-axis Caterpillar Printhead Screen Leveling Spool Holder Spool Holder Filament Breakage Z-axis End Stop Cable Tracks Clip Plate*2pcs Detector Top Front Profile Top Rear Profile Detached Spool Profile Corner Filament Guide Power Cable Leveling Card Holder Assembly Bracket*8pcs Aseembly (5KG)...
- Page 10 Machine Setup & Installation Please refer to the included USB Drive for a setup and installation instructional video. ① Dowel Pin Alignment Installation: The bottom profiles of the Z-axis Left and Z-axis Right Assemblies have corresponding dowel pin holes, so be sure to align them correctly during installation(Diagram 1)...
- Page 11 Machine Setup & Installation Profile Corner Bracket Installation:Four corner brackets are required to be installed at the bottom. Use (HM640) 8pcs and (HM630) 8pcs screws to pass through the corresponding holes of the profiles and secure them during installation. (Diagram 4) (HM6*30) (HM6*40) (Diagram 3)...
- Page 12 Machine Setup & Installation ① Top Rear Profile Installation:Use (PM6*28) 4pcs & (SW M6) 4pcs to secure the top rear profile. Then, proceed to install the corner brackets on both the left and right sides of the profile. For this, you will use two different sizes of screws: 4 pieces of (HM640) and 4 pieces of (HM6*30). Insert each screw through the corresponding hole on the profile and tighten them.(Diagram 5) ②...
Need help?
Do you have a question about the OrangeStorm Giga and is the answer not in the manual?
Questions and answers
"Use (PM6*28) 4pcs & (SW M6) 4pcs to secure the top front profile" What is the difference between these? and why are two different type of screws used?
The context mentions PM6*28 screws and SW M6 screws but does not clarify their differences. It suggests some uncertainty about whether they are the same or different types of screws. Without additional details from the manual or specifications, the exact difference cannot be determined.
This answer is automatically generated
How do I update the firmware in my gigastorm. couldn't find it in manual, looked on the website (seems to focus on selling stuff with lilttle product support) I have a coupld dozen printers, this is my first elegoo - started great, now 1 month later I **** unable to print anything. Found little information on internet