Advertisement
Quick Links
American Standard is devoted to making life,
in the heart of your home, better every day...
...so, thank you for inviting us in! With the very best in kitchen
and bathroom products, we are here to help make your life
happier, healthier and simpler. Our commitment to quality,
innovation and performance has made us part of your everyday
routine for nearly 150 years, and we look forward to being a
part of your life for many years to come.
Learn more at www.AmericanStandard.com
REGISTER YOUR WARRANTY
Try the easy-scan QR code to quickly enter
your information or find your product's
detailed warranty here:
www.AmericanStandard.com/warranty
Registering allows you to keep your product information
safe, and us the ability to contact you in the event of a
product recall or any news about your purchase.
And if ever you have a question or need help...?
Call us at 1-855-815-0004
756253-100 EN (11/23)
A8019T-LHO/A8019T-RHO/A8020T-RHO/A8020T-LHO/A8021T-RHO/A8021T-LHO/A8022T-CO
Advertisement

Related Manuals for American Standard Aspirations A8019T-RHO


Summary of Contents for American Standard Aspirations A8019T-RHO
- Page 1 American Standard is devoted to making life, in the heart of your home, better every day… …so, thank you for inviting us in! With the very best in kitchen and bathroom products, we are here to help make your life happier, healthier and simpler.
-
Page 2: Box Contents
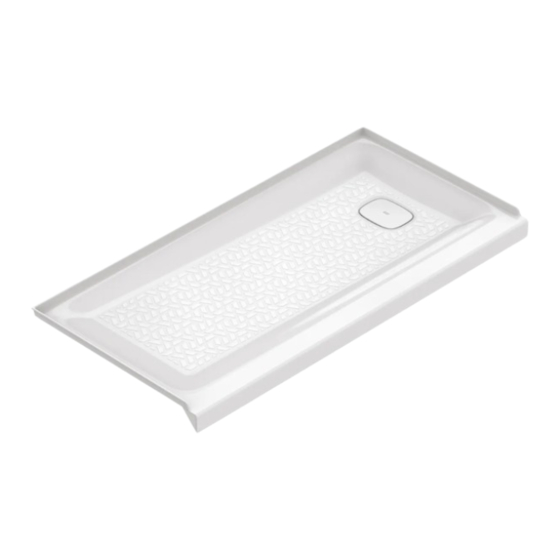
A8022T-CO INSTALLATION INSTRUCTIONS Thank you for selecting American Standard – the benchmark of fine quality for over 150 years. To ensure this product is installed properly, please read these instructions carefully before you begin. Certain installations may require professional help. -
Page 3: Installation Instructions
RECOMMENDED TOOLS AND MATERIALS Installation steps will indicate which tools should be used with asscociated letter 1234567891 0 11 12 13 14 15 16 17 18 19 20 21 22 23 24 Level Tape Measure Square Screwdriver Pipe Caulking Slip Joint Personal Safety Wrench Pliers... - Page 4 ROUGH-IN INFORMATION 48"x36" 48-3/8" 24" 16-7/8" 2-3/4" 1" 36" 3" 60"x30" 60-3/8" 10" 13-7/8" 2-3/4" 1" 8-7/8" 30" 3" 60"x32" 60-3/8" 10" 14-7/8" 2-3/4" 1" 32" 3"...
- Page 5 ROUGH-IN INFORMATION 60"x36" 60-3/8" 10" 16-7/8" 2-3/4" 1" 36" 3" Model 48X36" 48-3/8" 36" 24" 16-7/8" 3" 1" 2-3/4" 60X30" 60-3/8" 30" 10" 13-7/8" 3" 1" 2-3/4" 60X32" 60-3/8" 32" 10" 14-7/8" 3" 1" 2-3/4" 60-3/8" 36" 10" 16-7/8" 3" 1"...
- Page 6 SHOWER BASE INSTALLATION STEP 1A Locate studs as required. Ensure roughing-in FIG. 1 Each alcove stud dimensions are proper, plumb, and square (Fig. 1). must be plumb Fir out studding if necessary. It is strongly recommended and square. that an additional opening be provided for access to the drain components.
- Page 7 BASE INSTALLATION STEP 2A Place Base in studded alcove, and check level front FIG. 3 to back and side to side, shim as necessary, (Fig. 3). NOTE: If installing Aspirations shower door, reference figure below for additional wooden 2x4 support and keep threshold of base 1/2"...
- Page 8 BASE INSTALLATION NOTE: Do not place mortar under area of "Leveling Strips" for that could offset the level of the base. (Fig 4) After the bedding has been poured and before it sets, position the base within the alcove and check level in several directions (ref.
- Page 9 BASE INSTALLATION STEP 3A Any finish material such as tile or wallboard WOOD must be self-supporting if it contacts the deck of the STUDS base. Flooring will be butted against the bottom of the base FIG. 7 STUD flange, also holding the base in place. (Fig. 7). TILE WATERPROOF DRYWALL OR CEMENT BOARD...
- Page 10 POST INSTALLATION CLEAN-UP Remove all construction debris. Install any accessories, shelves or doors according to manufacturer’s installation instructions. Post installation clean-up generally can be completed using warm water and liquid dishwashing detergent. SShower Baseborn dirt or stains may be removed using granular Spic and Span® mixed with water. Painter’s naphtha can be used to remove excess adhesives and/or wet oil-base paint.
-
Page 11: Tell Us What You Think
Register your sink at www.americanstandard.com. Please save your proof of purchase (sale receipt). If you need assistance or do not have access to our website, please contact American Standard Customer Care at: (800) 442-1902. An American Standard representative will assist in completing the warranty registration.
Need help?
Do you have a question about the Aspirations A8019T-RHO and is the answer not in the manual?
Questions and answers