
Related Manuals for Eleiko 3085878


Summary of Contents for Eleiko 3085878
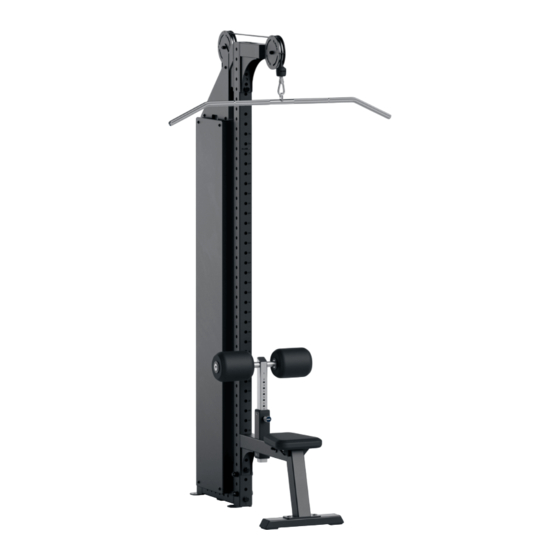
- Page 1 ELEIKO CABLE LAT PULL DOWN Art.no. 3085878 3085878-MS-120 3085878-FS-120 3085878-WM-120 3085878-MS-150 3085878-FS-150 3085878-WM-150...
-
Page 3: Table Of Contents
CONTENTS Read before installation and use Safety instructions Warning labels List of components (seat) List of components (frame) List of components (cable) Assembly instructions Tools needed User guide Purpose General instructions for use Product specifications Care and maintenance Preventive maintenance and inspections Spare parts and service Warranty NOTE! YOU WILL ONLY NEED TO USE THIS MANUAL! -
Page 4: Read Before Installation And Use
Install and use this equipment in a place where access and supervision are specifically controlled by the owner. Be sure to install the equipment on a stable base and level the equipment properly. Eleiko recommends that all equipment is installed by a licensed contractor or an Eleiko installer. -
Page 5: Warning Labels
WARNING LABELS - 5 -... - Page 6 ASSEMBLY INSTRUCTIONS TOOLS NEEDED You need the following tools to assemble the equipment. Wrench Size 14mm Spirit Level Socket Wrench Size 24mm Wrench Size 24mm Wrench Size 17mm Allen Key Size 3 Allen Key Size 6 Allen Key Size 5 Allen Key Size 8 NOTE: Do not use electric power tools for assembly.
- Page 7 BOLT TO GROUND Eleiko recommends that this product should be bolted to the ground. Make sure the ground is solid and level. Consult a licensed contractor to choose the appropriate anchoring fasteners for your facility. See assembly instructions for the position of the anchoring points.
-
Page 8: List Of Components (Seat)
LIST OF COMPONENTS SEAT Box1 + Upholstry 3002511 a2 2001997a1 3085554p24 2001997a3 2001997a2 2001276 2001274 3085858p15 Washer Coach Bolt Washer (Plastic) K6S M8x12 K6S M5x8 3002274 p14 2001436-L30 3002274 p30 2000747-L12 K6S M10x25 2000782-L8 2002158-L40 K6S M10x100 Washer M10 Locking Nut M10 Washer M10 Locking Nut M10 2001618 (Black) - Page 9 Box 1 2001276 2001274 Step 1, first of all assemble the seat and bracket Washer (Plastic) 3085878 Washer 3002274p14 K6S M8x12 2000747-L12 K6S M10x25 2000675-L25 Locking Nut M10 2001899 (Black) K6S M5x8 2000782-L8 Washer M10 3085554p24 2001911 (Black) Carriage Bolt...
-
Page 10: List Of Components (Frame)
LIST OF COMPONENTS (Frame) 2001991a1 2002008 2001373 3085858p15 2001992a1 2001374 2001320 Screw Kit 2002072 M16x110 M16x100 Locking Nut M16 Washer M16 2001385-L110 2001385-L100 2001379 2001421 - 10 -... - Page 11 Locking 2001992a1 Washer M16 2001373 Nut M16 M16x100 2001374 M16x110 Make sure the cut out triangle points forward LOOSE SCREWS! M16x100 M16x110 M16x100 LOOSE SCREWS! Make sure the cut out triangle points forward - 11 -...
- Page 12 2001373 Locking Nut M16 M16x100 Washer M16 2001320 LOOSE SCREWS! M16x100 M16x100 Make sure the cut out triangle points forward - 12 -...
- Page 13 Locking 2001991a1 M16x110 M16x100 Washer M16 Nut M16 2002008 TIGHTEN ALL M16 BOLTS! M16x110 LOOSE SCREWS! M16x100 - 13 -...
- Page 14 Below you see different options of Lat pull down, continue on the indicated page depending on which device you want to assemble. Multi Station 3085878-MS Continue on page 18. Wall Mounted 3085878-WM Continue on page 15. Free Standing 3085878-FS Continue on page 16.
- Page 15 3085878-WM (Wall Mounted) Wall Bracket Kit 2002074 Locking Washer M16 Nut M16 M16x110 Wall Bracket 3085849p1 The brackets can be flipped depending on how far from the wall you need the single station to be. Always make sure all the brackets are flipped the same, so they have equal length towards the wall.
- Page 16 3085878-FS Angled Leg Support Short Kit Angled Leg Support Kit (Free Standing) 3085910 2001925-pair Locking M16x100 Washer M16 3085910 Nut M16 Washer M16 2001925 M16x110 13th hole from bottom. M16x100 8th hole from bottom. - 16 -...
- Page 17 3085878-FS (Free Standing) For anchoring to floor or adjusting height, first remove the cover plates on all support legs! Use a spirit level when adjusting the height! Tighten this nut to lock machine foot! Adjust machine foot here! Hole for anchoring!
-
Page 18: List Of Components (Cable)
LIST OF COMPONENTS (Cable) 3002075 (4m) 2001806 3000146 CABLE 2001836 3085858p2 3085858p1 3085858p13 3085858a3 2002006 (120 kg) (150 kg) 3085858a1/3085858a5 3085858p12 2001590 2001483 Washer M8 K6S M8 x 12 Nut M10 (Black) K6S M10x50 K6S M8 x 30 3085570 p33 2001422 2001620-L12 2001624... - Page 19 3085858p13 3085570 p33 PLACE RODS IN TILTED POSITION IN THESE HOLES. RUBBER DAMPERS DOWN! WIPE OFF BOTH RODS WITH A CLEAN CLOTH! -19 -...
- Page 20 19x / 24x 2001590 ASSEMBLE THE WEIGHT STACK PLATE BY PLATE! MAKE SURE THE FIRST PLATE IS PUSHED ALL THE WAY DOWN AND LOCKED IN POSITION! This side up! Make sure the first plaseis is pushed down and lockt in position - 20 -...
- Page 21 3085858a1/3085858a5 Selector pin will determine from which side you will select your weights. -21 -...
- Page 22 K6S M8 x 30 3085601 p9 MOUNT PLASTIC TOP SUSPENSION! PUSH TO VERTICAL POSITION! - 22-...
- Page 23 Nut M10 (Black) K6S M10x50 3085858a3 2002006 2001624 2001619-L50 -23 -...
- Page 24 CABLE MAKE SURE THE CABLE IS TIGHT BY PULLING ITS END. LET THE CABLE PASS THROUGH THE SLEEV BEFORE FIXING IT WITH THESE THREE SCREWS! CUT OFF LEFTOVERS FROM CABLE! 1.Puch the cable through the sleev! 2. Tighten all three screws firmly! Cut of leftovers from cable! Section View - 24 -...
- Page 25 K6S M8 x 12 Washer M8 3085858p3 -25 -...
- Page 26 K6S M8 x 12 Washer M8 3085858p1 WIPE OFF BOTH RODS AGAIN WITH A CLEAN CLOTH BEFORE MOUNTING COVER PLATE! NOW YOU MUST DECIDE FROM WHICH SIDE YOU WOULD LIKE TO HAVE SELECTOR PIN! THE COVER PLATE MUST BE MOUNTED ON THE OPPOSITE SIDE OF THE SELECTOR PIN! -26 -...
- Page 27 2001483 SECURE SELECTOR PIN BY THREADING THE METAL RING INTO THE RIGHT HOLE! - 27-...
- Page 28 K6S M8 x 12 Washer M8 3085858p2 - 28 -...
- Page 29 Washer M16 Locking Nut M16 M16x100 3085858p15 2001421 2001379 2001385-L100 Assemble the protection plate on the same side as selector pin! -29 -...
-
Page 30: Assembly Instructions
USER GUIDE PURPOSE The Eleiko cable lat pull down provides users with a wide range of excercises that target all muscle groups. All with a small foot print. GENERAL INSTRUCTIONS FOR USE Use the selector pin to select training weight. -
Page 31: Care And Maintenance
E-mail: info@eleiko.com | Phone: +46 35 17 70 70 www.eleiko.com WARRANTY All products manufactured by ELEIKO are warranted to the original purchaser to be free from defects in workmanship and / or materials under normal use or service as follows: · 5 years on structural moving parts. - Page 33 Eleiko Group AB | Klastorpsvägen 18 | SE-302 62 HALMSTAD | Sweden E-mail: info@eleiko.com | Phone: +46 35 17 70 70 www.eleiko.com...
Need help?
Do you have a question about the 3085878 and is the answer not in the manual?
Questions and answers