Table of Contents
Advertisement
Quick Links
Advertisement
Table of Contents

Subscribe to Our Youtube Channel
Related Manuals for Eleiko 3085806


Summary of Contents for Eleiko 3085806
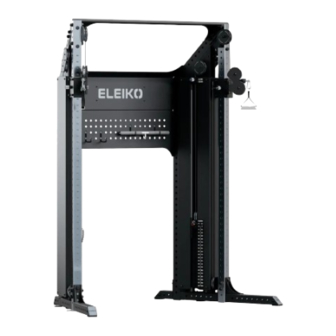
- Page 1 ELEIKO DUAL ADJUSTABLE PULLEY Art.no. 3085806...
-
Page 3: Table Of Contents
CONTENTS Read before installation and use Safety instructions Warning labels List of components Assembly instructions Tools needed User guide Purpose General instructions for use Product specifications Care and maintenance Preventive maintenance and inspections Spare parts and service Warranty NOTE! YOU WILL ONLY NEED TO USE THIS MANUAL! YOU WILL NOT NEED THE MANUAL THAT CAME IN THE WOODEN BOX TOGETHER WITH THE CABLE ATTACHMENT! -
Page 4: Read Before Installation And Use
Install and use this equipment in a place where access and supervision are specifically controlled by the owner. Be sure to install the equipment on a stable base and level the equipment properly. Eleiko recommends that all equipment is installed by a licensed contractor or an Eleiko installer. -
Page 5: Warning Labels
WARNING LABELS - 5 -... -
Page 6: List Of Components
LIST OF COMPONENTS 2001592 2001373 3085806p6 2001859 2001299 3085806a1 2001302 2001860a1 2001320 2001845 Screw Kit 2001937 M16x100 Locking Nut M16 M16x110 Washer M16 2001385-L100 2001379 2001385-L110 2001421 - 6 -... - Page 7 LIST OF COMPONENTS 3002075 (7,9m for 120 kg & 8,2m for 90 kg) 2001806 3000146 3085601 p3 3085601 p11 3085601 p25 CABLE 3085601 a7 3085601 a8 3085601 a9 3085601 a6 3085601 a3 (120 kg) (90 kg) 3085601 a1 (120kg) 3085601 a2 2001590 3085850 a1 (90kg)
- Page 8 LIST OF COMPONENTS 2001482 3085570 p36 2001482 3085601 p15 2001619-L45 2001619-L45 Double Wheel Kit Single Wheel Kit 3085601 p8 3085570 p33 3085601 p9 3085570 p34 2001483 2001808 2001000 3085601 p6 2001485 2000780-M12 Washer M8 K6S M8 x 12 K6S M8 x 30 2001422 2001620-L12 2000747-L30...
-
Page 9: Assembly Instructions
ASSEMBLY INSTRUCTIONS Before assembly, make sure you have enough clearance on all sides of the equipment, not less than 0,6 meters. Take in account the accessibility to remove and replace bar and weights. TOOLS NEEDED You need the following tools to assemble the equipment. Socket Wrench Size 24mm Wrench Size 24mm Wrench Size 17mm... - Page 10 BOLT TO GROUND Eleiko recommends that this product should be bolted to the ground. Make sure the ground is solid and level. Consult a licensed contractor to choose the appropriate anchoring fasteners for your facility. See assembly instructions for the position of the anchoring points.
- Page 11 2001373 2001845 - 11 -...
- Page 12 2001592 Remove screws and plate from floor beam! You will not need these parts! - 12 -...
- Page 13 2001302 Locking Nut M16 M16x110 M16x100 Washer M16 LOOSE SCREWS! M16x100 M16x110 - 13 -...
- Page 14 2001373 2001320 - 14 -...
- Page 15 M16x100 M16x110 2001859 Washer M16 Locking Nut M16 LOOSE SCREWS! M16x110 M16x100 - 15 -...
- Page 16 Locking Nut M16 Washer M16 2001299 M16x100 LOOSE SCREWS! This locking nut and washer will be mounted later! - 16 -...
- Page 17 2001373 2001845 - 17 -...
- Page 18 2001592 Remove screws and plate from floor beam! You will not need these parts! - 18 -...
- Page 19 2001302 M16x110 Washer M16 Locking Nut M16 M16x100 LOOSE SCREWS! M16x100 M16x110 - 19 -...
- Page 20 2001373 2001320 - 20 -...
- Page 21 M16x100 M16x110 2001859 Washer M16 Locking Nut M16 LOOSE SCREWS! M16x110 M16x100 - 21 -...
- Page 22 Washer M16 Locking Nut M16 2001299 M16x100 LOOSE SCREWS! This locking nut and washer will be mounted later! - 22 -...
- Page 23 3085806a1 Washer M16 Locking Nut M16 M16x100 LOOSE SCREWS! Screw from previous step! Screw from previous step! - 23 -...
- Page 24 3085806p6 Locking Nut M16 M16x100 Washer M16 LOOSE SCREWS! - 24 -...
- Page 25 2001860a1 M16x100 Locking Nut M16 If you have purchased Eleiko DAP Storage Shelf Adapter and Eleiko Prestera Storage Shelves. Install them before you tighten all screws! Carefully shake the rack so that all screws falls into the correct position before tightening all screws!
- Page 26 Washer M8 3085601 p8 K6S M8 x 12 Start with left side! - 26 -...
- Page 27 M16 x 100 3085601 a8 Washer M16 Locking Nut M16 - 27 -...
- Page 28 3085601 a7 M16 x 100 Locking Nut M16 Washer M16 - 28 -...
- Page 29 3085601 p3 3085570 p33 3085570 p34 - 29 -...
- Page 30 Place rods in tilted position in these holes. Rubber dampers and distance plates down! Wipe off both rods with a clean cloth! - 30 -...
- Page 31 / 14x (120 kg) (90 kg) 2001590 Assemble the weight stack plate by plate! Make sure the first plate is pushed all the way down and locked in position! This side up! - 31 -...
- Page 32 3085601 a1 / 3085850 a1 - 32 -...
- Page 33 3085601 p9 3085601 a2 Mount top weight and plastic top suspension! Push to vertical position! Top weight and plastic top suspension must be turned this way! - 33 -...
- Page 34 3085601 p6 K6S M8 x 30 K6S M8 x 12 Washer M8 Plastic top suspension from previous step! M8 x 30 3085601 p6 The weight incement can now be secured in a top position with help of the pop-pin! - 34 -...
- Page 35 Single Wheel Kit Double Wheel Kit Unscrew nuts and mount both wheel kits! - 35 -...
- Page 36 Washer M16 Locking Nut M16 3085601 a9 M16x100 These screws can be found in the screw kit that came with the frame! - 36 -...
- Page 37 3085601 a3 Remove plate and reassemble on upright! Be careful not to let any parts fall out! Make sure the screws are not too tight! Carriage should be easy to adjust in height! - 37 -...
- Page 38 M16 x 110 Locking Nut M16 3085601 a6 2001000 Washer M16 If locking nuts are on this side, loosen the screws and turn them so that screw heads are on this side! - 38 -...
- Page 39 Hollow Screw Unscrew nut and mount on carriage! Screw should be as far down as possible! Tension in the cable can later be adjusted by moving the screw upwards! - 39 -...
- Page 40 30a. CABLE Step 1 Step 2 Let cable pass inside this screw! Step 3 - 40 -...
- Page 41 30b. 2001808 Step 4 Step 5 Step 6 Make sure the cable is tight by pulling its end. Let the cable pass through the hollow screw before fixing it with the cable end! Cut off leftovers from cable! 2001808 - 41 -...
- Page 42 3085601 p25 K6S M8 x 12 Washer M8 Wipe off both rods again with a clean cloth before mounting the cover plate! - 42 -...
- Page 43 2001483 Secure selector pin by threading the metal ring into the left hole! - 43 -...
- Page 44 K6S M8 x 12 Washer M8 3085601 p11 Numbers to the left of the weight stack! - 44 -...
- Page 45 Washer M8 3085601 p8 K6S M8 x 12 Right side - 45 -...
- Page 46 M16 x 100 3085601 a8 Washer M16 Locking Nut M16 - 46 -...
- Page 47 3085601 a7 M16 x 100 Locking Nut M16 Washer M16 - 47 -...
- Page 48 3085601 p3 3085570 p33 3085570 p34 - 48 -...
- Page 49 Place rods in tilted position in these holes. Rubber dampers and distance plates down! Wipe off both rods with a clean cloth! - 49 -...
- Page 50 / 14x (120 kg) (90 kg) 2001590 Assemble the weight stack plate by plate! Make sure the first plate is pushed all the way down and locked in position! This side up! - 50 -...
- Page 51 3085601 a1 / 3085880 a1 - 51 -...
- Page 52 3085601 p9 3085601 a2 Mount top weight and plastic top suspension! Push to vertical position! Top weight and plastic top suspension must be turned this way! - 52 -...
- Page 53 3085601 p6 K6S M8 x 30 K6S M8 x 12 Washer M8 Plastic top suspension from previous step! M8 x 30 3085601 p6 The weight incement can now be secured in a top position with help of the pop-pin! - 53 -...
- Page 54 Single Wheel Kit Double Wheel Kit Unscrew nuts and mount both wheel kits! - 54 -...
- Page 55 Washer M16 Locking Nut M16 3085601 a9 M16x100 These screws can be found in the screw kit that came with the frame! - 55 -...
- Page 56 3085601 a3 Remove plate and reassemble on upright! Be careful not to let any parts fall out! Make sure the screws are not too tight! Carriage should be easy to adjust in height! - 56 -...
- Page 57 M16 x 110 Locking Nut M16 3085601 a6 2001000 Washer M16 If locking nuts are on this side, loosen the screws and turn them so that screw heads are on this side! - 57 -...
- Page 58 Hollow Screw Unscrew nut and mount on carriage! Screw should be as far down as possible! Tension in the cable can later be adjusted by moving the screw upwards! - 58 -...
- Page 59 48a. CABLE Step 1 Step 2 Let cable pass inside this screw! Step 3 - 59 -...
- Page 60 48b. 2001808 Step 4 Step 5 Step 6 Make sure the cable is tight by pulling its end. Let the cable pass through the hollow screw before fixing it with the cable end! Cut off leftovers from cable! 2001808 - 60 -...
- Page 61 3085601 p25 K6S M8 x 12 Washer M8 Wipe off both rods again with a clean cloth before mounting the cover plate! - 61 -...
- Page 62 2001483 Secure selector pin by threading the metal ring into the left hole! - 62 -...
- Page 63 K6S M8 x 12 Washer M8 3085601 p11 Numbers to the left of the weight stack! - 63 -...
-
Page 64: User Guide
USER GUIDE PURPOSE The Eleiko Prestera Dual Adjustable Pulley provides users with a wide range of excercises that target all muscle groups. All with a small foot print. GENERAL INSTRUCTIONS FOR USE Use the selector pin to select training weight. -
Page 65: Care And Maintenance
E-mail: info@eleiko.com | Phone: +46 35 17 70 70 www.eleiko.com WARRANTY All products manufactured by ELEIKO are warranted to the original purchaser to be free from defects in workmanship and / or materials under normal use or service as follows: · 5 years on structural moving parts. - Page 68 Eleiko Group AB | Klastorpsvägen 18 | SE-302 62 HALMSTAD | Sweden E-mail: info@eleiko.com | Phone: +46 35 17 70 70 www.eleiko.com...
Need help?
Do you have a question about the 3085806 and is the answer not in the manual?
Questions and answers