Table of Contents
Advertisement
Quick Links
THE PERFECT BALANCE OF FUNCTION AND STYLE
LAUNDRY - DISHWASHING - COOKING - COOLING
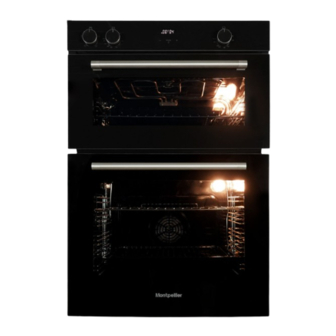
Built-In Double Oven
MBIDO90
Please read these instructions carefully before attempting to install or use this appliance.
We recommend that you keep these instructions in a safe place for future reference.
Installation and Operating Instructions
Advertisement
Table of Contents

Subscribe to Our Youtube Channel
Related Manuals for montpellier MBIDO90


Summary of Contents for montpellier MBIDO90
- Page 1 LAUNDRY - DISHWASHING - COOKING - COOLING Installation and Operating Instructions Built-In Double Oven MBIDO90 Please read these instructions carefully before attempting to install or use this appliance. We recommend that you keep these instructions in a safe place for future reference.
- Page 2 Welcome Thank you for choosing this Montpellier appliance. Our appliances have been designed to provide you with the best combination of style, reliability and performance to give you years of trouble-free use. You may be familiar with a similar product, but please take time to read these instructions carefully before installing or using your appliance to ensure you get the most from your purchase.
-
Page 3: Table Of Contents
CONTENTS 1.SAFETY INSTRUCTIONS ....................4 1.1 General Safety Warnings ....................4 1.2 Installation Warnings ...................... 6 1.3 During Use........................7 1.4 During Cleaning and Maintenance ................. 8 2.INSTALLATION AND PREPARATION FOR USE ............10 2.1 Instructions for the Installer ..................10 2.2 Installation of the Oven .................... -
Page 4: Safety Instructions
1. SAFETY INSTRUCTIONS • Carefully read all instructions before using your appliance and keep them in a convenient place for reference when necessary. • This manual has been prepared for more than one model therefore your appliance may not have some of the features described within. - Page 5 • Handles may get hot after a short period during use. • Do not use harsh abrasive cleaners or scourers to clean the oven door glass and other surface. They can scratch the surfaces which may result in shattering of the door glass or damage to surfaces.
-
Page 6: Installation Warnings
• Do not use the oven door handles to lift or move the appliance. • All possible measures have been taken to ensure your safety. Since the glass may break, care should be taken while cleaning to avoid scratching. Avoid hitting or knocking the glass with accessories. -
Page 7: During Use
1.3 During Use • When you first use your oven you may notice a slight smell. This is perfectly normal and is caused by the insulation materials on the heater elements. We suggest that, before using your oven for the first time, you leave it empty and set it at maximum temperature for 45 minutes. -
Page 8: During Cleaning And Maintenance
• Make sure the appliance control knobs are always in the “0” (stop) position when it is not in use. • The trays incline when pulled out. Take care not to spill or drop hot food while removing it from the ovens. •... - Page 9 Disposal of your old machine This symbol on the product or on its packaging indicates that this product should not be treated as household waste. Instead it should be handed over to the applicable collection point for the recycling of electrical and electronic equipment.
-
Page 10: Installation And Preparation For Use
2. INSTALLATION AND 2.1 inStruCtionS for the inStaller PREPARATION FOR USE General instructions WARNING : This appliance must be • After removing the packaging material installed by an authorised service from the appliance and its accessories, person or qualified technician, according to ensure that the appliance is not the instructions in this guide and in damaged. -
Page 11: Installation Of The Oven
2.2 inStallation of the oven The appliances are supplied with installation kits and can be installed in a wall unit. The dimensions for oven installation are given below. A (mm) E (mm) B (mm) min./max. F (mm) 560/580 H (mm) min. -
Page 12: Electrical Connection And Safety
2.3 eleCtriCal ConneCtion anD Safety • The appliance is designed for a power supply of 220-240V ~ and 380-415V WARNING: The electrical connection 3N~. If your supply is different, contact of this appliance should be carried the authorised service person or a out by an authorised service person qualified electrician. -
Page 13: Product Features
3. PRODUCT FEATURES Important: Specifications for the product vary and the appearance of your appliance may differ from that shown in the figures below. List of Components 13 50 Mode 1. Control Panel 2. Top Oven Door Handle 3. Top Oven Door 4. -
Page 14: Use Of Product
4. USE OF PRODUCT Top Oven Functions * The functions available on your oven may differ from those listed below depending on 4.1 oven ControlS the model purchased. NOTE: ALL oven functions should be Static Cooking Function: Switch on carried out with doors closed! the STATIC function using the top oven Oven function control knob... - Page 15 1. Press the “MODE” Grilling Function: for 2 sec to deactive Switch on the GRILL keylock and the dot function using the top in the middle of the oven function control screen will start to knob. The oven flash. thermostat and warning lights will illuminate, and the grill heating element will 2.
-
Page 16: Accessories
3. The symbol “ ” will Sound Adjustment remain illuminated, the To adjust the volume of the audible warning time will be saved and sound, while the current time of day is the warning will be set. displayed, press “+” and “-” keys and the dot in the middle of the screen will start to flash. - Page 17 Main Oven. The Wire Grid for Trays Make sure the wire grid is correctly placed within the tray. • Insert the accessory to the correct The Shallow Tray position inside the oven. The shallow tray is best used for baking •...
-
Page 18: Cleaning And Maintenance
Cleaning the Glass Parts 5. CLEANING AND MAINTENANCE • Clean the glass parts of your appliance on a regular basis. 5.1 CleaninG • Use a glass cleaner to clean the inside WARNING: Switch off the appliance and outside of the glass parts. Then, and allow it to cool before cleaning is rinse and dry them thoroughly with a dry to be carried out. - Page 19 Removal of the Inner Glass Removal of the Oven Door Before cleaning the oven door glass, you You must remove the oven door glass must remove the oven door, as shown before cleaning, as shown below. below. 1. Push the glass in the direction of B and 1.
-
Page 20: Maintenance
5.2 MaintenanCe WARNING: The maintenance of this appliance should be carried out by an authorised service person or qualified technician only. Changing the Oven Lamp WARNING: Switch off the appliance and allow it to cool before cleaning your appliance. • Remove the glass lens, then remove the bulb. -
Page 21: Troubleshooting&Transport
6. TROUBLESHOOTING&TRANSPORT 6.1 trouble ShootinG If you still have a problem with your appliance after checking these basic troubleshooting steps, please contact an authorised service person or qualified technician. Problem Possible Cause Solution Check whether there is power supplied. Oven does not switch Power is switched off. -
Page 22: Technical Specifications
7. TECHNICAL SPECIFICATIONS 7.1 enerGy fiChe Brand Model MBIDO90 Type of Oven ELECTRIC Mass 42,3 Energy Efficiency Index - conventional 93,9 Energy Efficiency Index - fan forced Energy Class Energy consumption (electricity) - conventional kWh/cycle 0,67 Energy consumption (electricity) - fan forced... - Page 23 Your 2 year Manufacturer's guarantee THIS DOES NOT AFFECT YOUR STATUTORY RIGHTS. Your new Montpellier appliance carries a free guarantee which protects you against the cost of repairs during the first 24 months from date of purchase provided that: Any claim is accompanied by evidence of the model reference, model serial number and proof of purchase, such as a Sales Receipt, showing that the appliance was purchased within the 24 months prior to the date of claim.
- Page 24 Montpellier Domestic Appliances Ltd. Unit 1, Tewkesbury Retail Park, Northway Lane, Tewkesbury, Gloucestershire GL20 8JU www.montpellier-appliances.com The symbol on the product or on its packaging indicates that this product may not be treated as household waste. Instead it shall be handed over to the applicable collection point for the recycling of electrical and electronic equipment. By ensuring this product is disposed of correctly, you will help prevent potential negative consequences for the environment and human health, which could otherwise be caused by inappropriate waste handling of this product.
Need help?
Do you have a question about the MBIDO90 and is the answer not in the manual?
Questions and answers