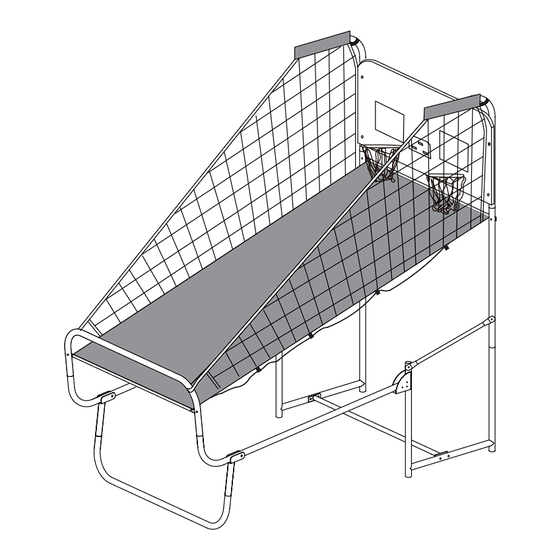
Summary of Contents for SPORTNOW A70-078V00
- Page 1 IN231000744V01_UK A70-078V00 IMPORTANT, RETAIN FOR FUTURE REFERENCE: READ CAREFULLY ASSEMBLY INSTRUCTIONS...
-
Page 2: Part List
Partlist... - Page 3 Electronic Scorer Switch Sensor Electronic Scorer 2PCS Face Plate Backboard Rim Support Plate Inflation Pump 2PCS 2PCS with Needle Ball Return Net M6 Washer M6 x 20mm bolt M8 Washer +1(spare) +1(spare) 38PCS 16PCS 2PCS M6 x 40mm bolt M6 x 45mm bolt M6 x 65mm bolt M6 Nut 4PCS...
- Page 4 ASSEMBLY INSTRUCTIONS 1. Find a clean, level place to begin the assembly of your basketball game. We recommend that two adults work together to assemble this basketball game. 2. Remove all the parts from the box and verify that you have all of the listed parts as shown on the parts list above.
- Page 5 STEP 2 Attach the tube #2 to tube #3 with spring lock as shown in FIG 3. Attach the tube #5 to tube #4 with bolts(#34) and washers(#22). Attach the tube #13 to tube #5 and tube #2 with bolts(#26) washers(#22) and nuts(#28).
- Page 6 STEP 3 Attach the tube #1 to tube #2 with spring lock Attach the tube #12 to the tube #2 by using bolts(#25) washers(#22) and nuts(#28). STEP 4 Attach the tube #6 to tube #5 by using bolts(#30), washers(#23) and nuts(#29). Please pay attention to the direction of the press botton on the tube as shown in FIG press botton upwards...
- Page 7 STEP 5 Attach the tube #6 to tube #7 with spring lock as shown in fig 9. Attach the tube #9 to the tube #7 by using bolts(#26), Washers(#22) and nuts(#28).
- Page 8 STEP 6 Attach the tube #9 to the tube #10 with spring lock. STEP 7 Attach the tube #7 to the tube #8 with spring lock.
- Page 9 STEP 8 Attach the rim(#18) and the rim support plates (#19 )by using the bolts (#24), washers (#22) and nuts(#28 ); And then attach the swith sensors(#15) to the backboard by using bolts (#24), washers(#22) and nuts(#28). STEP 9 Attach the electronic scorer face plate #16 to the front of the backboard and connect with electronic scorer (#14) by using #33 as shown in the fig 14.
- Page 10 STEP 10 With the help of another adult, attach the backboard (#17)to the top tube #1 by using bolts# 27, washers #22 and nuts# 28.
- Page 11 STEP 11 Slide staps and sleeve of ball return net #21 onto tubes #1 as shown in FIG 16, FIG 16A, FIG 16B. Slide the tube #12 through the sleeve on the front of the ball return net #21, attach the left side first by using bolts #25, washers #22 and nuts #28 as shown in FIG 17, Follow the same procedure on the right side.
- Page 12 STEP 12 Please make sure the net go throgh the bottom of tube #12 as shown in FIG 18A; At each bottom Slide the tube #12 through the sleeve on the front of the ball return net #21, attach the left side first by using bolts #25, washers #22 and nuts #28 as shown in FIG 18B, Follow the same procedure on the right side.
- Page 13 STEP 13 Attach the control box #36 to the middle of tube #8 as shown in FIG 20 Run the rest of the control wire through the loops on the ball return net #21. Place the control wire on the tube #8.
- Page 14 STEP 14 Attach the lock pin#37 to the tube #5 and insert into the tubet #5 as shown in FlG22. Folding position when not in use the basketball game and insert the lock pint #36 as shown in FIG22. Note: the lock pin#36 needs to be remove from its original position and insert to the new position as shown in FIG 23 once the game is being used.
-
Page 15: Control Box Operation
ELECTRONIC SCORER OPERATION Installing Batteries: Using a screwdriver, unscrew lid and open the battery box. Insert 3 “AAA” batteries( not included) in the order of polarity as shown on the inside cover. Close the cover and tighten screw. Turn the power ON using the ON/OFF switch. Reminders: ·... - Page 16 CHOOSE FROM 8 DIFFERENT GAME OPTIONS 1. Shot Clock Challenge · Press “PLAY” to enter game 1. · Press "UP/Down" to select single/multiple players(P1/P2/P3/P4). · Press “PLAY” after the number of plavers is selected. · Press "UP/Down" to select playing time, 30/45/60 seconds. Press “PLAY” to begin the game ·...
-
Page 17: Check Point
5. Check Point · Press "PLAY" to enter game 5. · Press "UP/Down" to select single/multiple players(P1/P2/P3/P4). · Press "PLAY" after the number of players is selected. "HOMe" displays "player"," VISITOR" displays " 24" points, pre-set 40 seconds playing time. ·...


Need help?
Do you have a question about the A70-078V00 and is the answer not in the manual?
Questions and answers