Table of Contents
Advertisement
Quick Links
Advertisement
Table of Contents

Related Manuals for Kogan KAMHTDRY8NA


Summary of Contents for Kogan KAMHTDRY8NA
- Page 1 8KG HEAT PUMP DRYER KAMHTDRY8NA...
-
Page 2: Table Of Contents
Safety & Warnings Overview Installation Before First Use Operation Cleaning & Care Specifications Troubleshooting... -
Page 3: Safety & Warnings
SAFETY & WARNINGS Read this manual thoroughly before first use, the safety precautions listed below reduce the risk of fire, electric shock and injury when correctly adhered to. Retain this user guide for future reference. If applicable, pass these instructions on to the next owner. WARNING •... - Page 4 • Do not repair or replace any part of the appliance or attempt any servicing unless it is specifically recommended in the Ensure that you understand all instructions and have the skills necessary to carry out any maintenance. If you are not confident, please consult a licenced trade professional. •...
- Page 5 Warning: To reduce the risk of fire or explosion • Do not dry items that have been previously cleaned, washed, soaked or spotted with gasoline, dry cleaning solvents or other flammable or explosive substances. They emit vapours that could ignite or explode. •...
-
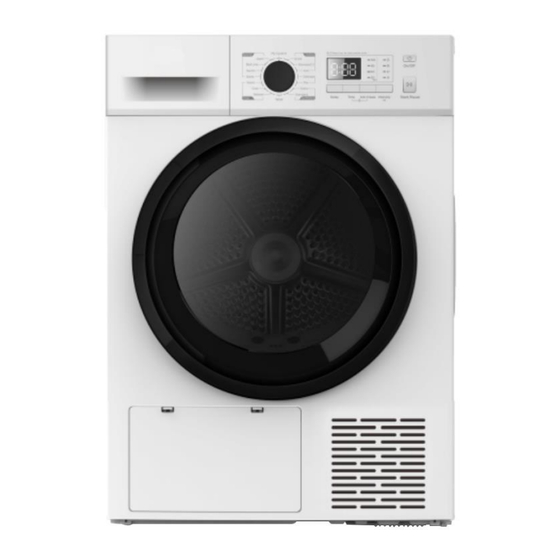
Page 6: Overview
OVERVIEW Power cord Top panel Control panel Water tank Door Drum Door filter Air inlet Maintenance cover Note: This image is for illustrative purposes only. The actual model may differ. Drain System Accessories The following parts are optional depending on your dryer model. If your dryer includes the following parts, it is recommended to wear gloves during the installation of accessories. -
Page 7: Installation
INSTALLATION Read the following instructions carefully before installing the dryer. Retain these instructions for future reference. • The dryer is not suitable for installation in a mobile home. • Remove the door from all discarded appliances to avoid the danger of a child being trapped and suffocating, after unplugging cut off Power Caution Cord. - Page 8 Drain System Accessories: The following parts are optional depending on your dryer model. If your dryer includes the following parts, it is recommended to wear gloves during the installation of accessories. External Drain Hose Connector Installation: Disconnect the drain hose from the water container inlet. Note: To assure water tightness, there is tension between the drain hose and the water inlet.
- Page 9 Place the External Drain Hose into either the laundry basin (78cm high max.) or a floor drain. Note: To assure the smooth drainage, ensure the pipe is not bent or sagging. Transport Exercise caution during movement. Do not grasp any protruding parts of the machine, and refrain from using the machine door as a handle for transportation.
- Page 10 Installation Guidelines • Children could be at risk of entanglement in packaging film or swallowing small parts, leading to suffocation. Ensure children do not play with the packaging. • Avoid installing the appliance behind a lockable door, a sliding door, or a door with a hinge opposite to that of the dryer.
- Page 11 Level Adjusting To ensure that the dryer provides the optimal drying performance, it must be levelled. To minimise vibration, noise and unwanted movement, the floor must be a perfectly level, solid surface. Once the dryer is in its permanent operating position, ensure the dryer is level with the aid of a spirit level.
-
Page 12: Before First Use
BEFORE FIRST USE Leave the dyer to stand for at least 2 hours after transporting. Use a soft cloth to clean the inside drum. Place some clean rags into the drum. Connect the power cord and press the Power button. program and press Start/Pause button. -
Page 13: Operation
OPERATION Note: Before using, make sure the dryer is installed correctly. Before Drying Plug in the power Load washing Close the door cord Drying Start Select function or default Select program... - Page 14 After Drying Buzzer beeps and "End" on display. Open the door and take Remove the water tank Pour out condensate water out laundry Clean the filter Disconnect the power Note: If the electrical outlet used has a switch, press it to directly turn off the power.
- Page 15 Weight of Dry Clothes (per item) Sweater Jacket Bath Towel Jeans (800g) (mixed 800g) (cotton 800g) (cotton 900g) Single bedsheet Work clothes Shirt Pyjamas (200g) (cotton 600g) (1120g) (cotton 300g) T-Shirt (cotton 180g) Underwear (cotton 70g) Socks (mixed weave 50g) Notes: •...
- Page 16 Control Panel Power Turns the dryer ON/OFF. If your dryer is on for more than 10 minutes without user input, it automatically goes into stand-by. Start/Pause Press to start or pause the program. Option These buttons are used for setting additional functions. Display The display shows the setting, estimated program time remaining and status messages of your dryer.
- Page 17 Option Delay This function is used for delaying the start of the drying program up to 24 hours. When the delayed program starts, the time starts to countdown on the display. Load your laundry and ensure the machine door is securely closed. Press the Power button and use the program selector knob to choose the desired program.
- Page 18 My Cycle Used to define and save your favourite program. Select the desired program and any drying options. Press and hold the Intensity for 3 seconds program has been saved. Turn the program select knob to the My Cycle position, then you can start your favourite program.
- Page 19 Selecting a Program When the display screen turns on, rotate the program select knob to select the desired program. Select options (Delay, Time, Intensity, Anti-Crease). Press the Start/Pause button. Press the Power button after the program has completed. Program Start The drum will rotate after the program starts.
- Page 20 For thick or multi-layer Extra synthetic fabrics to be dried completely. Synthetics 3.5kg To dry thin synthetic textiles, which are not ironed, such as Standard easy-care shirts, baby clothes or socks. To refresh your wool items and Wool 1.0kg make them fresher and fluffier. To dry jeans or leisure clothes Jeans 4.0kg...
- Page 21 To dry individual items or complete the drying process of multi-layer fabrics with different drying behaviour, Warm such as jackets, pillows or voluminous items. Min 10 min. to max. 150min. (in 10 mi. Steps) Time To air items without heating. Cool Min.
-
Page 22: Cleaning & Care
CLEANING & CARE Emptying the Water Tank Remove the water tank with two hands. Pour out the condensate water into a sink. Re-install the water tank. Notes: • Empty the water container after each use. • If the water container is filled completely, the program will be paused and the " " indicator will turn on. - Page 23 Clean the Lint Filter This dryer has a primary door lint filter. Ensure the door filter is cleaned after each cycle. Open the door. Take out the door filter. Open the filter and remove the fluff on the filter, you can clean it in running water. Dry the door filter thoroughly before installing it back.
- Page 24 Clean the Heat Exchanger At least every 2 months, remove the fluff from the heat exchanger using a vacuum cleaner with a dusting brush attached. Gently clean the heat exchanger without applying any pressure. Otherwise, the heat exchanger could be damaged. The dryer will not dry if the cooling fins are damaged or bent.
- Page 25 Fabric Care Chart The following symbols provide garment care direction. The clothing care labels include symbols for washing, bleaching, drying and ironing or dry cleaning when necessary. The use of symbols ensures consistency among garment manufacturers of domestic and imported items.
- Page 26 Tumble Dr y Cycle Medium Dry Flat Normal machine- washable Permanent Press/ wool. Wrinkle Resistant/ Loads Wrinkle Control should be under 8 pounds. Gentle/ Delicates...
-
Page 27: Specifications
SPECIFICATIONS Dimension 595 x 600 x 845mm Ambient temperature +2°C ~ +35°C Rated input power 800W Rated voltage 220-240V~ Rated frequency 50Hz Refrigerant R290 Weight of product 41kg Rated capacity 8.0kg CO - eq 0.00t Quantity of refrigerant 120g Disposal This marking indicates that this appliance should not be disposed with other household wastes. -
Page 28: Troubleshooting
TROUBLESHOOTING Many malfunctions and faults that might occur in daily operation can be easily remedied. The following guide may help you to find the reason for a malfunction and correct it. Problem Solution • Check if the power supply works. •... - Page 29 Error Code Possible Cause Solutions Humidity sensor error Contact help.Kogan.com Temperature sensor error if the problem occurs. PCB communication error WARNING: • Only authorised technicians can carry out repairs. • If any other error code is displayed. Contact help.Kogan.com for support.
- Page 30 Need more information?
Need help?
Do you have a question about the KAMHTDRY8NA and is the answer not in the manual?
Questions and answers