Advertisement
Quick Links
Advertisement

Related Manuals for Kogan KAMHTDRY8NA


Summary of Contents for Kogan KAMHTDRY8NA
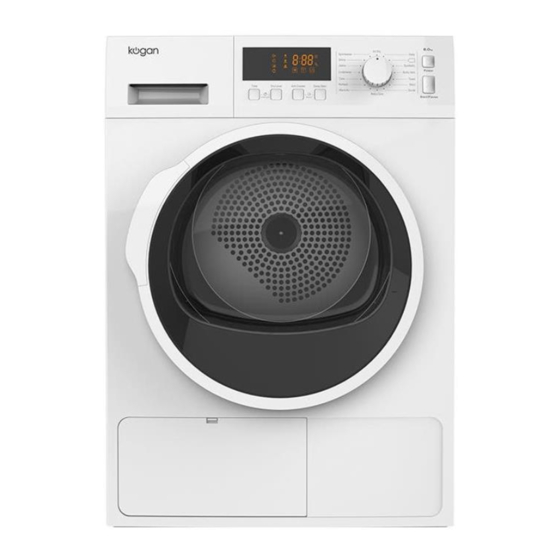
- Page 1 8KG HEAT PUMP DRYER KAMHTDRY8NA...
-
Page 2: Table Of Contents
Safety & Warnings Overview Installation Before First Use Operation Cleaning & Care Troubleshooting Notes... -
Page 3: Safety & Warnings
SAFETY & WARNINGS Read this manual thoroughly before first use, the safety precautions listed below reduce the risk of fire, electric shock and injury when correctly adhered to. Retain this user guide for future reference. If applicable, pass these instructions on to the next owner. WARNING •... - Page 4 • Do not repair or replace any part of the appliance or attempt any servicing unless it is specifically recommended in the Ensure that you understand all instructions and have the skills necessary to carry out any maintenance. If you are not confident, please consult a licenced trade professional. •...
- Page 5 Warning: To reduce the risk of fire or explosion • Do not dry items that have been previously cleaned, washed, soaked or spotted with gasoline, dry cleaning solvents or other flammable or explosive substances. They emit vapours that could ignite or explode. •...
-
Page 6: Overview
OVERVIEW Control panel Water tank Side plate Door Filter Maintenance Air inlet cover Adjustable leg (Two legs) Wiring box Drain hose... -
Page 7: Installation
INSTALLATION Read the following instructions carefully before installing the dryer. Retain these instructions for future reference. • The dryer is not suitable for installation in a mobile home. • Remove the door from all discarded appliances to avoid the danger of a child being trapped and suffocating, after unplugging cut off Power Caution Cord. - Page 8 Alcove, Closet or Recessed Installations WARNING: Avoid installing the dryer in a closet with other fuel-burning appliances, such as hot water systems. Minimum clearances between adjacent walls and other surfaces: Sides 25.4mm Rear 50.8mm 50.8mm Closet front 50.8mm 25.4mm 595mm 50.8mm 51mm 653mm...
- Page 9 Undercounter Installation 25mm 595mm 25mm 1072mm 850mm...
- Page 10 Stacked Washing Machine and Dryer Installation 76mm 3100mm² 1550mm² 76mm 50.8mm 25.4mm 595mm 76mm 653mm 50.8mm Note: The front of the closet must have two unobstructed air openings for a combined minimum total area of 465 sq.cm with a minimum clearance of 76mm at the top and bottom.
- Page 11 Stacking Kit Components: A Top panel & Handle (x1) B M6 Screw (x1) C M4 Screw (x8) D Gasket (x1) E Screw covers (x2) F Top Panel Block (x1) Tools required: Spirt Level Drill Ø3mm Drill Bit Phillips Screwdriver Ratchet Socket Set Ensure appliances are disconnected from power before installing the stacking kit.
- Page 12 Installation: Place the Top Panel (A) on top of the washing machine with the handle facing towards the front. Note: Ensure the washing machine is level. Handle Align the Top Panel with the left and right sides of the washing machine. WARNING: Ensure the Top panel is not hanging over the edges of the washing machine.
- Page 13 Using the Top Panel as a template, mark the 6 locations for the screws on top of the washing machine. Using a Ø3mm drill bit, drill the 6 holes and attach the Top Panel to the washing machine using x6 M4 Screws (C). Note: Ensure that the torque is less than 10nm when tightening the screws.
- Page 14 Place the Top Panel Block (F) underneath the rear of the Top Panel. Attach the jack catch of the Top Panel Block to the top of the washing machine. Align the mounting hole of the Top Panel Block with the hole in the Top Panel and secure it place using the M6 Screw (B) and Gasket (D).
- Page 15 At the rear of the dryer, remove the x2 screws located towards the base of the dryer. Remove the handle from the Top panel (A) and insert the dryer leveling feet into the frame of the Top panel. Once the 2 rear feet are inside the Top panel carefully push the dryer backwards until the 4 feet of the dryer are completely in the frame.
- Page 16 Replace the handle onto the front of the Top Panel and secure it in place using x2 M4 Screws (C). Cover the screws using the x2 Screw Covers (E). Handle...
- Page 17 10. Check if there are any loose parts or screws. If everything is secure, the stacking kit installation is now complete. IMPORTANT: The washing machine must be installed on the ground and not on top of a clothes dryer. Dryer Washing machine Washing machine...
- Page 18 Drain System Accessories: The following parts are optional depending on your dryer model. If your dryer includes the following parts, it is recommended to wear gloves during the installation of accessories. External Drain Hose Connector Installation: Remove the drain hose from the hose holder. Disconnect the drain hose from the water container inlet.
- Page 19 Connect the drain hose and the External Drain Hose using the Connector. Drain hose External drain hose Connector Place the External Drain Hose into either the laundry basin (78cm high max.) or a floor drain. Note: To assure the smooth drainage, ensure the pipe is not bent or sagging.
- Page 20 Level Adjusting To ensure that the dryer provides the optimal drying performance, it must be levelled. To minimise vibration, noise and unwanted movement, the floor must be a perfectly level, solid surface. Once the dryer is in its permanent operating position, ensure the dryer is level with the aid of a spirit level.
-
Page 21: Before First Use
BEFORE FIRST USE Leave the dyer to stand for at least 2 hours after transporting. Use a soft cloth to clean the inside drum. Place some clean rags into the drum. Connect the power cord and press the Power button. Select the Refresh programme and press Start/Pause button. -
Page 22: Operation
OPERATION Before Drying Plug in the power Load washing Close the door cord Drying Start Select function or default Select program... - Page 23 After Drying Buzzer beeps and "0:00" on display. Open the door and take Remove the water tank Pour out condensate water out laundry Clean the filter Disconnect the power...
- Page 24 Weight of Dry Clothes (per item) Sweater Jacket Bath Towel Jeans (800g) (mixed 800g) (cotton 800g) (cotton 900g) Single bedsheet Work clothes Shirt Pyjamas (200g) (cotton 600g) (1120g) (cotton 300g) T-Shirt (cotton 180g) Underwear (cotton 70g) Socks (mixed weave 50g) Notes: •...
- Page 25 Control Panel 8 10 4 1. Power button: Turns the dryer ON/OFF. If your dryer is on for more than 10 minutes without user input, it automatically goes into stand-by. 2. Start/Pause button: Press to start or pause the program. 3.
- Page 26 6. Time adjust: For Manual program only. Press the Time adjust button to change the drying time you prefer. Push repeatedly to select your desired drying time (120, 90, 60 & 30 minutes). 7. Dryness: • Select the dry level (More, Normal, Less, Damp). Different dry level will result in different drying time.
- Page 27 Selecting a Program When the display screen turns on, rotate the program select knob to select the desired program. Select options (Delay, Time, Intensity, Wrinkle-Care). Press the Start/Pause button. Press the Power button after the programme has completed. Program Start The drum will rotate after the program starts.
- Page 28 Buzzer sound Damp alert Program Status Unit is drying with heating air Unit is using cool air Time to open the door Wrinkle care cycle Drying a Load of Laundry 1. Power on the dryer: Press the Power button to power your dryer on. 2.
- Page 29 4. Start your dryer: • Pressing Start/Pause button will start the selected cycle. To pause cycle press, Start/Pause button then open the door. To resume operation after closing the door press the Start/Pause. • Opening the door during the operation will instantly stop operation and will require pressing the Start/Pause button to resume operation.
- Page 30 Damp Less Delicates Normal More Damp Active Less Wear Normal More Damp Less Towel Normal More Damp Less Bulky Normal More Damp Heavy Less Duty Normal More Damp Mixed Less Load Normal More My Cycle Note: Settings in the table are default. Optional functions marked 'Y' can be selected. For better drying, select a higher dry level.
- Page 31 For the best performance, the load for each cycle should be recommended as follows: Cycle Weight Recommend load Normal 3.63kg Cotton Jeans 3.63kg Jeans Perm Press 3.40kg Synthetic fibres (easy care) Quick Dry Small accounts of clothing 0.91kg Wool 1.36kg Wool Air Fluff 0.91kg...
- Page 32 5. Unloading your laundry: • flash for 10 seconds. • The dryer will beep 3 times after the program has finished. • The filter should be cleaned after every load once the laundry has been uloaded. Tips: • Clothes that are easy to be tangled or worn and small pieces, should be placed in the laundry bag to dry.
-
Page 33: Cleaning & Care
CLEANING & CARE Emptying the Water Tank Remove the water tank with two hands. Pour out the condensate water into a sink. Re-install the water tank. Notes: • Empty the water container after each use. • If the water container is filled completely, the programme will be paused and the " " indicator will turn on. - Page 34 Clean the Filter This dryer has a primary door lint filter. Ensure the door filter is cleaned after each cycle. Open the door. Remove the filter. Open the filter and remove the fluff on the filter. Rinse the filter with water. Dry the filter thoroughly before reinstalling.
- Page 35 Clean the Base Filter Open the cover. Unlock the 3 locking levers and grasp the filter handle. Remove the base filter and clean it. If there is too much lint on the filter, clean it in water. Dry the filter thoroughly before installing it back. Clean the rubber sealing, both at the filter and handle.
- Page 36 Clean the Heat Exchanger At least every 2 months, remove the fluff from the heat exchanger using a vacuum cleaner with a dusting brush attached. Gently clean the heat exchanger without applying any pressure. Otherwise, the heat exchanger could be damaged. The dryer will not dry if the cooling fins are damaged or bent.
- Page 37 DO NOT dry on a heat setting. Use the Air Fluff cycle Foam Rubber (rug backs, (no heat). stuffed toys, shoulder pads, Warning: Drying a rubber item with heat may damage etc.) it or create a fire hazard. • Use the Normal cycle. •...
-
Page 38: Troubleshooting
TROUBLESHOOTING Many malfunctions and faults that might occur in daily operation can be easily remedied. The following guide may help you to find the reason for a malfunction and correct it. Problem Solution • Make sure the door is latched shut. •... - Page 39 Check the water container. If it's full, pour out the condensate water and restart the dryer. • If the container is not full, restart the dryer directly. • icon is still flashing after you have finished the first two steps, contact help.Kogan.com for support.
- Page 40 Possible Cause Solutions Humidity Temperature sensor error Contact help.Kogan.com if the problem occurs. Motor communication error PCB communication error WARNING: • Only authorised technicians can carry out repairs. • If any other error code is displayed. Contact help.Kogan.com for support.
- Page 41 Fabric Care Chart The following symbols provide garment care direction. The clothing care labels include symbols for washing, bleaching, drying and ironing or dry cleaning when necessary. The use of symbols ensures consistency among garment manufacturers of domestic and imported items.
- Page 42 Tumble Dr y Cycle Medium Dry Flat Normal machine- washable Permanent Press/ wool. Wrinkle Resistant/ Loads Wrinkle Control should be under 8 pounds. Gentle/ Delicates...
-
Page 43: Notes
NOTES... - Page 44 Need more information?
Need help?
Do you have a question about the KAMHTDRY8NA and is the answer not in the manual?
Questions and answers