Advertisement
Quick Links
Advertisement

Related Manuals for Kogan KAMHTDRY8PA


Summary of Contents for Kogan KAMHTDRY8PA
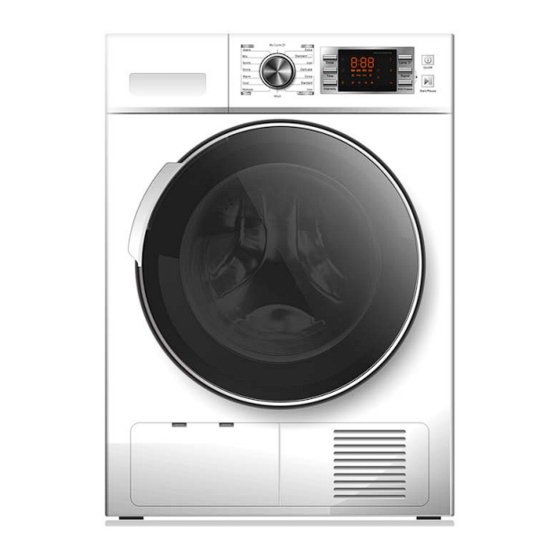
- Page 1 8KG PREMIUM HEAT PUMP DRYER (WHITE) KAMHTDRY8PA...
-
Page 2: Table Of Contents
Safety & Warnings Overview Installation Before First Use Operation Cleaning & Care Specifications Troubleshooting... -
Page 3: Safety & Warnings
The power plug must be connected to a three-core socket with an earth wire which is grounded properly. • If the supply cord is damaged, it must be replaced. Cease use immediately and contact help.Kogan.com for support. • DO NOT disconnect the power plug by pulling the cord. Hold the power plug with your hand. - Page 4 Possible Explosions • DO NOT put combustible liquid such as gasoline, petrol and alcohol into the appliance or nearby. Don't put clothes with that liquid into the appliance. • DO NOT connect or disconnect the power plug when leakage of gas or other combustible gas occurs.
- Page 5 Personal Injuries • The appliance can be used by children aged from 8 years and above and persons with reduced physical, sensory or mental capabilities or lack of experience and knowledge have been given supervision or instruction concerning use of the appliance in a safe way and understand the hazards involved.
- Page 6 Contains fluorinated greenhouse gases covered by the Kyoto Protocol. • Hermetically sealed system. • Do not vent gases into the atmosphere. • If the power cord is damaged, it must be replaced by Kogan.com or an authorised representative in order to avoid a hazard.
- Page 7 Electrical Connection • This appliance must be earthed. In case of failure or damage, earth can provide a minimum resistance to reduce the possibility of electric shock. The power cord has a grounding and must be inserted into a properly installed and grounded socket (in accordance with all local rules and standards).
-
Page 8: Overview
OVERVIEW Power cord Control panel Water tank Door Drum Filter Air inlet Maintenance cover Note: The above image is for illustrative purposes only. Actual product may differ slightly. Accessories The following parts are optional depending on your dryer model. If your dryer includes the following parts, it is recommended to wear gloves during the installation of accessories. - Page 9 Control Panel My Cycle Jeans Extra Bed Linen Standard Lamp Delay Sports Iron Shirts Delicate On/Off Signal Time Warm Cool Extra Intensity Anti-Crease Refresh Standard Start/Pause Wool Power button Turns the dryer ON/OFF Start/Pause Press the button to start or pause the drying cycle. Options Select additional functions.
- Page 10 Display Delay Child lock Remaining Time indicator/Error message Cycle phase status Clean filters (warning) Filter Empty water container (warning) Full Intensity (4 levels) Lamp Buzzer Anti-Crease My Cycle...
-
Page 11: Installation
INSTALLATION Hose holder Drain hose joint Pull up the drain hose joint Pull up the upper drain hose Connect the external drain hose to Route the external drain hose into the floor drain (be careful not to the water pump bend the external drain hose) - Page 12 Prior to setting up the tumble dryer, inspect it for any visible external damage. If there are signs of damage, do not install or use a damaged tumble dryer and contact help.Kogan.com for support. • Avoid installing the tumble dryer in a room where frost is likely to occur. The tumble dryer may not function properly at temperatures around freezing point.
- Page 13 • Never remove the feet of the dryer. They are an essential component of the appliance's stability and should remain intact. Level Adjusting Once the dryer is in its permanent operating position, ensure the dryer is level with the aid of a spirit level.
-
Page 14: Before First Use
BEFORE FIRST USE Leave the dyer to stand for at least 2 hours after transporting. Use a soft cloth to clean the inside drum. Place some clean rags into the drum. Connect the power cord and press the Power button. Select the “Refresh”... -
Page 15: Operation
OPERATION Note: Before first use, ensure the tumble dryer has been installed correctly. Before Drying Plug in the power cord Load washing Close the door Drying Start Select function or default Select program... - Page 16 After Drying Buzzer beeps and "0:00" on display. Open the door and Remove the water Pour out condensate take out laundry tank water Clean the filter Disconnect the power...
- Page 17 Weight of Dry Clothes (per item) Sweater (mixed Jacket (cotton Bath Towel Jeans (800g) 800g) 800g) (cotton 900g) Single bedsheet Work clothes Shirt (cotton Pyjamas (200g) (cotton 600g) (1120g) 300g) T-Shirt (cotton Underwear (cotton Socks (mixed 180g) 70g) weave 50g) Notes: •...
- Page 18 Controls My Cycle Jeans Extra Bed Linen Standard Lamp Delay Sports Iron Shirts Delicate On/Off Signal Time Warm Cool Extra Intensity Anti-Crease Refresh Standard Start/Pause Wool Power button Turns the dryer ON/OFF Start/Pause Press the button to start or pause the drying cycle. Options Select additional functions.
- Page 19 Time When the (Warm) or (Cool) or (Refresh) programme is selected, the Time button can be used to adjust the drying time in 10-minute increments. Intensity You can adjust the dryness level of the laundry by pressing the Intensity button. There are four levels.
- Page 20 Programme Selector When the display screen turns on, rotate the programme knob to select the desired programme. Select options (Delay, Time, Intensity, Anti-Crease). Press the Start/Pause button. Press the Power button after the programme has completed. Programme Start The drum will rotate after the programme starts. The display will light up and the remaining time will be displayed.
- Page 21 For machine washable wool Wool 1.0kg items. To dry jeans or leisure clothes Jeans 4.0kg that are spun at high speed in the washing machine. To dry bed linen, bed sheets or 4.0kg Linen other large items. To dry sportswear and thin fabrics from polyester, which Sports 3.0kg...
-
Page 22: Cleaning & Care
CLEANING & CARE Empty the Water Tank Remove the water tank with two hands. Pour out the condensate water into a sink. Re-install the water tank. • Empty the water container after each use. • If the water container is filled completely, the programme will be paused and the " " indicator will turn on. - Page 23 Clean the Filter This dryer has a primary door lint filter. Ensure the door Filter filter is cleaned after each cycle. Open the door. Remove the filter. Open the filter and remove the fluff on the filter. Rinse the filter with water. Dry the filter thoroughly before reinstalling.
- Page 24 Cleaning the Dryer • Disconnect the power cord before cleaning. • Clean the dryer with a damp cloth. • Do not use solvents, abrasive cleaners, glass cleaners or all-purpose cleaners. These could damage plastic surfaces and other parts. • It is recommended to wear gloves when cleaning. •...
-
Page 25: Specifications
SPECIFICATIONS Dimension (LxWxH) 650x 595x845mm Ambient temperature +5°C ~ +35°C Rated input power 800W Rated voltage 220-240V~ Rated frequency 50Hz Refrigerant R290 Weight 49kg Rated capacity* 8.0kg CO – eq 0.00t Quantity of refrigerant 150g *Note: The rated capacity is the maximum capacity to be dried at one time. Make sure that the dry clothes which are loaded into the appliance do not exceed the rated capacity. -
Page 26: Troubleshooting
Only authorised technicians can carry out repairs. • If any other error code is displayed. Contact help.Kogan.com for support. Note: Prior to contacting the help.Kogan.com, refer to troubleshoot table below to resolve any issues on your own. Problem Solution •... - Page 27 • Ensure dryer is connected to power supply. • Press the Power button • Dryer does not start Ensure the door is closed. • Check the programme is set. • Press the Start/Pause button. • Clean lint filter and heat exchanger. •...
- Page 28 Need more information? We hope that this user guide has given you the assistance needed for a simple set-up. For the most up-to-date guide for your product, as well as any additional assistance you may require, head online to help.kogan.com...
Need help?
Do you have a question about the KAMHTDRY8PA and is the answer not in the manual?
Questions and answers