Subscribe to Our Youtube Channel
Summary of Contents for Kogan KAMN44DQUCLA
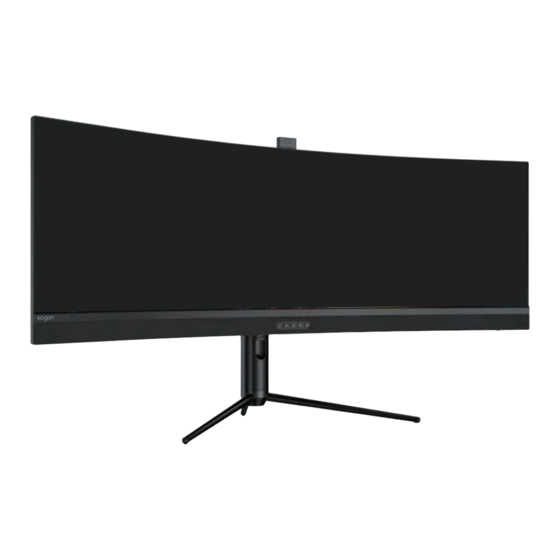
- Page 1 USER GUIDE 44.5" Curved Dual QHD USB-C Monitor 5120*1440, HDR 400, 120Hz KAMN44DQUCLA...
-
Page 3: Safety And Warnings
SAFETY & WARNINGS Read all instructions before using the appliance and retain for reference. This monitor is designed with ventilation holes on the back of the casing. Do not cover or block them. Do not insert any object or spray any liquid into the vents. Avoid placing the monitor near heaters, stoves, fireplaces or other sources of heat, as well as in rooms lacking adequate ventilation. - Page 4 COMPONENTS Monitor Stand Base Screws x4 Mount studs x4 DP signal cable Power cable User guide...
-
Page 5: Description Of Buttons
OVERVIEW Description of buttons Button Function Camera: Press to turn on/o . Volume Down. Volume Up. Microphone: Press to turn on/o . Power: Press to turn monitor on/o . Confirm button: Enter the currently selected menu. Rocker Switch Le : Press to return to the previous menu / exit menu. Rocker Switch Down: Scroll menu down. -
Page 6: Installation Of Base
ASSEMBLY Installation of base Open the package and take out the product with the foam still attached. Gently place it on a desktop or table. Tighten the bracket and base together with the three screws as shown in the picture. Screws x3 Put the assembled base into the corresponding slot of the back shell, gently press the bracket to lock it into the lock, please make sure it can be locked. - Page 7 Stand the monitor up on the assembled base.((Note: Do not squeeze the screen directly with your hands during the process of standing up the monitor to prevent it from breaking) Installation of mount 1. Open the package to take out foams and put them on a flat tabletop. 2.
- Page 8 Install the monitor on the wall, mount, or fixture as desire.During hanging of the product, do not pinch the screen with hand to avoid damage to the screen. Tips: The mounting hole distance of the mount for the product is 100x100mm. Mount (Not included) Notes:...
- Page 9 ADJUSTMENT -5° 13° 95mm Tilting angle Height adjustment -5.0°(±2.0°) ~ +13°(±2.0°) 95mm(±5.0mm) Rotation angle ±13°(±2.0°)
- Page 10 CONNECTIVITY Cable connection HDMI Interface DP Port USB B Interface Use the HDMI cable to connect Use the DP cable to connect Before enabling the the display HDMI IN port to the the display DP IN port to the DP camera/MIC, you need to use HDMI OUT port of PC.
-
Page 11: Operation
OPERATION The color and shape of the OSD menu may be slightly di erent of shown. OSD menu may changed by function improvements. The On-Screen Display (OSD) menu allows you to adjust the monitor settings, turn on the monitor, and press any of the rocker buttons to display the navigation interface. 1. - Page 12 Functions of the monitor vary with models, and the functions in this manual are for reference only. Main Menu Sub Menu Option Standard Mode O /On RTS/RPG Mode O /On FPS Arena Mode O /On MOBA Arena Mode O /On O /On Adaptive-Sync Shadow Balance...
- Page 13 Functions of the monitor vary with models, and the functions in this manual are for reference only. Main Menu Sub Menu Option PIP/PBP Mode O /PIP Mode/PBP 2Win 1:1/PBP 2Win2:1/PBP 2Win1:2 Sub-Signal Source Type-C/DP/HDMI1/HDMI2 Audio Source Auto/Type-C/DP/HDMI1/HDMI2 PIP/PBP PIP Position Top Right/Top Le /Bottom Right/Bottom Le PIP Size Small/Medium/Large...
-
Page 14: Specifications
SPECIFICATIONS Product model KAMN44DQUCLA Product name Liquid Crystal Display Screen size 44.5inch Aspect ratio 32:9 Viewing angle 178°(H) / 178°(V) Contrast ratio 3000:1(TYP) Color 16.7M Resolution 5120 x 1440 Refresh rate 120Hz 100-240V~ 50/60Hz 3.5A Power input The standard voltage and power supply may vary with countries, please refer to the label at the back of the product. - Page 15 NOTES...
- Page 17 Need more information? We hope that this user guide has given you the assistance needed for a simple set-up. For the most up-to-date guide for your product, as well as any additional assistance you may require, head online to help.kogan.com...
- Page 18 108.007.xxxxx KAMN44DQUCLA 45E3R-L KOGAN 说明书 2023.09.12 装订成册:140*210mm 100G双胶纸,单色印,骑马钉 zhanglei...


Need help?
Do you have a question about the KAMN44DQUCLA and is the answer not in the manual?
Questions and answers