Advertisement
Quick Links
T-Lock Cap Kit Instructions
Items Needed for Installing T-Lock Cap Kit:
T-Lock Cap Kit - #TLOCKCAPK
T-Lock Cap Platen Kit - Includes 2 risers, a spacer, accessory kit and a T-Lock Base.
Instructions for installing T-Lock Cap Kit:
Below are instructions for installing the T-Lock Cap Platen Kit.
1
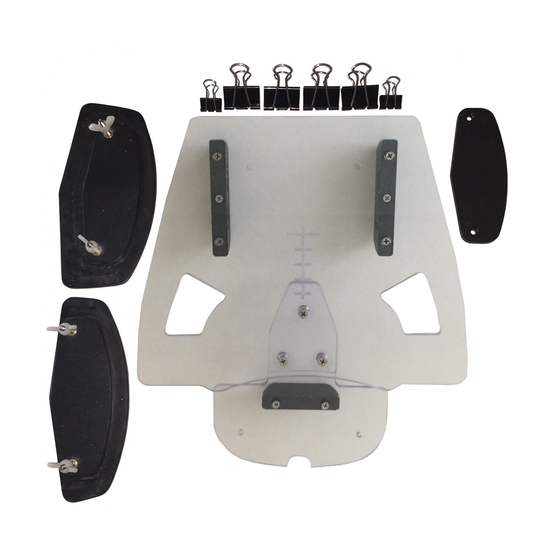
Step 1:
Hold the platen insert with counter sunk holes face up, place T-Lock
bracket under two counter sunk holes and use two (2) of included screws
to attach T-Lock side bracket. Attach the second side bracket and back
bracket in the same manner.
3
Step 3:
Secure the Platen Insert by rotating the center piece in the T-Lock
brackets.
BrotherDTG.com/Support • Visit www.BrotherDTG.com/Guides for additional platen instructions
Phillips Head Screw Driver
#2 Phillips Head Screw Driver
2
Step 2:
Install the T-Lock Cap Insert so that the T-Lock brackets slide into the slots
in T-Lock Base.
4
Step 4:
If platen insert is not level, adjust the 4 platen leveling screws until the
platen is level and secured.
Advertisement

Related Manuals for Brother DTG T-Lock Cap Kit


Summary of Contents for Brother DTG T-Lock Cap Kit
- Page 1 T-Lock Cap Kit Instructions Items Needed for Installing T-Lock Cap Kit: T-Lock Cap Kit - #TLOCKCAPK Phillips Head Screw Driver T-Lock Cap Platen Kit - Includes 2 risers, a spacer, accessory kit and a T-Lock Base. #2 Phillips Head Screw Driver Instructions for installing T-Lock Cap Kit: Below are instructions for installing the T-Lock Cap Platen Kit.
- Page 2 Step 5: Step 6: With the platen in place on the printer, set the spacer if needed and then From underneath take the 2 plastic wing nuts and screw them on to the the size insert you want through the matching holes in the platen. brackets screws from underneath to secure the insert to the platen.
- Page 3 Step 3: Step 4: Select the riser that you need for the style cap you are printing on. The From underneath take the 2 plastic wing nuts and screw them on to the larger insert is designed for printing on unstructured caps where as the brackets screws from underneath to secure the insert to the platen.
- Page 4 Step 7: Step 8: The Photoshop® template comes with a Cap Print Grid. If you print the The GT Cap Platen template was designed so that the front of the riser Cap Print Grid on the cap you are using with the riser / spacer combination being used would start 5 inches from the center of a 14”...
- Page 5 This guide will show you in greater detail Learn the steps to printing a cap on the how to setup the cap platen and print on Brother GTXpro direct to garment printer. caps effectively. Also Includes how to use the Acculine system to print caps.
Need help?
Do you have a question about the DTG T-Lock Cap Kit and is the answer not in the manual?
Questions and answers