Advertisement
Quick Links
T-LOCK SHOE INSERT INSTRUCTIONS
Items Needed for Installing T-Lock Shoe Inserts:
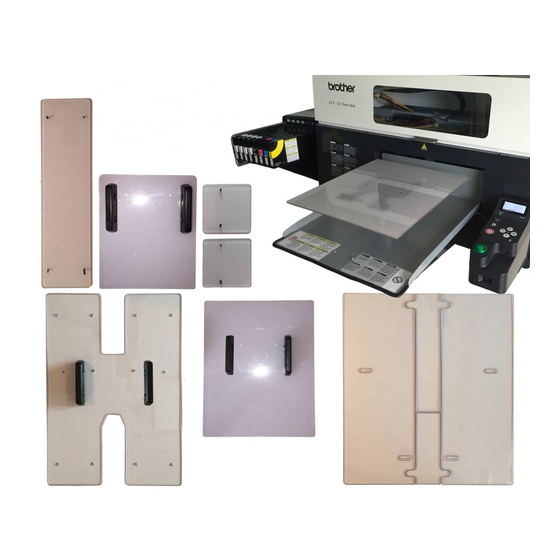
T-LOCK SHOE INSERTS - #TLOCKSPIDIST
T-Lock Shoe Inserts in 3 sizes
Instructions for installing T-Lock Shoe Inserts:
Below are instructions for installing the T-Lock Shoe Inserts on your T-Lock Platen Base.
1
Step 1:
Insert the T-Lock Base into the platen stem of the Brother DTG printer.
3
Step 3:
Insert the T-Lock Shoe Insert into the T-Lock Base.
BrotherDTG.com/Support • Visit www.BrotherDTG.com/Guides for additional platen instructions
T-Lock Base - #TLOCKBASE
T-Lock Base needed for using Shoe
Inserts
2
Step 2:
Adjust the height of the platen and tighten the locking lever.
4
Step 4:
Secure the T-Lock Shoe Insert by rotating the center piece in the T-Lock
brackets.
Double-sided Tape
T-Lock Base needed for using Shoe
Inserts
Advertisement

Related Manuals for Brother DTG T-LOCK SHOE INSERT


Summary of Contents for Brother DTG T-LOCK SHOE INSERT
- Page 1 Below are instructions for installing the T-Lock Shoe Inserts on your T-Lock Platen Base. Step 1: Step 2: Insert the T-Lock Base into the platen stem of the Brother DTG printer. Adjust the height of the platen and tighten the locking lever. Step 3: Step 4: Insert the T-Lock Shoe Insert into the T-Lock Base.
- Page 2 Step 6: Step 5: After loading shoes on the platen, insert the Alignment Jig in the square Apply double sided tape needed for securing shoes. cut-out on the Shoe Platen insert to be able to align the artwork in your graphic software program to match up with the Alignment Jig.
Need help?
Do you have a question about the DTG T-LOCK SHOE INSERT and is the answer not in the manual?
Questions and answers