Table of Contents
Advertisement
Download the app
& activate product
Before using this product, please read this manual carefully and keep it for future reference.
The design and specifications are subject to change without prior notice for product improvement. Consult
with your dealer or the manufacturer for details.
PORTABLE AIR CONDITIONER
USER MANUAL
MAP05S1AWT
MAP07S1AWT
Advertisement
Table of Contents

Related Manuals for Midea MAP05S1AWT


Summary of Contents for Midea MAP05S1AWT
- Page 1 PORTABLE AIR CONDITIONER USER MANUAL MAP05S1AWT Download the app & activate product MAP07S1AWT Before using this product, please read this manual carefully and keep it for future reference. The design and specifications are subject to change without prior notice for product improvement. Consult...
-
Page 2: Table Of Contents
THANK YOU LETTER Thank you for choosing Midea! Before using your new Midea product, please read this manual thoroughly to ensure that you know how to operate the CONTENTS THANK YOU LETTER.........................2 SAFETY INSTRUCTIONS......................3 BEFORE YOU GET STARTED....................8 PRODUCT INSTALLATION......................11 OPERATION INSTRUCTIONS....................17... -
Page 3: Safety Instructions
SAFETY PRECAUTIONS Read Safety Precautions Before Operation and Installation To prevent property damage or injury or death to the user or other people, the following instructions must be followed. Incorrect operation due to ignoring of instructions may cause death, harm or damage. Explanation of Symbols WARNING This symbol indicates the possibility of personnel injury or loss of life. - Page 4 Do not install the unit in a location that may be exposed to combustible gas, as this could cause fire. The unit has wheels to facilitate moving. Make sure not to use the wheels on thick carpet or to roll over objects, as this could cause the unit to tip over. Do not operate a unit that has been dropped or damaged.
- Page 5 CAUTION This appliance is not intended for use by persons (including children) with reduced physical, sensory or mental capabilities or lack of experience and knowledge, unless they have been given supervision or instruction concerning use of the appliance by a person responsible for their safety.
- Page 6 IMPORTANT NOTE: Read this manual CAUTION: carefully before installing or operating Risk of fire your new appliance. Make sure flammable materials to save this manual for future reference. Explanation of symbols displayed on the unit CAUTION This symbol shows that the operation manual should be read carefully. This symbol shows that a service personnel should be handling this equipment with CAUTION reference to the installation manual.
- Page 7 Flammable Refrigerant R32 is used within appliance. - When maintaining or disposing of the appliance, the refrigerant (R32) shall be recovered properly and shall not discharge to air directly. - Compliance with national gas regulations shall be observed. - Keep ventilation openings clear of obstruction. - The appliance shall be stored so as to prevent mechanical damage from occurring.
-
Page 8: Before You Get Started
BEFORE YOU GET STARTED The installation must be Installing your AC n u a carried out in strict should take about accordance with the 30 minutes. instructions in this manual. We recommend We’re here if you need us, doing this with please contact a helper. - Page 9 PRODUCT INSTALLATION LOCATION Your installation location should meet the following requirements: -Make sure that you install your unit on an even surface to minimize noise and vibration. -The unit must be installed near a grounded plug, and the Collection Tray Drain (found on the back of the unit) must be accessible.
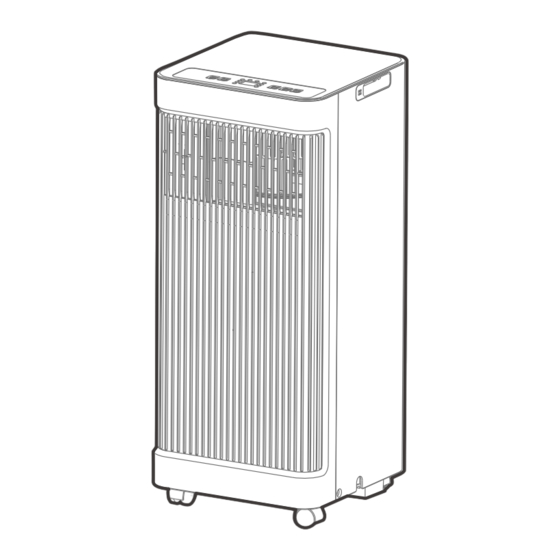
- Page 10 Product overview NOTE different. The actual shape will remain the same. The unit can be controlled by the unit control panel alone or with the remote control. Handle Control panel (both sides) Remote signal receptor Air filter Vertical louver control Upper air intake lever-manual adjustment (On some models)
-
Page 11: Product Installation
PRODUCT INSTALLATION Installation Completion Display Sliding Window Installation Hung Window Installation window slider assembly Extended Exhaust Hose Portable Air Conditioner Security Bracket and 2 Screws... - Page 12 List of installation tools (not included) Screwdriver & wrench Pencil A tape measure Scissors or Knife Saw (On some models, to shorten window adaptor for narrow windows) Installation accessories Your Window Installation Kit fits windows 19.4”-62.2”(49.3-158.1cm) and can be shortened for smaller windows. NOTE Items with (*) are on some models.
- Page 13 Confirm your window type (window type and opening size of different types) For optimal performance in operation INCORRECT CORRECT NOTE: To ensure proper function, DO NOT overextend or bend the hose. Make sure that there is no obstacle around the air outlet of the exhaust hose (in the range of 500mm) in order to ensure the exhaust system works properly.
- Page 14 Exhaust hose and adaptors installation 1. The Exhaust Hose assembly installation Exhaust hose (window type) assembly Press the exhaust hose(or extended exhaust hose) Exhaust hose into the window slider adaptor and unit adaptor. The pieces will clip together using the tabs on the adapters.
- Page 15 NOTE: Once the exhaust hose assembly and adjustable window slider are prepared, choose one of the two installation methods based on your window type. Foam seal A 3. Complete sealing of window Foam seal B (Adhesive type) (Adhesive type-shorter) Hung Window Installation Cut the adhesive foam seal A and B strips to the proper lengths, and attach them to the window sash and frame as shown.
- Page 16 5. Sliding Window Installation Insert the window slider assembly into the window opening. Cut the non-adhesive foam seal C strip to match the height of the window. Insert the seal between the glass and the window frame to prevent air and insects from getting into the room.
-
Page 17: Operation Instructions
OPERATION INSTRUCTIONS Electronic control operating instructions 5. Display 2. FAN 4. UP and DOWN 3. MODE 1. POWER 3. MODE button 1. POWER button Selects the appropriate operating mode. Each time you press the button, the mode is selected Wireless operation(on some models) in a sequence that goes from AUTO, DRY, COOL Used to initiate the wireless connection mode. - Page 18 FAN mode Press the "MODE" button until the"FAN " indicator light comes on. Press the "FAN SPEED" button on the remote controller to choose the fan speed. The temperature can not be adjusted. Do not put the duct to window. 4.
-
Page 19: Remote Control Instructions
REMOTE CONTROL INSTRUCTIONS Handling the Remote Control Location of the remote control Use the remote controller within a distance of 26.2 ft (8 meters) from the air conditioner, pointing it towards the receiver. Reception is confirmed by a beep. CAUTION The air conditioner will not operate if curtains, •... - Page 20 Function Buttons TEMP DOWN Button TEMP UP Button Press this button to Press this button to decrease the indoor increase the indoor temperature setting. temperature setting. SPEED Button Used to select the desired fan speed. TIMER Button Press this button to ON/OFF Button activate the “Auto Operation starts when...
- Page 21 Remote Screen Indicators Information is displayed when the remote controller is powered up. Mode display COOL AUTO AUTO COOL HIGH Displayed when data transmitted. Appears when the remote is enabled and can send a signal to the unit. If remote away from the unit and press the ON/OFF button.
- Page 22 How to Use the Buttons TIMER OPERATION Press the TIMER button to initiate the Auto-start and Auto-stop setting program of the unit. To set the Auto-start/stop time. Press the TIMER button, when the TIMER ON indicator is displayed on the LED window of the air conditioner, it indicates the Auto Start setting program is initiated.
- Page 23 COMBINED TIMER (Setting both ON and OFF timers simultaneously) AUTO STOP >AUTO START (On > Stop > Start operation) This feature is useful when you want to stop the air conditioner after you go to bed, and start it again in the morning when you wake up or when you return home.
- Page 24 Timer Functions Your air conditioning unit has two timer-related functions: TIMER ON - sets the amount of time after which the unit will automatically turn on. TIMER ON TIMER ON TIMER OFF - sets the amount of time after which the unit will automatically turn off.
- Page 25 Timer Functions (cont.) 3. Wait 2 seconds, then the TIMER OFF function will be activated. The digital display on your remote control will then return to the temperature display. T imer on NOTE When setting the TIMER ON or TIMER OFF functions, Continue to press up to 10 hours, the time will increase in 30 minute...
- Page 26 300 Kimball Dr Parsippany NJ 07054 Telephone number or internet contact information: Midea.com/us FCC Compliance Statement ( products subject to Part 15) This device complies with Part 15 of the FCC Rules. Operation is subject to the following two conditions: (1) This device may not cause harmful interference, and (2) this device must accept any interference received, including interference that may cause undesired operation.
- Page 27 OS may or may not be supported until a new version is released. Your specific mobile phone or problems in your network may prevent the system from working and Midea will not be responsible for any problems that could be caused by incompatibility or network issues.
- Page 28 1. How to Use SmartHome App Ensure that your mobile phone is connected to the wireless network. Bluetooth must be turned on. The device must also be powered up. STEP 1: Download the SmartHome App Scan the QR code below to download the SmartHome app from the app store or search for it directly on the Google Play Store or Apple’s App Store.
- Page 29 2) If no such message appears, proceed as follows: Tap on “ ” and select your device in the list of nearby available devices. If your device is not listed, please add your device manually, fi rst selecting the device category e.g.
- Page 30 2. How to Use Matter Matter is a connectivity technology that unifies the smart home by allowing devices and ecosystems (such as Alexa, Google Home and Apple Home) to speak the same language thus creating exciting new features and use cases. To use Matter, you will need at least one Matter enabled smart speaker from Amazon, Google or Apple, and it’s respective app.
- Page 31 STEP 3: Enter AP Mode Windows AC: Hold down the CONNECT / Power button for SWING 3 seconds to begin the pairing process (“AP” will appear on the AC’s display). Portable AC: Hold down the SWING / Power button for 3 seconds to begin the pairing process (“AP”...
- Page 32 STEP 6: Control Device After pairing is successful, you can control your AC’s temperature and mode settings, Air conditioner etc. through the respective ecosystem app and smart speaker. Due to a compatibility issue, the temperature value shown in the Alexa, Google Home or Apple Home app may be 1 degree different from that displayed on the air conditioner.
- Page 33 Declaration of Conformity FCC ID: 2ADQOMDNA23 IC: 12575A-MDNA23 This device complies with Part 15 of the FCC Rules and Industry Canada’s licence exempt RSSs. Operation is subject to the following two conditions: (1) This device may not cause interference; (2) This device must acceptany interference, including interference that may cause undesired operation of the device.
-
Page 34: Drainage Guide
DRAINAGE GUIDE Dehumidifying Mode Drainage Guide Step 1: Remove the Step 2: drain plug Install the continuous drain hose During dehumidifying mode, remove the drain plug from the back of the unit, install the drain connector (5/8" universal female mender) with 3/4"... -
Page 35: Cleaning And Maintenance
CLEANING & MAINTENANCE How to clean & maintenance your AC. Air Filter & Cabinet Cleaning Clean the unit using a damp, lint-free cloth and mild detergent. Dry the unit with a dry, lint-free cloth. Maintenance Tips · Be sure to clean the air filter every 2 weeks for optimal performance. ·... - Page 36 Store the unit when not in use Step 2 Step 3 Step 1 hours *Drain the unit‘s water collection *Please refer to the actual tray then reinstall the bottom plug, and the legend is for drain plug back in. reference only. Step6 Step4 Step 5...
-
Page 37: Troubleshooting Tips
TROUBLESHOOTING Problem Solving Common Issues The following problems are not a malfunction and in most situations will not require repairs. Collection Tray and P1 Protection Code restart the unit. Unit does not turn on when pressing In COOL mode: room ON/OFF button temperature is lower than Check the set temperature... -
Page 38: Warranty
Operating Instructions. 2) Damages caused by services performed by persons other than authorized Midea costumer service; or external causes such as abuse, misuse, inadequate power supply or acts of God. - Page 40 The design and specifications are subject to change without prior notice for product improvement. Consult with the sales agency or manufacturer for details. Any updates to the manual will be uploaded to the service website, please check for the latest version. 2023 MAPS 16120600A27518...
Need help?
Do you have a question about the MAP05S1AWT and is the answer not in the manual?
Questions and answers