Sign In
Upload
Download
Table of Contents
Contents
Add to my manuals
Delete from my manuals
Share
URL of this page:
HTML Link:
Bookmark this page
Add
Manual will be automatically added to "My Manuals"
Print this page
×
Bookmark added
×
Added to my manuals
Manuals
Brands
Nice Manuals
Door Opening System
SPIDER Series
Instructions and warnings for installation
Nice SPIDER Series Instructions And Warnings For Installation
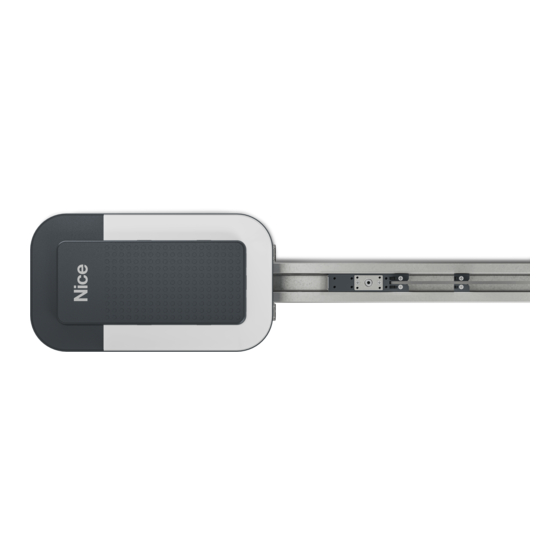
Gearmotor for garage door
Hide thumbs
Also See for SPIDER Series
:
Instruction manual
(17 pages)
1
Table Of Contents
2
3
4
5
6
7
8
9
10
11
12
13
14
15
16
17
18
19
20
21
22
23
24
25
26
27
28
29
30
31
32
33
34
35
36
37
38
39
40
41
42
43
44
45
46
47
48
49
50
51
52
53
54
55
56
57
58
59
60
61
62
63
64
65
66
67
68
page
of
68
Go
/
68
Contents
Table of Contents
Troubleshooting
Bookmarks
Table of Contents
Table of Contents
General Safety Warnings and Precautions
General Warnings
Installation Warnings
Product Description
List of Constituent Parts
Installation
Pre-Installation Checks
Product Usage Limits
Product Identification and Overall Dimensions
Receipt of the Product
Pre-Installation Works
Installing the Gearmotor
Manually Unlocking and Locking the Gearmotor
Electrical Connections
Preliminary Checks
Wiring Diagram and Description of Connections
Wiring Diagram
Description of Connections
Using the Control Unit Buttons
Addressing of Devices Connected with the Bluebus System
FT210B Photosensor
Final Checks and Start-Up
Power Supply Connection
Device Learning
Manual Programming of the Door Opening and Closing Positions
Automatic Force Search
Checking the Door Movement
Inverting the Direction of Motor Rotation
Testing and Commissioning
Testing
Commissioning
Radio Programming
Radio Programming Description
Procedure for Memorising Transmitter Buttons
Verifying Transmitter Encoding
Memorisation of a Radio Command
Memorisation in "Mode 1
Memorisation in "Mode 2
Memorising a New Transmitter "Near the Receiver
Memorising a New Transmitter Using the "Enabling Code" of an Old Transmitter Already Memorised in the Receiver
Deleting a Radio Command
Deleting a Single Command Associated with a Button from the Receiver's Memory
Deleting the Receiver's Memory (Fully or Partially)
Locking (or Release) of Memorisations Carried out with the "Near the Control Unit" Procedure And/Or through the "Enabling Code
Programming the Control Unit
Using the Programming Buttons
Level 1 Programming (ON-OFF)
Level 1 Programming Procedure
Level 2 Programming (Adjustable Parameters)
Level 2 Programming Procedure
Special Functions
Always Open" Function
Move Anyway" Function
Maintenance Notice" Function
Wi-Fi Connection
Integrated Wi-Fi Module (Depending on the Version)
Bidi-Wi-Fi Interface
Connecting the Pro-View
Z-Wave
Memory Deletion
Troubleshooting Guide
Troubleshooting
Signalling through Warning Light
Signals on the Control Unit
Radio Diagnostics
FURTHER DETAILS (Accessories)
Adding or Removing Devices
Bluebus
STOP Input
I/O Expansion Board (Optional Accessory)
Learning of Other Devices
Connecting an SM-Type Radio Receiver (Optional Accessory)
Relay Photocells with PHOTOTEST Function
Relay Photocells Without PHOTOTEST Function
Electric Lock
Connecting and Installing the Emergency Power Supply
Connecting the Oview Programmer
Connecting Other Devices
Parameters and Programmable Functions
Key to the Symbols
Common Parameters
Installation Parameters
Basic Parameters
Available Commands
Basic Commands
Extended Commands
Command Configuration
Standard Configuration
Configuration of the Safety Functions
Control Mode Description
Input Configuration
Output Configuration
Control Unit Output Configuration
Output Configuration - Expansion Modules
Advertisement
Quick Links
Download this manual
SPIDER
Gearmotor for garage doors
EN - Instructions and warnings for installation
Table of
Contents
Previous
Page
Next
Page
1
2
3
4
5
Advertisement
Table of Contents
Need help?
Do you have a question about the SPIDER Series and is the answer not in the manual?
Ask a question
Questions and answers
Related Manuals for Nice SPIDER Series
Garage Door Opener Nice Spider Instruction Manual
(17 pages)
Door Opening System Nice sumo Instructions And Warnings For The Fitter
Gearmotor for sectional doors sliding doors with two bi parting sliding door (16 pages)
Door Opening System Nice spido SP6000 Instructions And Warnings For The Fitter
Gearmotor for sectional doors and overhead spring or counterweight up-and-over doors (42 pages)
Door Opening System Nice SWN Series Instructions And Warnings For Installation And Use
Industrial doors (240 pages)
Door Opening System Nice SDN Series Instructions And Warnings For Installation And Use
Industrial doors (240 pages)
Door Opening System Nice SD Series Instructions And Warnings For Installation And Use
Gearmotors for sectional doors (100 pages)
Door Opening System Nice STX KIT Instructions And Warnings For Installation And Use
(64 pages)
Door Opening System Nice SPA2 Instructions And Warnings For Installation And Use
External manual release (2 pages)
Door Opening System Nice SP 6060 Instruction Manual And Spare Parts Catalogue
Electromechanical gearmotor for overhead spring or counterweight doors (16 pages)
Door Opening System Nice SD-70-20 3 400 Instructions And Warnings For Installation
Gearmotors for sectional doors (21 pages)
Door Opening System Nice SD-100-24 3 400 Instructions And Warnings For Installation
Gearmotors for sectional doors (21 pages)
Door Opening System Nice SPIDER800 Instructions And Warnings For Installation
Gearmotor for garage door (68 pages)
Door Opening System Nice SPIDER 6060 Instruction Manual And Spare Parts Catalogue
Electromechanical gearmotor for overhead spring or counterweight doors (16 pages)
Door Opening System Nice DC Blue Absolute Installer's Instructions
Domestic roll-up door operator (19 pages)
Door Opening System Nice Pro-T Instructions And Warnings For Installation And Use
Automation for sectional overhead door (48 pages)
Door Opening System Nice AVIO600 Instructions And Warnings For Installation And Use
(108 pages)
This manual is also suitable for:
Spider800
Spider1200blw
Table of Contents
Print
Rename the bookmark
Delete bookmark?
Delete from my manuals?
Login
Sign In
OR
Sign in with Facebook
Sign in with Google
Upload manual
Upload from disk
Upload from URL


Need help?
Do you have a question about the SPIDER Series and is the answer not in the manual?
Questions and answers