
Related Manuals for SMC Networks ZXPE5-P-X100


Summary of Contents for SMC Networks ZXPE5-P-X100
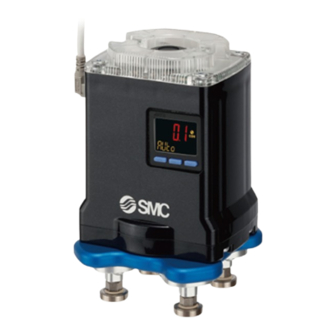
- Page 1 Doc. no. TQ1300100-OM101-B PRODUCT NAME Electric Vacuum Gripper MODEL / Series / Product Number ZXPE5-P-X100...
-
Page 2: Table Of Contents
Table of Contents 1. Parts included in the package ....................... 2 2. Names and descriptions of parts ......................3 2.1. Names of parts of the product ....................3 2.2. Descriptions of parts ........................4 2.3. LED light and status of the gripper ..................... 4 3. -
Page 3: Parts Included In The Package
1. Parts included in the package Main plate: 1 pc. Parallel pin (6x10): 1 pc. Hexagon socket thin head bolt (M6 x 10): 4 pc. Electric Vacuum Gripper: 1 pc. Clamper: 2 pc. Connector cable: 1 pc. Hexagon socket head bolt Part No. -
Page 4: Names And Descriptions Of Parts
2. Names and descriptions of parts 2.1. Names of parts of the product Hexagon socket head bolt Hexagon socket thin head bolt No. TQ1300100-OM101-B... -
Page 5: Descriptions Of Parts
2.2. Descriptions of parts Main plate: Connects the gripper with the robot. LED: Indicates the gripper’s status. DIP switch: Changes the gripper’s operation mode. Pressure monitor: Displays real-time vacuum pressure and the gripper's operation mode and sets parameter threshold values. Vacuum pump: Generates vacuum. -
Page 6: Specifications
3. Specifications 3.1. Specifications ■Product specifications Table 2. Product specifications UR3e, UR5e, UR10e, UR16e Compatible robot (UNIVERSAL ROBOTS) Standards Conforming to “ISO 9409-1-50-4-M6” 5 to 40 Operating temperature range [°C] Connector type M8 8-pin (Plug) Weight [g] excluding cups with adapter 722 (556) Body Max. - Page 7 4) These are the values under SMC measurement conditions when the vacuum pump working continuously and may vary depending on the atmospheric pressure (weather, altitude, etc.) and the measurement method. 5) Impact resistance: The characteristics are satisfied after being tested one time in each of the X, Y and Z directions with energization.
-
Page 8: Functions
4. Functions ■ Automatic mode In automatic mode, the electric vacuum gripper operates in an energy-saving manner, automatically setting a threshold value based on the vacuum pressure at gripping, the maximum vacuum pressure of the product. Below is the description of the energy-saving operation. Upon the grip command, the pump engages and starts suctioning. - Page 9 ■Factory reset The gripper can be reset to the factory settings if the current settings are uncertain. How to reset 1. Press and hold the button for 10 seconds or longer until [RSET] is shown on the left of the sub screen of the pressure monitor, and then release the button.
-
Page 10: Mounting
5. Mounting 5.1. Mounting ■Mounting the gripper on the robot 1) Insert the parallel pin into the robot tool flange pin hole. 2) Aligning the parallel pin with the oval hole of the main plate, mount the main plate on the robot with 4 hexagon socket thin head bolts provided, with a tightening torque of 5.2±0.5 N·m. -
Page 11: Wiring
5.2. Wiring ■Mounting the M8 connector cable Connect the electric vacuum gripper’s M8 connector pin (plug) and the tool flange’s tool I/O connector (plug) together with the M8 connector cable (socket – socket). Do not energize while securing the connector. Check that the connector is not loose. - Page 12 Digital inputs are allocated to the gripper’s control signals, and digital outputs are allocated to the status signals. Table 4. Digital inputs (control signals from the robot to the gripper) Digital input 0 Digital input 1 Status Idle Grip command Release command Idle Table 5.
- Page 13 5.3.2. Illustration of the gripper operation via IO communication Example 1 – Gripping/release motion and work drop detection Robot: ON Starts energizing gripper Grip command Release command Grip command Workpiece dropped Robot: OFF Digital input 0:Grip Digital input 1:Release P2-H2 Vacuum pressure value Atmospheric pressure...
- Page 14 Example 2 – Gripping failed Robot: ON Starts energizing gripper Grip command Release command Grip command Digital input 0:Grip Digital input 1:Release P2-H2 Vacuum pressure value Atmospheric pressure No light No light Flashing green No light LED display Red light Green light Flashing green Image of gripper...
-
Page 15: Urcap
5.3. URCap 5.3.1. Installation of URCap Before installation Copy “SMC-ElectricVacuumGripperSI-x.x.x.urcap” to a USB memory. The plugin software is compatible with a UR robot Polyscope version 5.9.1 or later. Before installing the plugin software, update the Polyscope to the 5.9.1 or later version, if it is prior to 5.9.1. How to install 1. - Page 16 4. Tap the "Restart" button to restart the robot. 5.3.2. Basic settings Tool I/O After restarting the robot, press “Installation” to open “Tool/IO” from “General”. Then, select “SMC Electric Vacuum Gripper” from the “Controlled by” drop down list. “Analogue Inputs – Communication Interface” and “Digital Output Mode” will be set automatically. -15- No.
- Page 17 General Settings Open “General Settings” from the “URCaps” menu in the “Installation” tab. 1. Select the display pressure unit: allows the user to change the measurement unit and set the pressure unit displayed on the URCap as well as the pressure unit displayed on the gripper’s pressure monitor. Measurement units available for use: “kPa”, “MPa”...
- Page 18 Pump Settings Open “Pump Settings” from the “URCaps” menu in the “Installation” tab. 1. Default mode: Allows the user to change the default gripper operation mode on the program and commissioning windows. The gripper has three operation modes: “Automatic” (default), “Manual” and “Continuous”. “Automatic”: In automatic mode, the electric vacuum gripper operates in an energy-saving manner, automatically setting a threshold value based on the vacuum pressure at gripping.
- Page 19 5.3.3. Program settings On the “ Program ” tab, you can create programs and configure their operation. GRIP From the “URCaps” menu in the “Program” tab, tap “SMC Electric Vacuum Gripper. Select “Grip” in “Select operation” to add “Grip: SMC Electric Vacuum Gripper” command to the “Robot Program”. Settings: Allows the user to set the parameters for each command.
- Page 20 RELEASE From the “URCaps” menu, tap “SMC Electric Vacuum Gripper”. Select “RELEASE” in “Select operation” to add the “Release: SMC Electric Vacuum Gripper” command to the “Robot Program”. Settings: Allows the user to set the parameters for each command. Atmospheric release time: Sets the duration of time for a valve to release air to atmosphere. The time can be set between 200 to 5000 msec.
- Page 21 5.3.4. Commissioning The “UR+” icon on the top right of the interface allows the user to commission the gripper. to see the gripper’s grip or release operation, status, and vacuum pressure. 1. Commissioning: Sets the gripper’s operation mode and threshold values of each parameter during commissioning.
-
Page 22: Dimensions
6. Dimensions 6.1. Electric Vacuum Gripper *Movable range: 25 to 35 (In case of the cup mounting on the center part.) -21- No. TQ1300100-OM101-B... -
Page 23: How To Change The Number Of Cups
7. How to change the number of cups 7.1. Change to 1 cup (with flange) 1. Removal of the cup (1) Remove the suction cup with adapter from Plate B using a spanner. (2) Loosen the bolt (M4x8) to remove Plate B from Plate A. Be careful not to lose the O-ring. -
Page 24: Maintenance
8. Maintenance Perform the maintenance and inspection shown below in order to use the electric vacuum gripper in a safe and appropriate manner for a long time. 8.1. Maintenance for electric vacuum gripper Caution 1) Inspection before and after maintenance When removing the product from the robot, ensure that the power supply is turned off and the vacuum pressure inside the product is released. - Page 25 2) Mesh If the mesh is used in such a way that foreign matter is absorbed from the air or the workpiece, it may become clogged, which will cause a reduction in the ejector performance. Clean the mesh periodically as necessary by washing, air blow and so on.
-
Page 26: Precautions
9. Precautions 9.1. Electric vacuum gripper precautions ■Designing Warning If power or air supply is shutdown, vacuum pressure may decrease and this product may drop a workpiece during gripping. It is necessary to take measures such as drop prevention so that injury and damage to machinery or equipment can be prevented. - Page 27 2) Depending upon the weight and shape of the workpieces, the diameter, quantity, and shape of cups suitable for use will vary. The selectable cups will differ based upon conditions other than the above, such as the condition of the workpiece surface (presence or absence of oil or water), the workpiece material, and its gas permeability.
-
Page 28: Troubleshooting
10.Troubleshooting Problem Cause Countermeasure Recheck the relationship between workpiece mass Gripping area is small. and lifting force. (Lifting force is lower than the - Use a suction cup with a large gripping area. workpiece mass.) - Increase the quantity of suction cups. Initial gripping problem...
Need help?
Do you have a question about the ZXPE5-P-X100 and is the answer not in the manual?
Questions and answers