
Related Manuals for Lehner Lifttechnik STRATOS


Summary of Contents for Lehner Lifttechnik STRATOS
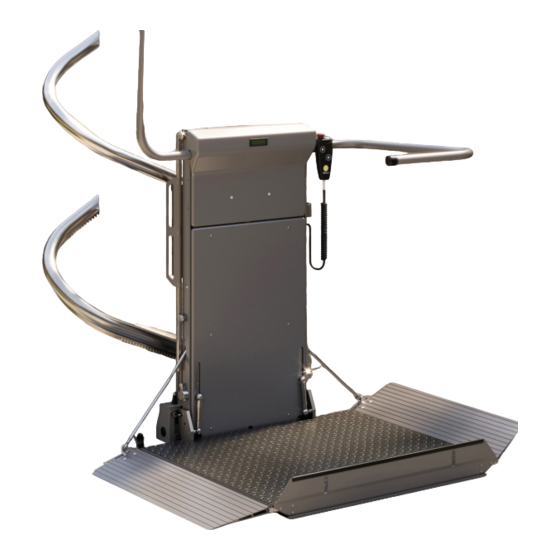
- Page 1 STRATOS Installation Manual Edition 04/2024 Installation Manual STRATOS Platform stairlift Stratos platform stairlift page 1 of 41...
-
Page 2: Table Of Contents
MENU ITEMS ........................31 ERROR AND OPERATION DIAGNOSTIC ON THE DISPLAY ......... 35 ADJUSTMENT OF THE PLATFORM INCLINATION ............39 CONFIGURATION OF THE REMOTE RADIO CONTROLS ..........40 DISMANTLE THE PLATFORM FLOOR ................41 Stratos platform stairlift page 2 of 41... -
Page 3: Observe The Following Points Before Installation
The following tools will be required to finish the installation successfully: ➢ A complete toolset for mechanical and electrical works ➢ Voltmeter ➢ Drilling machines ➢ Drills, thread cutter ➢ Fixing material ➢ Water lever with angle indication Stratos platform stairlift page 3 of 41... -
Page 4: Installation Material For Fixing Of The Rail
Installation material for fixing of the rail For concrete walls: For concrete walls: For concrete walls: For brick walls: For brick walls: Adhesive 2 components glue for brick wall installation – injection pistol and adhesive Stratos platform stairlift page 4 of 41... -
Page 5: Installation Of The Rails
The rail can be installed completely, not matter if the unit is fixed on the wall or on free standing pillars. Once installed please check if main dimensions are in according with installation drawing. Stratos platform stairlift page 5 of 41... - Page 6 If a hand, use the polyamid inserting pin (see picture on the right). Inster the pin into the upper tube only. This helps to insert the rails into the carriages and also to set the right angle for the upper carriage. Stratos platform stairlift page 6 of 41...
- Page 7 Then, with help of a second person, bring the first rail part and approach it to the carriages. Set the carriages to the rail inclination and carefully inserts the rail tubes into the carriages (between the plastic rollers) until the rack will contact the pinion. Stratos platform stairlift page 7 of 41...
- Page 8 STRATOS Installation Manual Edition 04/2024 Stratos platform stairlift page 8 of 41...
- Page 9 Now you use the landing remote control to drive platform pinion onto the on the rack. Be careful and watch if teeth of pinion contacts teeth of the rack correctly. Also observe upper rail tube to avoid bending or breaking of the lever for slow speed on the curve. Stratos platform stairlift page 9 of 41...
- Page 10 When the rail is inserted into the carriages, then move the platform to approach the rail tube connections. The upper connection part is 15mm longer than the lower one (for better guidance during inserting into next rail part). Stratos platform stairlift page 10 of 41...
- Page 11 STRATOS Installation Manual Edition 04/2024 In the first step insert the part into the top tube then into the bottom tube. Stratos platform stairlift page 11 of 41...
- Page 12 1x Screw M8x80, DIN 912, 1x Nut M8, DIN 985 1x Washer 8, DIN 125 for each connection The rail parts must be connected strongly with screws Stratos platform stairlift page 12 of 41...
- Page 13 Do not yet connect them into the floor or into the steps. Now move the platform upward onto the second rail part to finish rail and the fixing of the lower pillars. Stratos platform stairlift page 13 of 41...
- Page 14 STRATOS Installation Manual Edition 04/2024 Then fix rail to wall or pillars (and pillars to lower lever and steps). Stratos platform stairlift page 14 of 41...
- Page 15 All parts must be adjusted in according with exact lower stop position of the stairlift. Barrier locking cams Lower stop bracket with charging point must activate bypass switch before barrier locking cams are Bottom ultimate block pushed. Stratos platform stairlift page 15 of 41...
- Page 16 The holes with threads M4 must be made by installer on site after stop position adjusting. The ultimate bottom block is needed to mechanically stop the platform in case of switch failure. 2x Screw M4x12, ISO 7380 Screw M4 – connect to negative charging cable Stratos platform stairlift page 16 of 41...
-
Page 17: Installing Of The Charging Station/Limit Assembly
Fix the charging station with the limit assembly onto the steel profile in the upper and lower landing. Fine adjust limit switches S27 and S28 if necessary with the slot hole under the carriage covers. Connect Positive Connect Negative Stratos platform stairlift page 17 of 41... -
Page 18: Advice For Adjustment Of The Loading Ramps
S12 and S13. 2/3 of slot length 45° 45° Best location of screw in distance of around 2/3 of slot length and ring turned at 45° to ramp side Stratos platform stairlift page 18 of 41... -
Page 19: Adjusting Of The Control Cams
Add the red coloured plastic cap on the lever for the upper barrier – this indicates for the emergency rescue of passengers, as described in the user manual! The upper lever is responsible for the left barrier and, the lower lever is responsible for the right barrier! Stratos platform stairlift page 19 of 41... -
Page 20: Last Checks Before Using The Stairlift
If any malfunctions are occurring or adjustments need to be made please refer to the following pages for more detailed information. Stratos platform stairlift page 20 of 41... -
Page 21: Switches And Jumpers On The Control Unit
Switches and jumpers on the control unit Connector for service display Acoustic buzzer HF1 Button S1 for remote programming Radio remote receiver Switch S2 connector menu type selection Jumpers JP3, JP4 for left/right sided platform installation Stratos platform stairlift page 21 of 41... - Page 22 Jumpers JP3 and JP4 must be set properly according to left sided and right sided installation. Left sided – left rail Right sided – right rail CAUTION: Proper jumper setting is absolutely necessary for the correct and safe function – safety elements in the drive direction. Stratos platform stairlift page 22 of 41...
-
Page 23: Led Signalization On Platform's Control Unit
LD13 input SU active LD14 input SV1 active LD1 charging active LD15 input SV2 active LD27 input S28 active LD26 input S27 active LD16 input S29 active LD25 input S17 active LD34 relay K2 activated Stratos platform stairlift page 23 of 41... - Page 24 SV1; Goes off when platf. enters slowdown before stop SV2; Goes off when platf. enters slowdown in curve (for straight- LD15 green rail STRATOS always lights) LD16 green S29; always on for STRATOS rail without middle station LD17 green S33; reserve LD18 green S34; reserve S15;...
- Page 25 Lights when overcurrent is detected on the drive 2 – automatic LD44 floor actuator Lights when overcurrent is detected on the drive 3 – reserve LD45 (not used for Stratos) LD46 Lights when battery voltage is low Lights when quadrature input 2 is activated (not used for LD47...
-
Page 26: Position Switches On Platform
STRATOS Installation Manual Edition 04/2024 Position switches on platform Following schematics show states of position switches (and related LEDs) in dependency on the position of the floor and the barriers. Stratos platform stairlift page 26 of 41... - Page 27 STRATOS Installation Manual Edition 04/2024 Platform front view – switch position: Stratos platform stairlift page 27 of 41...
- Page 28 STRATOS Installation Manual Edition 04/2024 Platform backside view – switch position: Stratos platform stairlift page 28 of 41...
-
Page 29: Display Functions
SERVICE mode with the information about the battery voltage and the current flowing into the motor/actuator: If you want to enter the service mode you need to set switch S2 – see page 12 and 13. Stratos platform stairlift page 29 of 41... - Page 30 To exit menu choose “Back” item (one in each menu level/sublevel, repeatedly as much as necessary to jump up from menu sublevels). arrow highlights currently selected menu item Note: Default display language is English; in menu item “Language” other languages can be selected. Stratos platform stairlift page 30 of 41...
-
Page 31: Menu Items
In the following paragraphs some of menu items will be described. Descriptions are structured as based in main menu. Factory default settings are underlined in following lists. These settings can be restored by Menu items resetting system to factory default settings. See chapter 0 Stratos platform stairlift page 31 of 41... - Page 32 Clear errors Sure? By activation and selecting YES all stored errors will be purged from the list. CAUTION: List of errors can be deleted by the authorized technician only. Stratos platform stairlift page 32 of 41...
- Page 33 8 → Slow blinking/beeping Permanent tone 9 → permanent light/tone Buzzer ON/OFF Buzzer off This parameter sets presence of buzzer tone during the platform movement. Buzzer always on Buzzer on during movement only with RF controllers Stratos platform stairlift page 33 of 41...
- Page 34 Full speed 50…100 % PWM Sets maximum speed for drive up Full speed 50…100 % PWM Sets maximum speed for drive down DOWN Slowdown 10…60 % PWM Sets speed for drive up into station Stratos platform stairlift page 34 of 41...
-
Page 35: Error And Operation Diagnostic On The Display
Sets speed for drive down into DOWN station Curve UP 10…80 % PWM Sets speed for drive up in curves (not in use for straight Stratos) Curve 10…80 % PWM Sets speed for drive down in curves DOWN (not in use for straight Stratos) - Page 36 1 - footrest FOOTREST F404 CURRENT LIMIT ACT2 - Overload/overcurrent detected on actuator 2 – seat rotation SEAT F405 EMPTY BATTERY Battery voltage dropped below 19.4 V, further up direction STOP UP movement is blocked Stratos platform stairlift page 36 of 41...
- Page 37 Shows after reaching upper station with closed platform STOP DRIVE UP sensitive pad hit an obstacle during driving up SI: S27 STOP DRIVE DOWN sensitive pad hit an obstacle during driving down SI: S28 Stratos platform stairlift page 37 of 41...
- Page 38 S27 and S28 switches are opened further stairlift movement is SI: S27,S28, S29 blocked for any controllers excluding opening or closing of floor EXCEED RUN TIME Slowdown before station timeout has expired INTO STATION Stratos platform stairlift page 38 of 41...
-
Page 39: Adjustment Of The Platform Inclination
➢ If barrier arms are not horizontal open the screw shown in Hook the illustration, 1-2mm distance adjust the barrier and lock the adjustment with the screw again. Extend ball Main bearing Necessary 2mm gap bearing Stratos platform stairlift page 39 of 41... -
Page 40: Configuration Of The Remote Radio Controls
Radio signal is not ok – there is a disruption Red blinking The batteries of the sender a weak and should be changed Green blinking The sender was successfully connected to the receiver during programming Stratos platform stairlift page 40 of 41... -
Page 41: Dismantle The Platform Floor
• Remove the main bearing pin and take off the platform floor Loosen ball bearing Disconnect platform rod Disconnect spring Bend in metal part Disconnect fixing Take out main Take out spring screw and wiring bearing pin Stratos platform stairlift page 41 of 41...
Need help?
Do you have a question about the STRATOS and is the answer not in the manual?
Questions and answers