
Related Manuals for VERITAS Rubina


Summary of Contents for VERITAS Rubina
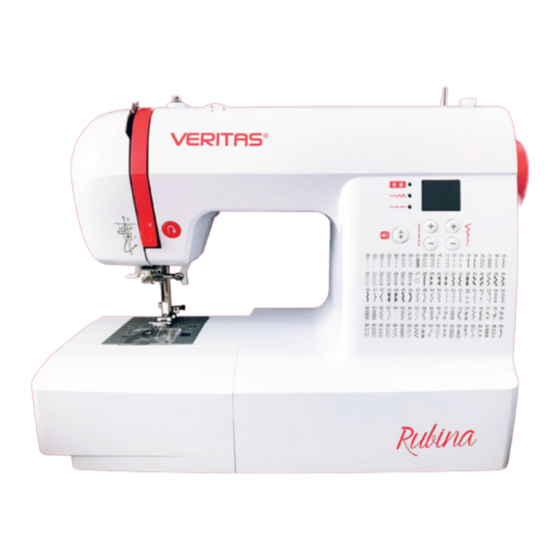
- Page 1 Instruction manual www.facebook.com/veritassewing www.instagram.com/veritassewing www.veritas-sewing.com...
- Page 3 We wish you much pleasure and great sewing successes! Questions concerning machine, service and customer care Toll-free customer service number: 00800 333 00 777 service-uk@veritas-sewing.com Service address: Crown Technics GmbH Service Center c/o Sertronics GmbH Ostring 60...
-
Page 4: Important Safety Instructions
Important Safety Instructions When using an electrical appliance, basic safety instructions 5. Keep your fingers away from all moving parts. Increased cau- should always be followed. Please read through this user manual tion is called for in the vicinity of the sewing needle. Moving thoroughly before using your sewing computer and keep these parts such as needle, presser foot lifter, etc. - Page 5 Important Safety Instructions 13. Neither tug nor rip on the cloth while sewing – that might 26. Your sewing computer is equipped with a LED light. If the overly bend the needle, causing it to break. LED light is damaged, it has to be replaced by the manufac- turer or its customer service to prevent danger.
- Page 6 W C orrect Use Danger! Electric shock due to humidity - The sewing machine must only be stored and used in dry rooms. - Humidity and dampness may cause an electric shock. Danger! Eye injuries due to a broken needle - Only soft, flexible textiles may be sewn.
- Page 7 W C orrect Use Danger! Unsuitable installation sites (workplaces) can result in accidents. - The machine must only be operated on a stable surface. - Shaky, unstable or untidy workplaces can cause the machine to fall down or cause needle-prick injuries. Danger! Persons without knowledge of these operating instructions may injure themselves or damage the sewing machine.
-
Page 8: Table Of Contents
Content Important safety instructions.............4 Changing the stitch lenght ............33 Principal parts of the machine ...........9 Zigzag stitches ................34 Machine control buttons ............10 Stretch stiches................35 Stitch overview................11 Overcasting Stitches ..............36 Accessories ..................12 Blind hems ..................38 Before first use ................13 Button sewing ................39 Connecting the machine to the power source ....14 Buttonhole sewing ..............40 Attaching the presser foot ............15... -
Page 9: Principal Parts Of The Machine
W P rincipal Parts of the Machine Principal Parts of the Machine 1 Tension dial 2 Reverse/ Auto-lock button 3 Thread cutter 4 Buttonhole lever 5 Auto needle threader 6 Needle plate cover 7 Sewing table and accessory box 8 Bobbin winder spindle 9 Number display 10 Stitch width adjustment buttons 11 Stitch length adjustment buttons... -
Page 10: Machine Control Buttons
Machine Control Buttons 1 Reverse button / Auto-lock button Hold down this button to sew stitches in reverse or sew reinforcement stitches at a low speed. When the patterns 01-05 are selected, the machine will sew reverse stitch at a low speed if the reverse button is pressed. -
Page 11: Stitch Overview
Stitch Overview... -
Page 12: Accessories
Accessories Accessories standard Accessories standard 1 All purpose foot �� 2 Zipper foot �� 3 Buttonhole foot �� 4 Blind hem foot �� 5 Satin stitch foot �� 6 Button sewing foot �� 7 Bobbin (3x) 8 Spool holder (large) 9 Spool holder (small) 10 Spool pin felt ����... -
Page 13: Before First Use
W B efore first use Before first use Please note that improper handling of electrical currents can be lethal. Therefore, please read the safety meas- ures on page 12 and the following safety precautions: • Make sure that children do not get the opportunity to play with the sewing machine! •... -
Page 14: Connecting The Machine To The Power Source
Power Source CAUTION: Always make sure that the machine is unplugged from power source and the main switch is on „O“ when the machine is not in use and before inserting or removing parts (f.e. changing the needle). Connecting the machine to the power source Before connecting the power supply, make sure that the voltage and frequency shown on the machine is... -
Page 15: Attaching The Presser Foot
W P resser foot ATTENTION: Turn power switch to off („O“) position when changing the presser foot. Attaching / changing the presser foot Attaching the presser foot holder 1. Raise the presser foot bar (a) by raising the presser foot lifter. -
Page 16: Winding The Bobbin
Winding the Bobbin Winding the bobbin Place the thread and spool holder onto the spool pin. For larger spools of thread, place the large side of the spool holder toward the spool. For smaller spools of thread, place the small side of the spool holder toward the spool, or use the small spool holder. - Page 17 W W inding the Bobbin Winding the bobbin When the bobbin winder shaft is pushed to the right, the number display will show "SP". Hold the thread tail securely in one hand. Press on the foot control to start winding the ...
-
Page 18: Inserting The Bobbin
Inserting the Bobbin Inserting the bobbin When inserting or removing the bobbin, the needle must be fully raised. Raise also the presser foot. Then turn off the machine. ATTENTION: Turn power switch to off („O“) before inserting or removing the bobbin. Disengage the lever by pressing the lever to the right ... -
Page 19: Threading The Upper Thread
W U pper Thread Threading the upper thread NOTE: Threading the upper thread is very easy. It is important to carry out the threading correctly as by not doing so several sewing problems could result. First turn on the machine with the power switch (posi- tion “–“). - Page 20 Upper Thread Threading the upper thread Guide the thread around the thread guide pulling the thread through the pre-tension spring as illustrated. Guide the thread into the right slot and pass it down- wards. Then, down and around the check spring holder and ...
-
Page 21: Using The Needle Threader
W N eedle Threader ATTENTION: Turn power switch to the off position („O“). IMPORTANT: The needle was raised before to its highest position by turning the handwheel. Lower the presser foot. Using the needle threader Lower the needle threader lever slowly and draw the ... -
Page 22: Drawing Up The Lower Thread
Drawing up the lower thread Drawing up the lower thread Hold the upper thread with the left hand. Turn the handwheel towards you (counterclockwise) lowering, then raising the needle. Gently pull on the upper thread to bring the bobbin ... -
Page 23: Adjustments
W A djustments Cutting the thread Raise the presser foot. Remove the fabric, draw the threads to the left side of the face cover and cut using the thread cutter. The threads are cut at the proper length to start the next seam. -
Page 24: Starting Sewing
Sewing Starting sewing Foot control With the sewing machine turned off, insert the foot control plug into its connector on the sewing ma- chine. The speed limiting adjustment lever can control the sewing speed. To increase the sewing speed, slide the lever to the right. -
Page 25: Thread Tension
W T hread tension Thread tension – Basic thread tension setting is „4“. – To increase the tension, turn the dial to the next number up. – To decrease the tension, turn the dial to the next number down. Proper setting of tension is important for good sewing. -
Page 26: Presser Foot Chart
Presser Foot Chart The twin needle can be used for some stitches, offering more stitching options. For more information, go to the section „Using the twin needle“. General sewing, Satin stitch sewing Patchwork stitches, Decorative stitching, Smocking, Fagoting, etc. All purpose foot (T) Satin stitch foot (A) Inserting zippers Zipper foot (I) -
Page 27: Matching Needle/Fabric/Thread
Matching Needle / Fabric / Thread Needle, fabric, thread selection guide 9-11 (70-80) Lightweight fabrics: thin cottons, voile, silk, muslin, interlocks, cotton knits, tricot, Light-duty thread in cotton, nylon, polyester or cotton wrapped jerseys, crepes, woven polyester, shirt & blouse fabrics. polyester. -
Page 28: Replacing The Needle
Replacing the Needle / Feed Dogs Replacing the needle ATTENTION: Turn power switch of off („O“) po- sition when carrying out any of the operations shown below. Change the needle regularly, especially if it is showing signs of wear and causing problems. Insert the needle following the illustrated instructions. -
Page 29: Operation Buttons
W O peration Buttons The most important functions at a glance A Reverse/ Auto-lock button B Mode selection/ Sound button C Stitch length adjustment buttons D Stitch width adjustment buttons Reverse/ Auto-lock button (A) When the patterns 01-05 are selected, the machine will sew reverse stitch at a low speed if the reverse button is pressed. -
Page 30: Stitch Length Adjustment Buttons
Operation Buttons The most important functions at a glance Stitch length adjustment button (C) When you select a stitch the machine will automati- cally set the recommended stitch length. If the pre-set stitch length need adjusting once the pattern is selected, push mode button " "... -
Page 31: Sewing Tips
W S ewing Tips Sewing corners 1. Stop the sewing machine when you reach a corner. 2. Lower the needle into the fabric manually by turn- ing the handwheel. 3. Raise the presser foot. 4. Use the needle as a pivot and turn the fabric 90°. 5. -
Page 32: Sewing On Heavy Fabrics
Sewing Tips Sewing on heavy fabrics The black button on the right side of the all purpose presser foot will lock the presser foot in a horizontal position if you push it in before lowering the presser foot. This ensures even feeding at the beginning of a seam and helps when sewing multiple layers of fabric such as sewing over seams when hemming jeans. -
Page 33: Changing The Needle Position
N eedle Position and Stitch Length Changing the needle position and stitch length Changing the needle position These setting apply only to Direct Patterns 00– 04. The pre-set position is „3.5“, center position. When you press the ”−“ of stitch width adjustment button, the needle position will be moved to the left. -
Page 34: Zigzag Stitches
Zigzag Stitches Zigzag stitches Adjusting the stitch width The maximum stitch width for zigzag stitching is ”7.0“; however, the width can be reduced for most patterns. The width increases or decreases as you press the ”+“ or ”−“ stitch width adjustment buttons from ”0.0 –7.0“. -
Page 35: Stretch Stiches
Stretch Stitches Stretch stitches Stretch stitches are strong and flexible and will give with the fabric without breaking. Good for easy to ravel and knit fabrics. It is good for joining durable fabric such as denims. These stitches can also be used as a decorative top stitch. -
Page 36: Overcasting Stitches
Overcasting Stitches Overedge stitch This is the same type stitch used by the garment industry in making sport swear - it forms and finishes the seam in one operation. It is very effective for use in repairing raw or worn edges of garments. - Page 37 W O vercasting Stitches Slant overedge stitch Seams and overcasts in one operation to produce a narrow, supple seam, particularly suited to swimwear, sportswear, T-shirts, babywear in stretch nylon, stretch towelling, jersey and cotton jersey.
-
Page 38: Blind Hems
Blind Hems Blind hems 12: Blind hem for woven fabrics 14: Blind hem for stretch fabrics NOTE: It takes practice to sew blind hems. Always make a sewing test first. Fold the fabric as illustrated with the wrong side uppermost. -
Page 39: Button Sewing
W B utton Sewing Button sewing Move the drop feed lever to to lower the feed dogs. Position the work under the foot. Place the button in the desired position, lower the foot. Adjust the stitch width to ”2.5– 4.5“ according to the ... -
Page 40: Buttonhole Sewing
Buttonhole Sewing Buttonhole sewing 20 For thin or medium fabric 21 For thin or medium fabric 22 For horizontal hole on blouses or shirts made from thin or medium fabric 23 For horizontal buttonholes on thick fabrics 24 For suits or overcoats 25 For thick coats 26 For jeans or trousers ... - Page 41 W B uttonhole Sewing Buttonhole sewing Select the buttonhole stitch. Adjust the stitch width and the stitch length to the desired width and density. Position the fabric under the presser foot so that the centerline’s mark is aligning with the center of the buttonhole foot.
- Page 42 Buttonhole Sewing Buttonhole sewing Buttonholes are sewn from the front of the presser foot to the back, as shown. Cut the center of the buttonhole with the seam ripper being careful not to cut any stitches on either side. Use a pin as a stopper at the bar tack so you do not cut too much.
-
Page 43: Making Cordes Buttonholes
W B uttonhole Sewing Making corded buttonholes When sewing corded buttonholes, hook a heavy thread or cord under the buttonhole foot. Attach the buttonhole foot and hook the gimp thread onto the back of the presser foot. Bring the two gimp thread ends to the front of the foot and insert them into the grooves, then temporarily tie them there. -
Page 44: Bar Tack Stitch
Bar Tack Stitch Bar tack stitch Select pattern 28 to get the bar tack stitch. Change the presser foot to the buttonhole foot. Pull the button holder to the rear. Set the button guide plate on the buttonhole foot to the desired length. Position the fabric so that the needle is 2 mm (1/16“) ... -
Page 45: Zipper Insertion
5 cm 5 cm 5 cm 5 cm Zipper Insertion Zipper insertion ATTENTION: Zipper foot should be used with machine set for straight stitch only. Care should be given when choosing needle position (choose 3.5, the center position) as the needle could hit the presser foot and break when sewing with an altered needle position or with any other pattern. -
Page 46: Inserting A Lapped Zipper
Zipper Insertion Inserting a lapped zipper Baste the zipper opening on the garment. Fold back to the left seam allowance. Turn under the right seam allowance to form 3 mm (1/8 inch) fold. Attach the zipper foot. Attach the right side of the ... -
Page 47: Satin Stitch Sewing
W S atin Stitch Sewing Satin stitch sewing Use the satin stitch foot for satin stitching and sew- ing decorative stitches. This foot has a groove on the underside which allows dense stitching to pass freely underneath. To change the satin or decorative stitch pattern, you may adjust the length and width of the pattern by pressing the stitch length and width adjustment but- tons. -
Page 48: Smocking
Smocking Smocking Use the all purpose foot to sew straight lines 1 cm (3/8“) apart, across the area. It may be helpful to reduce the needle thread tension slightly, so that the bobbin thread may be drawn later to gather the fabric. -
Page 49: Fagoting
Fagoting Fagoting Separate the folded edges of the fabric pieces with a gap of 4 mm (1/8 inch) and baste them onto a piece of thin paper or water-soluble stabilizer sheet. Align the center of the presser foot with the center of ... -
Page 50: Decorative Topstitching
Decorative Topstitching Decorative Topstitching Place the two fabrics, right sides together, and sew using a straight stitch. Open the seam allowance and press it flat. Working on the right side of the fabric, place the cen- ter of the presser foot on the seam line of the joined fabrics and stitch over the seam. -
Page 51: Scallop Stitch
Scallop Stitch Scallop edging Sew on hem line. Trim the fabric close to the stitching taking care not to cut the thread. ... -
Page 52: Warning Beeping Sound
Warning Functions Warning beeping sound: – When operating correctly: 1 beep – When operating incorrectly: 3-short beeps – When the sewing machine is in trouble and can’t sew: 3-short beeps It means that the thread is twisted or jammed and the hand wheel axle can’t move. -
Page 53: Maintenance
W M aintenance Maintenance Cleaning the hook Lint and bits of thread may accumulate in the hook and will interfere with the smooth operation of the machine. Check regularly and clean the stitching mechanism when necessary. ATTENTION: Disconnect the machine from the wall outlet before carrying out any mainte- nance. -
Page 54: Trouble Shooting Guide
Trouble Shooting Guide Prob- Cause Correction Page Prob- Cause Correction Page Upper 1. The machine is not threaded 1. Rethread the machine. Loose 1. The machine is not correctly 1. Check the threading. 38 - 52 38 - 52 thread correctly. -
Page 55: Disposal
When replacing old appliances with new once, the retailer is legally obligated to take back your old appliance for disposal at least for free of charge. ELECTRICAL CHARACTERISTIC DATA VERITAS RUBINA 100–240 V 50 / 60 Hz 70 W Protection class II Lamp 5 V max. - Page 56 IM_Rubina_09042024_EN...
Need help?
Do you have a question about the Rubina and is the answer not in the manual?
Questions and answers