Table of Contents
Advertisement
Quick Links
Advertisement
Table of Contents

Related Manuals for IFM Electronic ecomat 200 DA101S


Summary of Contents for IFM Electronic ecomat 200 DA101S
- Page 1 Original Installation Instructions Safety Standstill Monitor DA101S...
-
Page 2: Table Of Contents
Contents 1 Preliminary note ���������������������������������������������������������������������������������������������������4 1�1 Symbols used ������������������������������������������������������������������������������������������������4 2 Safety instructions �����������������������������������������������������������������������������������������������5 3 Items supplied������������������������������������������������������������������������������������������������������6 4 Functions and features ����������������������������������������������������������������������������������������6 4�1 Requirements for the hardware configuration �����������������������������������������������7 4�1�1 Product-independent requirements ������������������������������������������������������7 4�1�2 Product-dependent requirements ���������������������������������������������������������7 5 Function ���������������������������������������������������������������������������������������������������������������8 5�1 Block diagram ������������������������������������������������������������������������������������������������8 5�2 Operating principle ����������������������������������������������������������������������������������������8 5�3 Switching function �����������������������������������������������������������������������������������������9 5�4 Switch point setting ����������������������������������������������������������������������������������������9... - Page 3 7�6 Switching outputs 14-23 and 24-24) ������������������������������������������������������������17 7�7 Y7 transistor output ��������������������������������������������������������������������������������������18 8 Set-up ����������������������������������������������������������������������������������������������������������������19 9 Indicators �����������������������������������������������������������������������������������������������������������19 9�1 LED indications and switching characteristics ���������������������������������������������20 9�1�1 General �����������������������������������������������������������������������������������������������20 9�1�2 External errors ������������������������������������������������������������������������������������20 9�1�3 Internal faults ��������������������������������������������������������������������������������������21 10 Maintenance, repair and disposal ��������������������������������������������������������������������21 11 Technical data ��������������������������������������������������������������������������������������������������22 12 Tests / approvals ����������������������������������������������������������������������������������������������24 13 Terms and abbreviations ����������������������������������������������������������������������������������25...
-
Page 4: Preliminary Note
1 Preliminary note The instructions are part of the unit� They are intended for authorised persons according to the EMC and Low Voltage Directive and safety regulations� The instructions contain information about the correct handling of the product� Read the instructions before use to familiarise yourself with operating conditions, installation and operation�... -
Page 5: Safety Instructions
2 Safety instructions • Follow the operating instructions� • Improper use may result in malfunctions of the unit� This can lead to personal injury and/or damage to property during operation of the machine� For this reason note all remarks on installation and handling given in these instructions� Also adhere to the safety instructions for the operation of the whole installation�... -
Page 6: Items Supplied
The safe state is when the output contacts (13-14 and 23-24) of the device are open� ifm electronic gmbh does not assume any liability for the function and the interaction of the device with devices from other manufacturers� Suitability of the device for a certain application cannot be assured and must be ensured by the user�... -
Page 7: 4�1 Requirements For The Hardware Configuration
4.1 Requirements for the hardware configuration The following requirements must be met when using the device: 4.1.1 Product-independent requirements It must be ensured that the safety requirements of the respective application correspond to the requirements stated in these instructions� The specified technical data indicated in these instructions must be complied with� The principle of normally closed operation must be applied to all external safety circuits connected to the system�... -
Page 8: Function
5 Function 5.1 Block diagram 24 V DC S34 S43 inputs switchpoint controller 1 power controller 2 fault 1: Supply voltage 4: Feedback contact 2: Inputs 5: "Standstill" switching outputs 3: Switch point setting (bridging) 6: "Fault" transistor output 5.2 Operating principle The device is a 2-channel pulse evaluation system for the safe detection of underspeed or standstill�... -
Page 9: 5�3 Switching Function
5.3 Switching function In accordance with a "safe standstill message", the output relays are energised when the switch point is not reached or with standstill� The output relays K1/K2 switch (are energised) when the set switch point is 5% below the set level� They switch back (are de-energised) when the set switch point is exceeded by 5%�... -
Page 10: 5�6 Y7 Transistor Output
5.6 Y7 transistor output The Y7 transistor output provides a non-safety related signal for communication to a PLC� Status Y7 transistor output normal operation (no error) HIGH (ON) Error LOW (OFF) The output data is compatible with the input data of the current-sinking inputs of type 1, 2, 3 to EN 61131-2�... -
Page 11: 5�9 Error Message
The device monitors continuously if this condition is met�If this regulation is violated, there is an error and the device goes into the safe state� (→ 6.3 Arrangement of the damping cams) 5.9 Error message If the device detects an error, the switching outputs are kept in the safe state�The "Fault"... -
Page 12: Installation
6 Installation 6.1 Installation of the device ► Mount the device on a DIN rail in a housing protected against dust and humidity (min� IP 54 - degree of soiling 2)� 6.2 Installation of the pulse-pickups (sensors) ► Mount the pulse-pickups mechanically separated from each other� (Not together on a mounting bracket�) 6.3 Arrangement of the damping cams The arrangement of the damping cams and the gaps must ensure that at... -
Page 13: 6�3�2 Example Cam Disc
6.3.2 Example cam disc Mechanical requirements... -
Page 14: Electrical Connection
7 Electrical connection ► Use 60/75°C copper conductors only� Do not use unconnected terminals as support point terminal� 7.1 Connections (overview) S34 S43 Y5 Y6 Combicon connector Connector Terminal Connection L-, L+ supply voltage (→ 7.2) switch point setting (bridging) (→ 7.3) Y4, Y5 feedback contact (→ 7.5) -
Page 15: 7�2 Supply Voltage
7.2 Supply voltage ► Connect the supply voltage of the device to terminals L+ and L-� For safety reasons the unit can only be restarted by separation from the voltage supply in case of a fault�It is thus recommended to install a RESET button in series with the L+ circuit�... -
Page 16: 7�3 Switch Point Setting
7.3 Switch point setting ► Set the requested switch point via a hard-wired bridge on the terminals S33, S44, Y2 or Y6� Only change the switch point when disconnected from power� When switched on, a change of the circuitry will produce an error message of the device�... -
Page 17: 7�5 Feedback Contact
7.5 Feedback contact ► Connect the feedback contact to input A2 (Y4-Y5)� ► Observe the characteristic data of the input (→ 11 Technical data). If the monitoring function is not required, the terminals Y4-Y5 can be permanently bridged� Y5 Y6 Y5 Y6 Without monitoring with bridge 1: Feedback contact (normally closed ) 7.6 Switching outputs 14-23 and 24-24) ►... -
Page 18: 7�7 Y7 Transistor Output
7.7 Y7 transistor output ► Connect transistor output Y7 to the signal input of the PLC� ► Observe the characteristic data of the output (→ 11 Technical data). Y5 Y6 Fault Transistor output... -
Page 19: Set
8 Set-up The device is ready for operation after application of the supply voltage and the self-diagnosis� ► After installation and electrical connection, check whether the device operates safely� 9 Indicators Power Fault Indicators Colour Meaning (normal operation) Yellow input signal channel 1 output relay channel 1 Yellow input signal channel 2... -
Page 20: 9�1 Led Indications And Switching Characteristics
9.1 LED indications and switching characteristics 9.1.1 General Status Power Fault K1, K2 E1, E2 Outputs Transistor 13-14, 23-24 Standstill HIGH No standstill HIGH Feedback contact HIGH open Overvoltage/ HIGH undervoltage Symbols used (→ 1.1) *) current status 9.1.2 External errors Status Power Fault K1, K2 E1, E2... -
Page 21: 9�1�3 Internal Faults
9.1.3 Internal faults Status Power Fault K1, K2 E1, E2 Outputs Transistor 13-14, 23-24 Device-internal error A flash code is output via the "Power" LED�This flash code enables the manufacturer to analyse the device-internal error� ► If the error message is not reset in spite of the interruption of the supply voltage, exchange the device (→ 4.1.2 Product-dependent requirements). -
Page 22: Technical Data
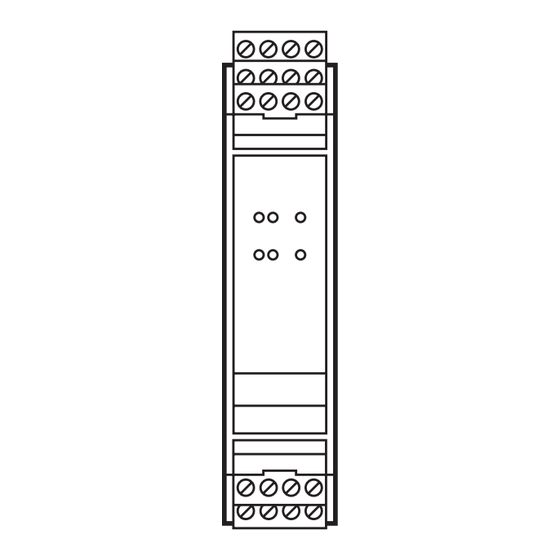
11 Technical data DA101S Safety Standstill Monitor Evaluation systems 1: Combicon connector with screw terminals 2: Mounting on DIN rail Made in Germany Product characteristics Safety Standstill Monitor Evaluation system for safe standstill monitoring for 2 pnp switching sensors 4 switch points selectable Error message Complies with the requirements: EN ISO 13849-1: category 4 PL e... - Page 23 • Same polarity (phase) referred to the output contacts Pack quantity [piece] ifm electronic gmbh • Friedrichstraße 1 • 45128 Essen — We reserve the right to make technical alterations without prior notice. — GB — DA101S-00 — 16.05.2013 Seite 2 von 2...
-
Page 24: Tests / Approvals
12 Tests / approvals The device was tested and certified by TÜV-Nord� The device was developed and tested in accordance with the following directives and standards: • 2006/42/EC Machinery Directive • 2004/108/EC EMC Directive • 73/23/EEC or 93/68 Low voltage directive • ISO 13849-1: 2008 Safety of machines - safety-related parts of control systems • IEC 61508: 2011 Functional safety of electrical/electronic/programmable electronic safety-related systems... -
Page 25: Terms And Abbreviations
13 Terms and abbreviations Cat� Category Classification of the safety-related parts of a controller as regards their resistance to failures� Common Cause Failure Diagnostic Coverage MTTF Mean Time to Failure MTTF Mean Time To Dangerous Failure Probability of (dangerous) (PFH Failure per Hour Performance Level PL to ISO 13849-1...
Need help?
Do you have a question about the ecomat 200 DA101S and is the answer not in the manual?
Questions and answers