
Related Manuals for Clarke AC5000B


Summary of Contents for Clarke AC5000B
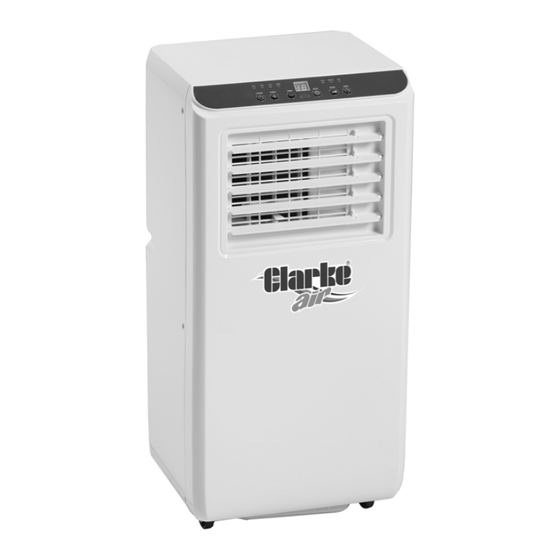
- Page 1 3 IN 1 AC, FAN, DEHUMIDIFIER MODEL NO: AC5000B PART NO: 3230580 OPERATION & MAINTENANCE INSTRUCTIONS ORIGINAL INSTRUCTIONS DL0124 Rev 1...
- Page 2 INTRODUCTION Thank you for purchasing this CLARKE Portable 3 in 1 Air Conditioner, Fan and Dehumidifier. Before attempting to operate the machine, it is essential that you read this manual thoroughly and carefully follow all instructions given. In doing so you will ensure the safety of yourself and that of others around you, and you can also look forward to the product giving you long and satisfactory service.
- Page 3 OVERVIEW Parts & Service: 020 8988 7400 / E-mail: Parts@clarkeinternational.com or Service@clarkeinternational.com...
-
Page 4: Safety Instructions
SAFETY INSTRUCTIONS • Carefully read the instructions before operating the appliance. • This appliance is for indoor use only. • This appliance must only be connected to a 230 V / 50 Hz earthed outlet. • Installation must be in accordance with regulations of the country where the appliance is used. - Page 5 • The appliance must be placed in a room without sources of ignition (for example: open flames, an operating gas appliance or an operating electric heater). • Condensation may form on the base of this appliance during use, DO NOT use on sensitive or absorbent floors.
-
Page 6: Electrical Connections
ELECTRICAL CONNECTIONS WARNING! READ THESE ELECTRICAL SAFETY INSTRUCTIONS THOROUGHLY BEFORE CONNECTING THE PRODUCT TO THE MAINS SUPPLY. Before switching the product on, make sure that the voltage of your electricity supply is the same as that indicated on the rating plate. This product is designed to operate on 230 V AC 50Hz. -
Page 7: Control Panel And Remote Control
CONTROL PANEL AND REMOTE CONTROL 1. Power Button 2. Timer/Temperature Up Button 3. Timer/Temperature Down Button 4. Mode Button 5. Speed Button 6. Timer Button 7. Water Full Indicator 8. Fan Speed Indicator - High 9. Fan Speed Indicator - Low 10. -
Page 8: Installation
FITTING BATTERY TO THE REMOTE CONTROL 1. Push in the clip on the side of the battery compartment and slide the battery holder out of the remote control. 2. Place a CR2025 battery (not included) with the positive side facing the rear of the remote control in the battery holder and slide the holder back into the remote control. - Page 9 3. Attach the Hot Air Outlet/Duct Connector on to the rear of the appliance by sliding it from the left. 4. Pull out a couple of inches of the Air Exhaust Duct and rotate several times until it is secure in the Hot Air Outlet/Duct Connector located on the rear of the appliance.
- Page 10 7. Move the air conditioner into position and extend the flexible exhaust duct to suit your window layout. NOTE: The length of the exhaust duct is variable between 245 mm and 1580 mm (adaptors included). NOTE: The length of duct has been designed to suit the specification of the air conditioner.
-
Page 11: General Operation
OPERATION GENERAL OPERATION • If the room is exposed to direct sunlight, draw any curtains during the sunniest part of the day. 1. Press the Power button to switch the appliance On/Off. • The appliance will select the last mode used. COOLING MODE (COOL) 1. -
Page 12: Fan Mode (Fan)
FAN MODE (FAN) 1. Press the mode button repeatedly to select FAN. • The FAN indicator lamp lights 2. Press the speed button to select between High / Low speed. NOTE: In fan mode, you cannot set the temperature. DEHUMIDIFYING MODE (DEHUM) 1. -
Page 13: Protection & Troubleshooting
2. Press the Time/Temperature up or down buttons to set the ON time in 1 hour increments (1-24 hours). • The timer indicator lamp lights up. TO SET THE “OFF” TIME (WHEN THE APPLIANCE IS RUNNING). 1. Press the Timer button to set the OFF time. 2. -
Page 14: Troubleshooting
the appliance and move it to a suitable place to drain the water from the drain port on the rear of the appliance. or attach a drain hose. TROUBLESHOOTING Problem Likely Cause Solution The appliance Appliance is not plugged in. Plug the appliance into a fails to suitable power source. -
Page 15: Maintenance
MAINTENANCE CLEANING WARNING: PLEASE SHUT OFF THE APPLIANCE AND UNPLUG FROM THE MAINS BEFORE CLEANING OR PERFORMING ANY MAINTENANCE. 1. Clean the outside surfaces of the appliance with a duster or a soft, moist cloth. • DO NOT use solvents which could damage the plastic components. CLEANING THE AIR FILTER Clean the air filter every 2 weeks. -
Page 16: Parts Diagram
PARTS DIAGRAM Parts & Service: 020 8988 7400 / E-mail: Parts@clarkeinternational.com or Service@clarkeinternational.com... -
Page 17: Parts List
PARTS LIST PART NO DESCRIPTION PART NO DESCRIPTION Air Vent Vanes Compressor Air Vent Connecting Rod Power Cable Front Shell Compressor Wiring Control Panel Cover Base Control Panel Box Castors Control Panel Board Water Plug/Cap Upper Vane Stand Water Wheel Vane Support Water Pump Manual Swing... -
Page 18: Technical Specifications
TECHNICAL SPECIFICATIONS Model Number AC5000B Power Supply 230V/50Hz Weight 18kg Dimensions (H x W x D) 685 x 330 x 280 mm Drain Hose 10mm x 1000mm Air Flow Volume 270 m Applicable Area Usage Operating Temperature 15 - 35 Dehumidifying Capacity 0.5l/hour... -
Page 19: Declaration Of Conformity
DECLARATION OF CONFORMITY Parts & Service: 020 8988 7400 / E-mail: Parts@clarkeinternational.com or Service@clarkeinternational.com... -
Page 20: Environmental Protection
ENVIRONMENTAL PROTECTION Recycle unwanted materials instead of disposing of them as waste. All unwanted accessories and packaging should be sorted and taken to a recycling centre for disposal in a manner which is compatible with the environment. By purchasing this product, the customer is taking on the obligation to deal with its safe disposal in accordance with the Waste Electrical and Electronic Equipment regulations (WEEE).
Need help?
Do you have a question about the AC5000B and is the answer not in the manual?
Questions and answers