
Related Manuals for Viola Systems Arctic 3G


Summary of Contents for Viola Systems Arctic 3G
- Page 1 Arctic 3G Gateway User Manual Document version 1.1 Firmware version 1.2.5 Modified January 27, 2009 ©Viola Systems Ltd...
-
Page 2: Table Of Contents
1.1 About the Arctic 3G Gateway ........ -
Page 3: Contents
CONTENTS 4.3.1 DNS proxy ..........4.4 Network status information . - Page 4 Copyright © 2008, Viola Systems Ltd. All rights to this manual are owned solely by Viola Systems Ltd. (referred in this manual as Viola Systems). All rights reserved. No part of the contents of this manual may be transmitted or reproduced in any form or by any means without the written permission of Viola Systems.
- Page 5 The names of the programs as well as all copyrights relating to the programs are sole property of Viola Systems. Any transfer, licensing to a third party, leasing, renting, transportation, copying, editing, translating, modifying into another programming language or reverse engineering for any intent is forbidden without the written consent of Viola Systems.
- Page 6 Warranty and Safety Instructions Read these safety instructions carefully before using the product: Warranty will be void, if the product is used in any way, which is in contradiction with the instructions given in this manual, or if the product has been tampered with. The devices mentioned in this manual are to be used only according to the instructions described in this manual.
-
Page 7: Introduction
Flexible routing Arctic 3G can be configured to fit in all kinds of networks. It also has full support for Serial – Ethernet routing of industrial network protocols. -
Page 8: Hardware Description
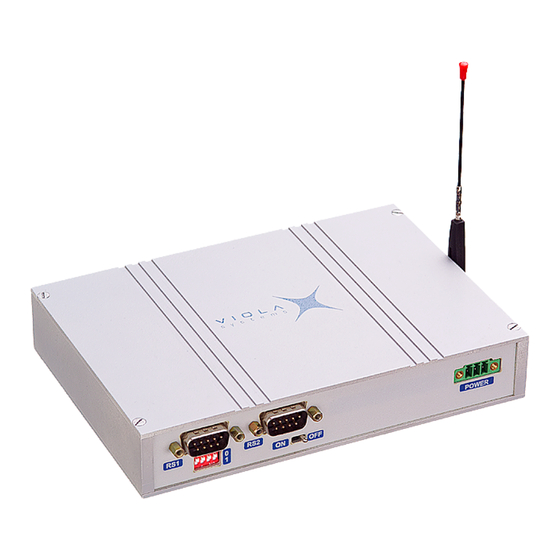
Chapter 2 Hardware description This section describes the physical interfaces on Arctic 3G. Front panel Arctic 3G front panel is shown in figure 2.1. Figure 2.1: Front panel LEDs and switches (from left to right) with section reference to more detailed information: 1. -
Page 9: Side Panel
CHAPTER 2. HARDWARE DESCRIPTION Side panel Arctic 3G side panel has the SIM card slot and an antenna connector. See section 2.5.1 for more information about wireless functionality. Figure 2.3: Side panel Items (from left to right): 1. SIM card slot 3. -
Page 10: Ethernet Leds
When the button is pressed, the card will pop outwards and can be removed. Note: It is not recommended to insert or remove the SIM card while the Arctic 3G is turned on Figure 2.4: SIM card installation... -
Page 11: Ethernet Wan
Serial port connectors are 9-pin D-sub (male) connectors. Serial ports enact as DTE devices. 2.6.1 Serial console port Serial console connector is located in Arctic 3G front panel (see figure 2.1). Connector type is RJ45. Connector is described in table 2.6. Function... -
Page 12: Serial Port 1
Console port can be connected from a PC by using a Cisco compatible serial console cable. Ethernet – serial console adapters are available from Viola Systems. They allow serial console access with the adapter and straight Ethernet cable. Viola Systems order code is 3170. Contact your local sales office for more details. -
Page 13: Serial Port 2
1. Required tools and accessories are: DIN rail mounting kit (2 mounting brackets and 4 screws), screw driver 2. Use the screw driver to attach the screws to bottom panel of the Arctic 3G. DIN rail brackets can be installed to either diagonally or horisontally depending on the wanted DIN rail installation angle. -
Page 14: Product Label
MAC addresses of Ethernet ports. Figure 2.6: Product label 2.11 Accessories Viola Systems supplies certain accessories for Arctic 3G. Possible accessories are listed in table 2.12. Accessory Order code Serial console adapter: RS232 to RJ45... -
Page 15: Quick Installation
Arctic 3G has three network interfaces, Ethenet WAN, Mobile WAN (3G) and Ethernet LAN. WAN interfaces are used for connecting Arctic 3G to public Internet or private APN. Ethernet LAN is used for connecting other Ethernet devices to Arctic 3G’s local network. -
Page 16: Configuring Ethernet Lan
Note: If you change the IP addresses, your existing web browser connection hangs up after you apply the settings, so open a new connection to the new IP address (check your Ethernet cabling) 5. Now you should be able to connect to the Arctic 3G with your new IP address. Configuring Mobile WAN (3G) 1. -
Page 17: Configuring Default Gateway
5. If you have both Ethernet WAN and Mobile WAN configured, you can define the Backup WAN Interface. If the primary WAN interface comes down, Arctic 3G automatically switches default route to backup WAN interface. Figure 3.3 shows example configuration where Ethernet WAN is configured as default route. -
Page 18: Network Configuration
4.1.1 Host and domain names Host and domain names can be set from the System General Settings screen. Figure 4.1: General settings 4.1.2 Ethernet WAN This screen configures the Ethernet WAN interface on Arctic 3G. Figure 4.2: Ethernet WAN configuration... -
Page 19: Mobile Wan (3G)
PIN code if set, APN name and authentication details if needed. If Arctic 3G acts as a wireless router to Ethernet devices and DNS is needed, enter DNS configuration as well. When ready, press the Submit button on the bottom of the page to save settings. -
Page 20: Ethernet Lan
Disable if both wireless and wired WAN interfaces have to be up all the time. 4.1.5 Ethernet LAN This screen configures the Ethernet LAN interface on Arctic 3G. Figure 4.5: Ethernet LAN configuration Ethernet LAN configuration is very simple. It configures the IP address for the Ethernet LAN interface. -
Page 21: Routing
4.3.1 DNS proxy DNS proxy allows the Arctic 3G to act as a DNS server to devices connected to Ethernet LAN. The configuration is located in Services- Common screen. To use this feature, configure the device to use Arctic 3G Ethernet LAN IP address as its DNS server. This... -
Page 22: Network Status Information
CHAPTER 4. NETWORK CONFIGURATION Network status information 4.4.1 System status screen Network status information can be seen from System- Status screen. Figure 4.7: Network status screen 4.4.2 Mobile WAN (3G) status LEDs Status of mobile WAN interface can be seen from the front panel LEDs. The initialization sequence is: 1. -
Page 23: Serial Port Configuration
Chapter 5 Serial Port Configuration Configuring serial gateway This section describes how to configure serial Ethernet functionality. Serial gateway feature enables data from the serial port attached device to be routed to Ethernet and vice versa. Serial gateway processes the transmitted data transparently and does not alter it any way except for buffering it for transmission. -
Page 24: Additional System Configuration
Changing system password Username and password can be changed from Tools- User Config screen. It is always recommended to change the password from the factory default when the Arctic 3G is connected to a public network. Figure 6.1: User config screen New username and password will be active after the Arctic 3G is restarted. -
Page 25: Firmware Update
Firmware update Current running firmware version can be seen from the System- Status screen. Arctic 3G firmware can be updated from the Tools- Firmware Update screen. Figure 6.3: Firmware update screen Note that firmware update erases all the settings on the unit to the factory defaults. It is recommended to create backup from the old configuration before attempting to update the firmware. -
Page 26: Troubleshooting
4. Check that DNS Proxy is enabled from Services- Common screen. 5. Configure network settings on laptop to use Arctic 3G Ethernet LAN address as gateway and DNS server. With these settings you should be able to access the Internet with the laptop. -
Page 27: Technical Specifications
Chapter 8 Technical Specifications Processor PowerPC 400MHz Memory 64MB Hard Drive 32MB flash Input voltage 11-18 Volts Power consumption 7W max Power connector Phoenix Contact MC 1,5/ 3-STF-3,5 Casing Aluminium sheet Operating temperature 0 ... +70 C Storage temperature -40 ... +85 C Humidity 0 ... -
Page 28: Limited Warranty
Your sole and exclusive remedy for a covered defect is repair or replacement of the defective product, at Viola Systems’ sole option and expense, and Viola Systems may use new or refurbished parts or products to do so. If Viola Systems is unable to repair or replace a defective product, your alternate exclusive remedy shall be a refund of the original purchase price. -
Page 29: Technical Support
Chapter 10 Technical Support Contacting Technical Support • Phone: +358 20 1226 226 • Fax: +358 20 1226 220 • E-mail: support@violasystems.com • On-line http://www.violasystems.com Recording Product Information Before contacting our Technical Support staff, record the following information about your product: •... - Page 30 Index 3G settings, 18 SIM card installation, 9 Specifications, 26 Accessories, 13 System log, 23 Antenna specification, 9 System status screen, 21 Back panel, 7 Technical support, 28 Time, 23 Console adapter, 11 Troubleshooting, 25 Contact information, 3 Copyright and trademark, 3 Username, 23 Date, 23 Warranty, 5...
Need help?
Do you have a question about the Arctic 3G and is the answer not in the manual?
Questions and answers