Advertisement
Table of Contents
THIS MODEL NEEDS LIGHT OILING BEFORE USE:
Whilst this model has been lubricated at manufacture, it is required that you add a small amount of oil directly into the exposed gears
on the underside of the chassis on the powered car. There are several brands of synthetic oil in the market and your local model shop
will be able to advise you. Please note there is no need to oil any Dummy Car.
Failure to oil may affect any warranty claim. Please use caution when applying oil as some types can cause damage to plastic. If oil touches
the body then immediately wipe off using a non-fluffy cloth. No part of the motor requires lubrication. Do not operate the model on track laid
onto carpet as the dust and fibres will impare the mechanism.
If you wish to run the model on standard DC - then do nothing. Our PCB will automatically recognise you have a DC controller and will allow
operation at normal DC requirements.
'N' gauge controller as '00' controllers will not allow the measure of control required for our super-fine 'N' motors.
Our model is fully DCC Ready. Each coach is fitted with a DCC board which features a 6-pin NEM socket pre-fitted with a DC 'Blanking Plug'.
Carefully remove the blanking plug and insert the decoder of your choice. The PCB also has a solder table for those wishing to hard-wire their
decoder. Before converting to DCC please ensure that your decoder will fit the model, as some decoders are large and could have a thick protective
outer shroud. The decoder chosen should be below 11.25mm wide x 13.10mm long (excluding pins) x 3mm thick.
To expose the PCB, simply remove the roof using finger pressure and noting which way the roof should re-fit. Fit your decoder and repeat the
process for the second car. Then programme both decoders to the same address and operate as normal. Please Note * Some DCC controls will
not register the 'load' of the dummy car and may refuse to programme. If this happens then programme the decoder in the powered unit and then
move the programmed decoder into the dummy unit before fitting a new decoder into the powered unit and programming.
LIGHT BARS:
This model is 'Light Bar Ready'. The Dapol Light Bars operate on both DC and DCC power without any external modification. Instructions
for fitting Dapol Light Bars are contained within the packaging of the Light Bar packs.
CLOSE COUPLING:
This model is supplied with alternate corridor connectors and closer coupling for those modellers that have larger radius curves on their layout
and wish to have tighter gaps between the two cars. To change the corridor connectors please unclip the roof using finger pressure. At the rear
of the coach you will see the corridor connector. This is placed into a vertical pin located onto the inside of the chassis. Simply pull the corridor
connector vertically away from the chassis and insert the replacement in the same position, ensuring that it locates correctly onto the pin.
Please note that there is a fine 'Hair' wire attached to the corridor connector that fits into a cut groove on a pillar just inside of the opening. Ensure
that the wire returns to fit inside of the cut groove. Replace the roof, ensuring that the pin on the underside of the roof engages into the top of the
corridor connector, as this is crucial to allow the corridor connector to 'Free Pivot' on curves.
The end bogie of each car will now need their pre-fitted coupling arm replacing; this is a simple 'clip-in' type held in place by a retention pin.
Upturn the model, gently push the retention clip into the body and slide out the coupling arm. Then get the smaller retention arm supplied in
the accessory pack and fit in place of the original. However please take care not to break the pin on removal and insertion.
SCHARFENBURG COUPLERS:
This model is fitted with working 'Scharfenburg' couplers. It will allow your model to not only look protypically correct when viewed from the
front, but to also couple up with other Class 156 units from our range as well as our Class 153 model. Each 'Scharfenburg' coupler is designed
to 'click' into its opposite coupler when presented to each other on straight level track. To uncouple, you simply pull them apart (again on
straight and level track).
DUMMY UNITS:
Our range of Class 156 models will incorporate a range of Twin-Car Dummy Units and which will allow the creation of protypically correct
four-car units. You will couple the two twin-car sets via the 'Scharfenburg' couplers described above.
The dummy sets are also DCC Ready and Light Bar Ready and the installation of both of these follows exactly the method used in these
instructions.
WARRANTY:
Dapol Ltd will remedy any defect or malfunction occuring with the set during a period of six months from the date of purchase. This guarantee
does NOT extend to defects or malfunctions caused by damage or unreasonable use, including failure to provide correct lubrication. If for any
reason the model develops any fault within the warranty period, please return it to THE PLACE OF PURCHASE with your PROOF OF PURCHASE
(till receipt / credit card slip etc). Do NOT return it to Dapol Ltd. The seller will then, if appropriate, return it to Dapol Ltd under their agreed returns
policy. Without a suitable proof of purchase Dapol Ltd cannot guarantee to offer any warranty service. The Dapol warranty is given in addition
to all legal rights of the purchaser under the 'Sale of Goods act' and shall expire six months from the date of purchase. Dapol Ltd shall not be
responsible for any consequential loss or damages arising in regard to any Dapol Ltd product.
Please refer to the various photos / drawings overleaf for any clarification on these written instructions
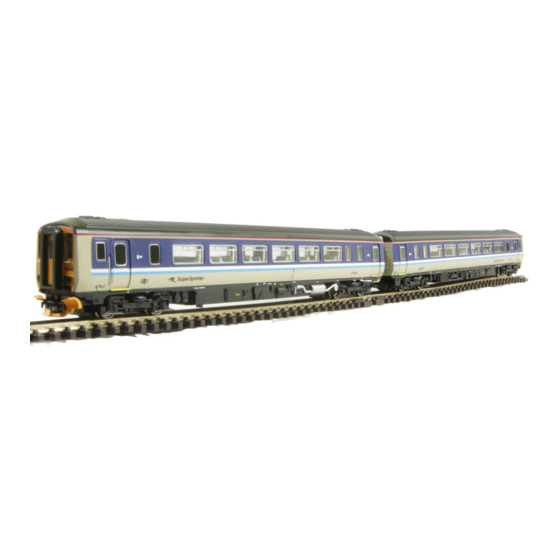
Class 156 D.M.U. - DCC Ready Twin Car Set
* PLEASE NOTE: When using standard 12v DC power, it is important that you use an appropriate
Advertisement
Table of Contents

Related Manuals for DAPOL Class 156 Locomotive


Summary of Contents for DAPOL Class 156 Locomotive
- Page 1 THE PLACE OF PURCHASE with your PROOF OF PURCHASE (till receipt / credit card slip etc). Do NOT return it to Dapol Ltd. The seller will then, if appropriate, return it to Dapol Ltd under their agreed returns policy.
- Page 2 OILING: Please oil into the exposed gears as shown on the sketch. Exposed Exposed gears gears DCC - Fitting of Decoder: Please refer to the sketch and note the position of the Light Bar Socket. Corridor Connector Light Bar Socket DC Blanking Plug Scharfenburg Couplers: Please refer to the photos showing the positions for pre-coupling and post-coupling.
-
Page 3: Warranty
Class 156 Locomotive IMPORTANT INSTRUCTIONS Please read BEFORE using this model UNPACKING & HANDLING YOUR LOCOMOTIVE: This model has been factory lubricated and requires no initial lubrication. RUNNING IN’ YOUR LOCOMOTIVE: WARRANTY: Please refer to separately provided warranty paperwork for details. -
Page 4: Light Bar
Light Bar: The model is ‘Light Bar Ready’. The Dapol Light Bar operates on both DC and DCC power without any external modification. Instructions for fitting Dapol Light Bars are contained within the packaging of the Light Bar packs. - Page 5 Class 156...
-
Page 6: European Regulations
fitting method When refitting, ensure that the gear on top of the bogie tower meshes with the worm. EUROPEAN REGULATIONS: Dapol products conform to WEEE and RoHS requirements. If you have a need to dispose of any electrical part, please do so correctly. Made in China...
Need help?
Do you have a question about the Class 156 Locomotive and is the answer not in the manual?
Questions and answers