Advertisement
Quick Links
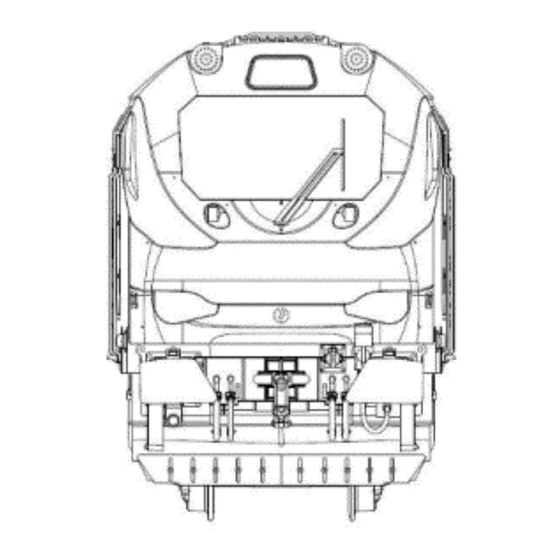
Dapol OO gauge class 68 locomotive
Thank you for purchasing this Dapol product. This information is applicable to all versions of this
locomotive.
•
The model can be controlled with a DCC decoder or by DC operation and is factory set
for DC operation.
•
The model is shipped with directional head and tail lamps and leading cab light 'ON'. It
is ready to run in DC mode or with a 2 function DCC decoder. Full operation and
selection of lighting functions in DC mode is described in section 4.
•
DCC decoder fitting instructions and description of DCC lighting is in section 5 and the DCC guide sheet.
1. Running in / First use:
have been designed with care to offer many years of service with minimal maintenance. However, we suggest that
before you operate your model for an extended time, you first run it in both directions at a low speed whilst checking
for correct operation. This operation can be performed in either DC or DCC (after fitting a decoder – see section 5)
Also, please check that you have the following items within the packaging (in addition to this sheet).
a) Dapol 'No Quibble' warranty sheet
b) DCC Guide sheet
2. Fitting accessories:
a.
Your model has been supplied fitted with one slotted and one unslotted valance. A spare valance has been
provided for use in case you wish to change the coupling set-up of your model. The fitted valances are a push
fit into the body and can be carefully pulled to remove. To re-fit, push the valance into position.
b. The NEM coupling can be pulled out from its pocket and the pocket can be removed entirely to allow an
unslotted valance to be fitted (or vice-versa)
3. Removing the body:
a. The body is held to the chassis by 4 clips, these are positioned adjacent to the bogie as shown above.
b. Two methods of body release can be used:
i. Carefully avoiding underframe detail, locate the inboard recesses moulded into the chassis (located near the
inboard wheels), using these, gently ease the body outwards whilst pulling up on the chassis. Repeat with the
remaining three clips.
ii.Using four offcut strips of thin plastic sheet, slide a strip between the body and chassis near the clip, slide towards
the clip until you feel resistance then work the strip between the clip and body. Repeat with the remaining three
clips until all four strips are in place the body can then be lifted off.
c.
The body will lift clear of the chassis once all clips are released. There is no need to be concerned about wires, as a
'plugless' connector has been used which will separate when the body is removed.
No special running in or initial lubrication is required, as our 'new generation' locomotives
All detail parts have been factory fitted to your locomotive,
Owners guide
Class 68 OO information sheet. V 1.0 17-12-2015
Advertisement

Related Manuals for DAPOL OO gauge class 68 locomotive


Summary of Contents for DAPOL OO gauge class 68 locomotive
- Page 1 Owners guide Dapol OO gauge class 68 locomotive Thank you for purchasing this Dapol product. This information is applicable to all versions of this locomotive. • The model can be controlled with a DCC decoder or by DC operation and is factory set for DC operation.
-
Page 2: Maintenance
Remove surplus oil using a lint free cloth. • Regularly check your model for build-up of dust or loose scenic materials around moving parts. 7. Spare parts: A range of spare parts are available from Dapol service centres. Class 68 OO information sheet. V 1.0 17-12-2015... - Page 3 (CV8 =4) will return the model to address 3. The lighting functions will no longer operate as shown above. Please refer to the paragraph ‘Restore class 68 settings’ overleaf. The decoder used is a Dapol Imperium and full programming information can be found on our website: www.dapol.com...
- Page 4 Please note that if moving functions within the range of F1-F3 additional changes are required. The decoder fitted to this model a Dapol Imperium. Full programming information can be found on our website: www.dapol.com.
- Page 5 Dapol OO gauge class 68 locomotive DCC Sound users guide. This guide is applicable to the Dapol factory sound fitted models. Due to design of the models lighting for ‘Push-Pull’ operation, please read this guide in full as some features may not operate in the manner you are used to.
- Page 6 Dapol OO gauge class 68 locomotive DCC Sound users guide. lighting functions appropriately for any of these scenarios, with the sound and lighting functions changing ends automatically as appropriate with no further intervention. F19 is used if the train is at the loco’s #1 end, and F20 if the train is at the #2 end (the model has #1 and #2 printed on the cab doors, just like the real loco’s).
- Page 7 Dapol OO gauge class 68 locomotive DCC Sound users guide. 2. To shorten the priming sequence, turn F1 off at any time during priming, wait for priming to stop, and then turn F1 back on. The engine will crank and start immediately.
- Page 8 Dapol OO gauge class 68 locomotive DCC Sound users guide. The brake severity can be set by CV 179 (0 minimum – 255 maximum) Driver’s door slam (F6) There are three different door slam sounds, one of which is played at random each time F6 is turned on.
- Page 9 Dapol OO gauge class 68 locomotive DCC Sound users guide. Electric Train Heat (ETH) (F15) When Class 68’s operate with electrically heated coaching stock the engine revs rise when the Electric Train Heat (ETH) is turned on. Turn F15 on to engage the ETH.
- Page 10 Dapol OO gauge class 68 Zimo Sound Decoder The latest release of the OO Gauge class 68 sound-fitted loco has a new sound project using the Zimo MS440 decoder. The sounds were recorded with the help of DRS at Gresty Bridge, and we are grateful to them for this assistance in this regard.
- Page 11 CV983: higher speeds - default value being 64. F9: ‘light engine’. When F9 is ON, the Inertia of the locomotive is reduced as appropriate for a locomotive that does not have a heavy train ‘on the hook’. The status of F9 ON or OFF also affects the sound of the flange squeal, the behaviour of the diesel engine ‘notching’, and is used to select the prototypical longer startup sequence if this is desired.
- Page 12 F22: Coach door slams F22 is ON, the sound of coach doors slamming will be heard. This sound will be heard until F22 is turned OFF, and can be played even with F1 OFF. CV680 can be used to alter the volume, the default value being 0 (maximum).
Need help?
Do you have a question about the OO gauge class 68 locomotive and is the answer not in the manual?
Questions and answers