ICP DAS USA tSH-700 Series Firmware Update
Hide thumbs
Also See for tSH-700 Series:
- User manual (47 pages) ,
- Firmware update (21 pages) ,
- Quick start manual (9 pages)
Advertisement
Quick Links
S
UPPORT
Models supported include tSH-722, tSH-732, tSH-725,
tSH-735, tSH-724, tSH-734, tSH-722i, tSH-732i, tSH-725i,
tSH-735i, tSH-724i and tSH-734i.
W
ARRANTY
All products manufactured by ICP DAS are warranted
against defective materials for a period of one year from
the date of delivery to the original purchaser.
W
ARNING
ICP DAS assumes no liability for damages consequent to
the use of this product. ICP DAS reserves the right to
change this manual at any time without notice. The
information furnished by ICP DAS is believed to be
accurate and reliable. However, no responsibility is
assumed by ICP DAS for its use, nor for any
infringements of patents or other rights of third parties
resulting from its use.
C
OPYRIGHT
Copyright © 2024 by ICP DAS. All rights are reserved.
T
RADEMARKS
Names are used for identification purposes only and
may be registered trademarks of their respective
companies.
C
U
ONTACT
S
If you have any questions, please feel free to contact us
via email at:
service@icpdas.com
tSH-700
Series
Firmware Update via Ethernet
Version: 1.4/Updated: Feb. 2024
Ch. 0. How to identify your tSH-700_RevB
type
Ch. 1. Setting up the tSH-700_RevB
Module
Ch. 2. Firmware Update Procedure
Ch. 3. Troubleshooting
Ch. 4. Additional Information
ICP DAS CO., LTD.
Website: http://www.icpdas.com
RevB /
RevB2
Advertisement

Subscribe to Our Youtube Channel
Related Manuals for ICP DAS USA tSH-700 Series


Summary of Contents for ICP DAS USA tSH-700 Series
- Page 1 RevB / tSH-700 RevB2 UPPORT Series Models supported include tSH-722, tSH-732, tSH-725, tSH-735, tSH-724, tSH-734, tSH-722i, tSH-732i, tSH-725i, Firmware Update via Ethernet tSH-735i, tSH-724i and tSH-734i. ARRANTY Version: 1.4/Updated: Feb. 2024 All products manufactured by ICP DAS are warranted against defective materials for a period of one year from Ch.
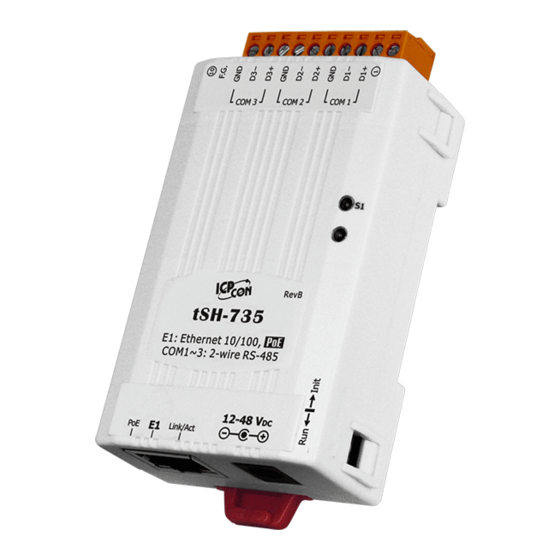
- Page 2 RevB / RevB2 0. How to identify your tSH-700 module Note: In this document, tSH-700_RevB will represent both the tSH-700 RevB and tSH-700 RevB2 modules. When your tSH-700_RevB series module needs a firmware update, please check the module name on the front panel that without “RevB” or “RevB2” are not applicable to this firmware update, as shown in the figure below: RevB / RevB2 Module Name: tSH-700...
- Page 3 _RevB Module 1. Setting up the tSH-700 Before updating the firmware, please ensure that the network settings for both your host computer and tSH-700_RevB modules are correctly configured, or the update procedures via the Ethernet network may not function correctly. Step 1: Connect the tSH-700_RevB to the same hub or the same sub-network as your Host PC, and attach a power supply to the tSH-700_RevB.
-
Page 4: Firmware Update Procedure
2. Firmware Update Procedure The firmware update can fail when the computer has multiple network interfaces (e.g., LAN and Wi-Fi). Therefore, enable only one network interface for updating the firmware, and temporarily turn off other network interfaces, firewalls, anti-virus software, VPN, VirtualBox, VMWare first. 2.1 tSH-700 Firmware Update RevB... - Page 5 Step 4: In the “Open” dialog box, select the firmware file (tSH700_RevB.dat) that will be used to update the module and then click the “Open” button. Download the Firmware File. Step 5: Assign a valid IP Address (can be different with the current IP) and the factory-default MAC Address for the tSH-700_RevB module.
- Page 6 Step 7: You are now ready to update the firmware. A command prompt window will appear to show the progress of the update. Waiting for a request from the tSH-700 module to begin updating the device Step 8: Set the tSH-700_RevB module to “Init Mode”.
- Page 7 Step 11: Once the update is complete (i.e., when the progress indicator reaches 100%), set to “Run Mode”. Step 12: Power-on reset the tSH-700_RevB module. Step 13: In the eSearch Utility, search for the tSH-700_RevB module again to verify that it is functioning correctly.
- Page 8 Step 16: A new password is required before the first login. Enter the default password “admin” in the “Current password” field , and enter the new password in both the “New password” and “Confirm new password” fields. Step 17: Verify that the firmware version and date details are correct. RevB tSH-700 Series Firmware Update via Ethernet (Ver.
-
Page 9: Remote Firmware Update
2.1.2 Remote Firmware Update In order to perform a Remote Firmware Update, use an application that allows an external system to be remotely controlled, such as TeamViewer, in order to create a connection between the local and the remote system. Note that all firmware update procedures need to be carried out on the remote system. - Page 10 Step 4: In the “Open” dialog box, select the firmware file (tSH700_RevB.dat) that will be used to update the module and then click the “Open” button. Download the Firmware File. Step 5: Assign a valid IP Address (can be different with the current IP) and the factory-default MAC Address for the tSH-700_RevB module.
- Page 11 Step 7: You are now ready to update the firmware. A command prompt window will appear to show the progress of the update. Waiting for a request from the tSH-700 module to begin updating the device Step 8: Open a web browser and enter the URL for the tSH-700_RevB in the address bar of the browser and log in to the web configuration pages.
- Page 12 Step 9: Click the “Network” tab to display the Network Settings page. Step 10: Click the “Update” button in the “Firmware update via Ethernet” section to start the update. RevB tSH-700 Series Firmware Update via Ethernet (Ver. 1.4/Feb. 2024) Page: 11...
- Page 13 Step 11: Confirm that the two MAC addresses (factory-default) listed in the Command Prompt window, “Waiting request from MAC x.x.x.x” “BOOTPREQ from MAC: x.x.x.x”, are the same, as indicated in the image below. If these addresses do not match, the update cannot proceed.
- Page 14 Step 16: A new password is required before the first login. Enter the default password “admin” in the “Current password” field , and enter the new password in both the “New password” and “Confirm new password” fields. Step 17: Verify that the version and date details for the firmware are correct. RevB tSH-700 Series Firmware Update via Ethernet (Ver.
-
Page 15: Troubleshooting
3. Troubleshooting 3.1 Firmware update in BOOTP mode If the module is not functioning correctly (e.g. there is no response to the search request, or if the system LED is always displayed as either off or on), please download a new firmware from the ICPDAS web site and then update the firmware for the module using the following procedure. - Page 16 Step 4: Right click on the name “BOOTP” and then select the “Firmware Update” item from the popup menu. Step 5: Refer to Steps 4 to 17 “Chapter 2-Firmware Update Procedure” for details of how to complete the update process. Note, the module will response with no IP address in the BOOTP mode.
- Page 17 Step 6: After updating the firmware, disable BOOTP mode from the eSearch utility. RevB tSH-700 Series Firmware Update via Ethernet (Ver. 1.4/Feb. 2024) Page: 16...
- Page 18 3.2 How to update Firmware when IP addresses of tSH-700_RevB and host PC are on different network segments? The IP address of tSH-700_RevB module and Host PC, and the network access point (without passing through a router/gateway) must be in the same subnet for firmware update. ...
- Page 19 Step 3: Select the “1: ON” option from the “DHCP:” drop-down menu and click the “OK” button. Step 4: Wait 2 seconds and then click the “Search Servers” button again to ensure the tSH-700_RevB is working well with new configuration. Step 5: Refer to “Chapter 2-Firmware Update Procedure”...
- Page 20 Method 2: Using “Manual configuration” to assigns an IP address to tSH-700_RevB series module. Follow the procedure described below: Step 1: Run the eSearch Utility to search for tSH-700_RevB modules Step 2: Double click the name of tSH-700_RevB to open the “Configure Server (UDP)”...
- Page 21 Step 5: Wait 2 seconds and then click the “Search Servers” button again to ensure the tSH-700_RevB is working well with new configuration. Step 6: Refer to “Chapter 2-Firmware Update Procedure” for details of how to complete the update process. RevB tSH-700 Series Firmware Update via Ethernet (Ver.
- Page 22 3.3 How to solve issues encountered during Firmware update Issue 1: If the update progress is stuck at 0% with no response. Solution: After completing the following steps, please Power-on reset the module. Step 1: Please make sure that the Init/Run Switch of the module is in the "Init" position.
- Page 23 Issue 3: When users fail to properly close the Command Prompt window during the Firmware update, it may result in the occupation of the Socket. Subsequently, when using eSearch to update Firmware, the following warning may appear. Solution: Please close the eSearch Utility and the Command Prompt window. Afterward, reopen the eSearch Utility and perform the update process again.
- Page 24 Steps 2: The module's default IP address is 192.168.255.1. Set your computer's IP address to something other than the module's setting, for example, 192.168.255.10. Steps 3: Please disable the firewall and antivirus software, and unplug all other network cables, leaving only the network cable connection between the tSH-700_RevB module and the computer. Note: If the tSH-700_RevB module is powered via PoE, the PoE switch should not be connected to the external network.
-
Page 25: Additional Information
4. Additional Information The code contained in the boot loader, which is used to update the firmware image, is not part of the firmware it-self. This means that the firmware can still be updated even if the built-in firmware has been corrupted or does not exist. If the firmware update fails, simply execute the update procedure again in BOOTP mode, as described in Chapter 3, and the update should be successful. - Page 26 Note 3: When updating the firmware, the factory-default MAC address is used rather than any user-defined MAC address. Thus, the MAC address (user-defined) displayed in the firmware update window may not be the one required. If this is the case, the factory-default MAC address should be manually entered into the MAC Address field, or the MAC address should be restored to the factory-default settings via the web configuration pages.
Need help?
Do you have a question about the tSH-700 Series and is the answer not in the manual?
Questions and answers