
Related Manuals for Bose Sub2


Summary of Contents for Bose Sub2
- Page 1 Sub2 Powered Bass Module Service Manual ©2021 Bose Corporation Reference Number 840917-SM REV 01...
-
Page 2: Table Of Contents
MAIN ASSEMBLY LIST, Sub2 Power Stand..................9-10 Figure 2. Sub2 Power Stand Exploded View ..................10 MAIN ASSEMBLY LIST, Sub2 I/O Panel Assy...................11-12 Figure 3. Sub2 I/O Panel Assy Exploded View ..................13 MAIN-I/O PCB PART LIST........................14-20 POWER-AMP PCB PART LIST......................21-28 DISASSEMBLY PROCEDURE......................29-32 Figure 4. -
Page 3: Safety Information
If it is not within the limits specified, there is the possibility of a shock hazard, and the unit must be repaired and rechecked before it is returned to the customer. CAUTION: The Bose Sub2 Powered Bass Module contains no user-serviceable parts. To prevent war- ranty infractions, refer servicing to warranty service stations or factory service. -
Page 4: Electrostatic Discharge Sensitive (Esds) Device Handling
WARRANTY The Bose Sub2 Powered Bass Module is covered by a limited 5-year transferable warranty. Units that fail within 90 days of sale should be replaced. PART LIST NOTES 1. -
Page 5: Product Description
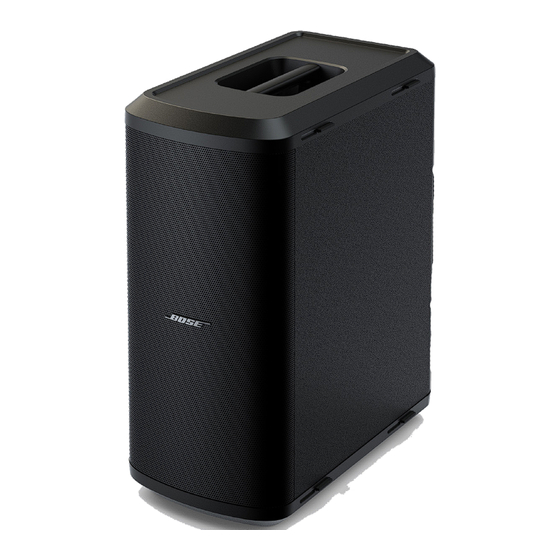
PRODUCT DESCRIPTION Sub2 is Powered Bass Module which includes one 10” x 18” Racetrack Woofer, built-in 1000W Amplifier and 2 input channels with line outputs. - Page 6 PRODUCT DESCRIPTION...
- Page 7 PRODUCT DESCRIPTION...
-
Page 8: Packaging Part List
Packaging Part List Sub2 Powered Bass Module (see Figure 1) Item Number Description Part Number Notes CARTON 857517-0010 GUIDE, QUICK START 853576-0010 GUIDE, SAFETY 853577-0010 SLIP COVER 856988-0110 CABLE, LINE CORD, IEC C13, NA 350745-0010 CABLE, LINE CORD, IEC C13, EU... -
Page 9: Main Assembly List, Sub2 Power Stand
Main Part List Sub2 (see Figure 2) Item Number Description Material Number Qty/Note LOGO GRILLE SUBASSY, BLACK L, SVCE 842805-011S SILICON SHEET_BLACK_ADHESIVE 3M9448A L EVA 38° ADHESIVE L350XW17XT1.0MM K GRILLE SUBASSY, SVCE 865145-011S GASKET EVA 38° ADHESIVE L230XW15XT1 K NON WOVEN SHEET_BLACK_ADHESIVE 3M 9 K... - Page 10 Main Part List Sub2 (see Figure 2) Item Number Description Material Number Qty/Note SILICON FEET BOTTOM 840826-0110 PC SHEET_ADHESIVE 3M 300LSE L 840861-0110 PC SHEET_ADHESIVE 3M 300LSE L 841678-0110 PC SHEET_ADHESIVE 3M 300LSE L 840862-0110 PRODUCT LABEL_PC SHEET_TRANSPARENT_ L 7 8 9 Sub2 Figure 2.
-
Page 11: Main Assembly List, Sub2 I/O Panel Assy
Main Part List Sub2 I/O Panel Assy (see Figure 3) Item Number Description Material Number Qty/Note SCREW M3.0XL9 0.5P BLUE ZINC+NYLOK K SHIELD COVER SECC NATUR COLOR K SCREW M3XL14 0.5P BLUE ZINC+HT K HEATSINK AMP CHI AL 6063 NATUR COLOR K... - Page 12 Main Part List Sub2 I/O Panel Assy (see Figure 3) Item Number Description Material Number Qty/Note GASKET_38 DEGREE_BLACK_ADHESIVE DS1 K IO PANEL AL1050 NATUR COLOR L SCREW M3XL10 0.5P_ZINC+NI L SCREW T3XL12 1.3P_ZINC+NI L VOLUME KNOB ABS 94V2 BLACK L 840887-0110 SCREW T3XL12 P1.058 ZINC+NI L...
- Page 13 I/O Panel Assy Exploded View Sub2 Figure 3. I/O Panel Assy Exploded View...
-
Page 14: Main-I/O Pcb Part List
MAIN-I/O PCB PARTS LIST Resistors Reference Designator Description Material Number Note R100 RES, THICK FILM, 0603, 0.1W, 1%, 10 OH 857326-0181 R103, R239, R244, R253, RES, THICK FILM, 0603, 0.1W, 1%, 100K 857326-0094 R259, R261 R133-R135, R146-R147, RES, THICK FILM, 0402, 0.063W, 1%, 390 857326-0063 R150-R151 R143... - Page 15 MAIN-I/O PCB PARTS LIST Resistors (continued) Reference Designator Description Material Number Note R237, R240, R243, R256, RES, THICK FILM, 0603, 0.1W, 1%, 10K 857326-0093 R260 R238, R252 RES, THICK FILM, 0402, 0.063W, 1%, 857326-0046 220K RES, THICK FILM, 0402, 0.063W, 1%, 857326-0027 1.2K R241, R258...
- Page 16 MAIN-I/O PCB PARTS LIST Resistors (continued) Reference Designator Description Material Number Note R77-R78, R81-R82, RES, THICK FILM, 0603, 0.1W, 1%, 470 857326-0154 R115-R116, R119-R120 R8, R11, R75, R84, R113, RES, THICK FILM, 0603, 0.1W, 1%, 47K 857326-0156 R121 RES, THICK FILM, 0603, 0.1W, 1%, 5.6K 857326-0166 Capacitors Reference Designator...
- Page 17 MAIN-I/O PCB PARTS LIST Capacitors (continued) Reference Designator Description Material Number Note CAP, X7R, 0603, 50V, 10%, 150pF, COMM 718875-151K1H CAP, X7R, 0402, 16V, 10%, 5600pF, 718866-562K1C COMM C58, C169, C208 CAP, C0G, 0402, 50V, 5%, 22pF, COMM 766718-220J1H C59-C60 CAP, C0G, 0402, 50V, 5%, 15pF, COMM 766718-150J1H C61, C67, C78, C84,...
- Page 18 MAIN-I/O PCB PARTS LIST Inductors Reference Designator Description Material Number Note FERRITE, BEAD, 0805, 2A, 220 OHM 739338-221 INDUCTOR, PWR, WW, SMT, 1.3A, 3.3uH 855985-3R3M , COMM L16, L22 INDUCTOR, WW, CM, 1206, 0.2A, 2200 855607-222 OHM, COMM L18-L20 INDUCTOR, POWER, SMT, 2.5A, 20%, 853388-220M 22uH, COMM L1-L12, L15...
- Page 19 MAIN-I/O PCB PARTS LIST Integrated Circuit Reference Designator Description Material Number Note U1, U4-U8 IC, OP AMP, DUAL, NJM4580E-TE2, 855786-01A2 SOP8, 90DEG IC, uC, ARM CORTEX-M0, 128KB, 786831-RBT6 32F072, 64LQFP IC, V-DETECT, 2.93V, APX809S-29, SOT- 856551-0010 IC, VREG, SW, BUCK, 2AD, ADJ, 62084, 791774-0020 WSON8 IC, DCDC CONV, BUCK, PWM, 1A, TSOT,...
- Page 20 MAIN-I/O PCB PARTS LIST Miscellaneous Reference Designator Description Material Number Note CONN, RECP, 2.54mm C, 28P, 2R, R, 847748-0028 SMT, ST, BL, Au CONN, HDR, 2.54mm C, 10P, 2R, P, TH, 847828-0010 RA, BLACK CONN, HDR, 1.5mm C, 8P, 1R, P, SMT, 847746-0080 ST, BEIGE CONN, RECP, 2mm C, 2P, 1R, R, SMT, ST...
-
Page 21: Power-Amp Pcb Part List
POWER-AMP PCB PARTS LIST Resistors Reference Designator Description Material Number Note R108 RES, THICK FILM, 0603, 0.1W, 1%, 30.9K 857326-0142 R109 RES, THICK FILM, 0603, 0.1W, 1%, 133K 857326-0104 R10X, R10Y, R11X, R11Y RES, THICK FILM, 0603, 0.1W, 1%, 22 857326-0130 R112, R143, R181 RES, THICK FILM, 0603, 0.1W, 1%, 4.7K... - Page 22 POWER-AMP PCB PARTS LIST Resistors (continued) Reference Designator Description Material Number Note R193-R194 RES, THICK FILM, 0603, 0.1W, 1%, 330K 857326-0145 R196, R198-R199 RES, THICK FILM, 0603, 0.1W, 1%, 470K 857326-0157 R19X, R19Y, R20X, RES, THICK FILM, 1206, 0.25W, 1%, 10K 857326-0196 R20Y, R21X, R21Y, R22X, R22Y...
- Page 23 POWER-AMP PCB PARTS LIST Resistors (continued) Reference Designator Description Material Number Note R34, R43, R59, R65, RES, THICK FILM, 0805, 0.125W, 5%, 4.7 857326-0194 R85, R90, R114, R121, R126, R130, R163, R190, R212, R247, R1X, R1Y R38, R42, R103, R127, JUMPER, CHIP, 0603 857326-0218 R195, R232-R234, R236,...
- Page 24 POWER-AMP PCB PARTS LIST Capacitors Reference Designator Description Material Number Note C103, C189 CAP, X7R, 0805, 100V, 10%, 0.033uF, 763872-333K2A COMM C106, C113 CAP, X7R, 0603, 100V, 10%, 220pF, 718875-221K2A COMM C108 CAP, X7R, 0603, 50V, 10%, 0.015uF, 718875-153K1H COMM C114 CAP, C0G, 0603, 50V, 5%, 100pF, COMM 780788-101J1H...
- Page 25 POWER-AMP PCB PARTS LIST Capacitors (continued) Reference Designator Description Material Number Note C48, C62, C64 CAP, X7R, HI VOLT, 0805, 630V, 10%, 852020-103K2J .01uF, COMM C49-C50 CAP, EL, SNAP-IN, 450V, 20%, 330uF 853707- 331M2WCC C52-C53, C120, C129, CAP, EL, POLYMER, SMT, 25V, 20%, 857020- C141 47uF, COMM...
- Page 26 POWER-AMP PCB PARTS LIST Diodes Reference Designator Description Material Number Note DIODE, BRIDGE RECTIFIER, 25A, 800V, 842301-0800 D19-D21, D24 DIODE, RECT, S-FAST, 400V, 10A, TPM- 855873-0400 R10G, SMPC DIODE, ZENER, 0.2W, 15V, 5%, SOD- 856094-15V0 323F D25-D26 DIODE, ZENER, 0.5W, 2.4V, 2%, SOD- 856111-02V4 123F DIODE, RECT, ULTRAFAST, 200V, 6A,...
- Page 27 POWER-AMP PCB PARTS LIST Transistors Reference Designator Description Material Number Note Q1, Q3, Q6, Q8, TRANSISTOR, MFET, N-CH, 600V, 18A, 849830-0020 Q10-Q11, Q13-Q14 DPAK Q12, Q18 TRANSISTOR, MFET, N-CH, 0.3A, 60V, 356154-0010 SOT-23 TRANSISTOR, MFET, P-CH, 4A, 30V, 357292-0020 SOT23 Q2, Q7, Q19-Q21, Q32 TRANSISTOR, PNP, 40V, 0.6A, SOT-23, 260354-001...
- Page 28 POWER-AMP PCB PARTS LIST Miscellaneous Reference Designator Description Material Number Note FUSE, 12A, 250V, SLO-BLO, 5x20mm, 317834-123B AXIAL INDUCTOR, POWER, SMT, 2.5A, 20%, 853388-220M 22uH, COMM L2, L7 INDUCTOR, CUSTOM, RADIAL, 85uH 852652-0010 L4-L6 INDUCTOR, CUSTOM, RADIAL, 15mm 852653-0010 HEIGHT, 8.5mH CONN, HDR, 3.96mm C, 2P, 1R, P, TH, 847740-0020 RA, WHITE...
-
Page 29: Disassembly Procedure
ESD damage. Be sure to use an approved and tested ESD strap that is properly grounded to your work bench before attempting disas- sembly or repair of the Sub2 Powered Bass Module. 1. I/O Panel Assy Removal 1.1 Remove the 14 screws securing the I/O Panel Assy as indicated in Figure 4. - Page 30 DISASSEMBLY PROCEDURE 2.4 Remove the 12 screws that secure the Shield cover of Power-Amp board as indicated in Figure 8 & Figure 9. Note: When installing the Shield cover, RTV need to be used to prevent buzz and vibration. Figure 8. Shield Cover Screws Removal 1 Figure 9.
- Page 31 DISASSEMBLY PROCEDURE 2.7 Remove the 10 screws that secure the Power-Amp board as indicated in Figure 12. 2.8 Remove the Heatsink from the PCBA. Re-assembly Note: The old power amp IC thermal grease must be removed with isopropyl alcohol and the new thermal grease, GAP FILLER, THERMAL, part Figure 12.
- Page 32 DISASSEMBLY PROCEDURE 4. Woofer Removal 1 2 3 4 4.1 The PC sheets are secured with Pressure Sensitive Adhesive - use a spudger, lift the PC sheets up and grasp and pull them off. Figure 16 (left). Re-assembly Note: Be careful to not cause cosmetic damage to the unit.
-
Page 33: Test Procedure
TEST PROCEDURE Required Equipment: 1. Bose L1 Pro32 Power Stand, Line Array and Sub1/Sub2 bass module (UUT) 2. Audio Signal Generator, Audio Precision ATS-1 or equivalent 3. Multimeter 4. Cables listed below: - XLR audio cable - 1/4 inch TRS audio cable... - Page 34 G1/G2. 2.6 Apply a balanced, 100mV (Sub1) or 160mV (Sub2), 40 Hz audio signal to the Line In 1 1/4” TRS audio input (2). Sweep the input frequency between 40 Hz and 250 Hz, turning volume knob between minimum to mid-position.
- Page 35 TEST PROCEDURE 5. Button Extended Functions Test 5.1 Perform the button tests below to verify extended functionality of the buttons/controls. Product I/O User Trigger User Action Control Power ① Press “Off/On”>”On/Off” Power on/off Press and hold 10 seconds All LED flash 1 time. DUT reboot and reset all settings to default value Line IN...
- Page 36 TEST PROCEDURE Button Extended Functions Test (continued): Product I/O User Trigger User Action Control SubMatch Use SubMatch cable Enable another product to pow- connect SubMatch THRU er on and output audio signal. THRU ⑪ port and another product’s G1/G2 SubMatch In port SubMatch Use SubMatch cable con- Enable G1/G2 to power on and...
-
Page 37: Hi-Pot Test
HI-POT TEST 1. Hi-Pot Test Procedure THIS IS A MANDATORY TEST 1.1 Connect the positive side (hot) of the Hi-Pot tester to both terminals of the AC mains CAUTION - All units that are disassembled as input. part of a repair MUST be Hi-Pot tested before being returned to the customer. -
Page 38: Software Update
Microsoft Edge products is not compatible with Thunderbolt 3 cables. Google Chrome, Mozilla Firefox On a computer, open a web browser and go to btu.bose.com. Note: Not compatible with Internet Explorer or Safari. Click Download to download the Bose Updater. - Page 39 SOFTWARE UPDATE If your product needs a software update, your screen will read, There’s an update available for your product! Click Update Now. Note: Do not unplug or power off your product while the update is in progress. 10. Once the update is complete, your screen will read, Your product is now up-to-date!. English •...
-
Page 40: Service Manual Revision History
SERVICE MANUAL REVISION HISTORY Revision Changes Driven Pages (s) Date Description of Changes Level Affected 1/9/2021 Document released at revision 00 Initial Release 2/17/2022 Add EPE Foam Back &Front Page 8... - Page 41 Bose Corporation 100 The Mountain Road Framingham Massachusetts USA 01701 Reference Number 840917-SM REV 01, 2/2022 http://serviceops.bose.com...
Need help?
Do you have a question about the Sub2 and is the answer not in the manual?
Questions and answers