Dorma PORTEO Manual
Hide thumbs
Also See for PORTEO:
- Quick start manual (2 pages) ,
- Technical documentation manual (9 pages) ,
- Assembly instruction manual (20 pages)

Related Manuals for Dorma PORTEO


Summary of Contents for Dorma PORTEO
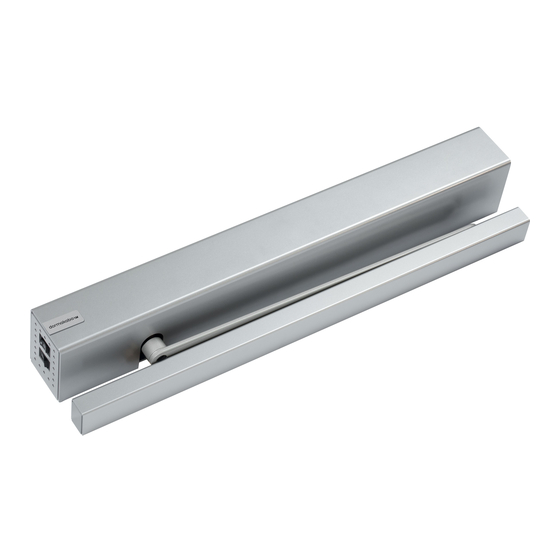
- Page 1 DORMA PORTEO PORTEO Manual Product information Pages 1 - 36 Read the manual before the assembly carefully! Follow the instructions in the documents! www.dorma.com/porteo...
- Page 2 - Function - Adjustments Approach to installation and commissioning page 12 Determine way of mounting, then mount system and commission PORTEO door assistant Lintel mounting with slide channel - Lintel mounting on the hinge side (pull-side), left-handed version Installation drawings...
-
Page 3: Table Of Contents
DORMA PORTEO Contents - Operating type PowerMotion - Operating type PermanentOpen PermanentOpen with flip-flop function (pushbutton -optional) Operating type/function PowerLess - Operating type/function Push&Go - Obstacle recognition - Vandalism mode - Latching action Adjustments page 22 - 23 - Adjustment of operating type... - Page 4 PORTEO PORTEO Service-Hotline Do you have any question, do you need help? In case you have technical questions or require advice regarding the PORTEO door assistant, please call our PORTEO Service-Hotline! Our competent staff will help you in every respect.
- Page 5 Main closing edge at the different closing edges. Required protection according to DIN 18650 for PORTEO door assistant "low energy" The German industrial standard DIN 18650 has different requirements regarding the protection of the above-mentioned danger spots.
- Page 6 Limitation of liability PORTEO door assistant must only be applied according to its intended application. The DORMA GmbH + Co. KG does not accept any liability for damages resulting from unauthorised modifications of the system. 5. Documentation Important instructions for the safe installation of the system.
- Page 7 In order to reduce this noise level, further action should be taken. For example cellular rubber strips or self-adhesive rubber cushions should be attached to the closing edges. 7. Improper application PORTEO door assistant is not suitable for application on fire and smoke doors and in external areas. Disposal PORTEO door assistant may not be disposed with the domestic refuse.
- Page 8 DORMA PORTEO Standard scope of delivery 79 0 Use the enclosed tools to adjust the potentiometers. 2x 2x Mounting plate Fixing screw Documentation (without illustration) Drive unit Fixing screw - Installation drawings Cover Slide channel - Extended documentation Cover Cover of slide channel...
- Page 9 - Allen key , 5 mm (Scope of delivery) - Potentiometer-tool (Scope of delivery) - Power drill Drill bit, depending on surface Authorised DORMA specialist dealers offer competent advice and the required accessories for the PORTEO door assistant. GB 09...
- Page 10 Example 1 - Lintel mounting on opposite hinge side (push side) - Left-handed design (right-handed version is laterally reversed) PORTEO door assistant with slide channel (standard) A rack & pinion arm has to be applied on the hinge side when it comes to lintel depths of more than 30 mm.
- Page 11 Active activators are for example pushbuttons or door handles while automatic activators are radar motion detectors or sensors. Settings/Adjustments The control unit of the PORTEO door assistant requires the following parameter settings for control-internal operations: - swing direction -left or right...
- Page 12 Lintel mounting with slide channel (standard). Door leaf mounting with slide channel Lintel depth mounting. with projecting arm (option). 3. Following the installation, commission the PORTEO door assistant. Betriebsanleitung Either with standard commissioning , see operating instructions on page 14 and 15...
- Page 13 DORMA PORTEO Requirements for standard commissioning Basic settings basic settings offer base values for these settings: - lintel mounting - with slide channel - on the hinge side (pull side) m a x . - door weight of up to 60 kg - door width of up to 1,000 mm m a x .
- Page 14 DORMA PORTEO Standard commissioning Requirements · PORTEO door assistant has been installed. · The door can easily be moved by hand. · Perform the following steps of the standard commissioning one after the other. · The (visual) acknowledgement is made via the light indicator (LED).
- Page 15 The LED (green) emits permanent light. max. 110° Following the learning cycle, the PORTEO door assistant is ready for operation. Now you can perform further adjustments like speed, hold-open time or adjustments regarding the optional accessories like for example the electric strike, see...
- Page 16 You can stop and restart this procedure at any time by simply switching off the system. Requirements - The PORTEO door assistant has been installed. - The door can easily be moved by hand. The stored settings can be "overwritten" by a new commissioning procedure.
- Page 17 DORMA PORTEO Extended commissioning Connect power plug. Set power switch to "0N" position. Set program switch to "OFF" position (central position). The LED (green) blinks. Determination of swing direction: Service pushbutton - Open door by approximately 5°. The LED (green) blinks.
- Page 18 DORMA PORTEO Extended commissioning Determination of swing direction: Service pushbutton - Press service key, until the door starts moving (approx. 3 sec.). The LED (green) emits a permanent light for 3 sec., then it blinks During this procedure the control unit determines and stores the swing direction of the door.
- Page 19 10 sec. 10 sec. signal. Following the commissioning and learning cycle, the PORTEO door assistant is ready for operation. The operating instructions, to follow. For adjustments like speed, hold-open time or adjustments regarding the optional accessories like for example the electric strike, see...
- Page 20 Program switch in "O" (OFF) position When in "0" position: - The electric functions of the PORTEO door assistant are switched off. PORTEO door assistant does not have a function The door can be accessed manually Either via door handle or key Program switch in "I"...
-
Page 21: Operating Type/Function Powerless
, in order to relieve the obstacle. After a waiting period the door tries to close again. This procedure is continued so long until the obstacle is eliminated. Vandalism mode PORTEO door assistant has a vandalism mode. In case the door is pressed against its original driving direction during an opening or closing cycle, the gear is disabled (the door can be operated manually). -
Page 22: Adjustments
DORMA PORTEO Adjustments = PowerLess = Speed = Hold-open time = Wall blanking = Delayed opening for locking mechanism = Service pushbutton = Light emitting diode (LED, green) = DIP switch PowerLess Position Use the enclosed tool (potentiometer tool) to adjust the potentiometers. -
Page 23: Adjustment Of Hold-Open Time
DORMA PORTEO Adjustments Adjust hold-open time Set program switch in position "ON" Adjust the desired hold-open time via potentiometer 2 The hold-open time is adjustable for a period from approx. 5 sec. to 30 sec. = 5 sec. hold-open time = 30 sec. -
Page 24: Connection Diagram For Connection Unit
DORMA PORTEO Connection diagram for connection unit + 24 V DC Electromechanical locking device potential-free changeover contact Not assigned Power supply for 0 V DC external accessories 24 V DC max. 300 mA + 24 V DC e.g. locking device 0 V DC Activator (e.g. -
Page 25: Connection Diagram For Electric Strike (Optional)
DORMA PORTEO Connection diagram: electric strike ip-switch A to "ON" Set DIP switches "B" "C" "D" ays to "OFF" position Adjust desired delayed opening for locking mechanism 0.2 sec. to 3 sec. Locking device (fail-secure type) with integrated 24 V DC power supply... -
Page 26: Direct Power Supply, Straight Out Of The Wall (Optional)
(installation of cord by others). Unscrew the cables of the power cord before starting with the installation. Install PORTEO. Put the cable into the intended "slot" during the installation. 1 7 9 0 5 Fit connection bayonets. -
Page 27: Accessories (Optional)
DORMA PORTEO Accessories Mounting plates, 30 mm and 40 mm For mounting of slide channel at door frames that are not suitable for direct mounting. Angle bracket For installation of slide channel on opposite hinge side (push side) when it comes to door frames with deep lintel. Safety sensors (optional). - Page 28 In this case the PORTEO door assistant has to be equipped with another connection unit, the DORMA Comfort Board Please contact your DORMA specialist dealer for further information. Manual release switch DORMA system 55 (option) + 24 V DC 0 V DC...
-
Page 29: Hand-Held Transmitter Rc-T
) is installed in the provided slot The LED flashes 30 seconds. of the PORTEO door assistant Then there is a short permanent light interval (approx. 3 sec.); press a button of the hand- Functions held transmitter while the permanent light is... -
Page 30: Commissioning, Care, Maintenance
Safekeeping of the properly filled-out checklist according to our specifications for at least 1 year by the facility operator. Checklist (start-up test, maintenance, regular inspections) for PORTEO door assistant according to DIN 18650-2, paragraph 5.1-5.4 Proper installation according to the instructions of the manufacturer. -
Page 31: Troubleshooting Instructions
DORMA PORTEO Troubleshooting instructions Malfunction Possible cause Remedy The LED light indicator No power supply. Switch on power switch. is off. Loose cable connections. Connect cable connections The door does not thoroughly. respond. Damaged cable. Replace cable. The power plug is not connected. - Page 32 DORMA PORTEO Troubleshooting instructions Remedy Malfunction Possible cause The electric strike does Program switch in position "II" Set program switch in position "I" not work. PermanentOpen General malfunctions. Reset system. 1. Program switch to "0" position. 2. Program switch to desired mode.
- Page 33 DORMA PORTEO Notizen notes nota s note notas Notizen notes nota s note notas...
- Page 34 DORMA PORTEO Notizen notes nota s note notas Notizen notes nota s note notas...
- Page 35 DORMA PORTEO Notizen notes nota s note notas Notizen notes nota s note notas...
- Page 36 DORMA PORTEO...
Need help?
Do you have a question about the PORTEO and is the answer not in the manual?
Questions and answers