Table of Contents
Advertisement
Quick Links
Download this manual
See also:
Operator's Manual
Advertisement
Chapters
Table of Contents

Related Manuals for THOMSON MEC 320 - GENSET CONTROLLER


Summary of Contents for THOMSON MEC 320 - GENSET CONTROLLER
- Page 1 MEC 320 GENSET CONTROLLER OPERATING MANUAL SOFTWARE VERSION 2.33.X PM079 Rev 0 07/06/08 9087A – 198 Street, Langley, BC Canada V1M 3B1 Telephone (604) 888-0110 Telefax (604) 888-3381 E-Mail: info@thomsontechnology.com www.thomsontechnology.com...
-
Page 3: Table Of Contents
YPE OF PRODUCT ......................7 UTILITY SOFTWARE WARNING FUNCTIONAL DESCRIPTIONS....................8 ..........................8 TANDARD FUNCTIONS ............................9 PPLICATIONS ............................15 LOWCHARTS ............................26 EQUENCES DISPLAY UNIT AND MENU STRUCTURE................35 ............................35 ISPLAY UNIT ..........................39 ENU STRUCTURE ..........................46 ODE OVERVIEW ..........................47 ODE SELECTION ............................48 ASSWORD ADDITIONAL FUNCTIONS......................50 ..........................50 HORT TIME PARALLEL .......................51... -
Page 4: About This Document
This Reference Handbook is divided into chapters and in order to make the structure of the document simple and easy to use, each chapter will begin from the top of a new page. The following will outline the contents of each of the chapters. - Page 5 This chapter describes the additional functions of the unit. Procedure for parameter setup This chapter deals with the procedure to be followed, when the parameters are set up or changed. By use of various illustrations this chapter will guide the user through the procedure for parameter setup step by step.
-
Page 6: Warnings And Legal Information
THOMSON TECHNOLOGY takes no responsibility for installation or operation of the generator set. If there is any doubt about how to install or operate the generator set controlled by the unit, the company responsible for the installation or the operation of the set must be contacted. -
Page 7: General Product Information
The MEC 320 is part of the THOMSON TECHNOLOGY product family. The concept of the MEC 320 is to offer a cost-effective solution to gen-set builders, who need a flexible generator protection and control unit for medium to large gen-set applications. Being part of the THOMSON TECHNOLOGY product family, the standard functions can be supplemented with a variety of optional functions. -
Page 8: Functional Descriptions
MEC 320 GENSET CONTROLLER 4. Functional descriptions This chapter includes functional descriptions of standard functions as well as illustrations of the relevant application types. Flowcharts and single-line diagrams will be used in order to simplify the information. Standard functions In the following paragraphs the standard functions are listed. -
Page 9: Applications
Auto mode description Back synchronizing ON (Closed Transition) The purpose of the load take over mode is to transfer the load imported from the mains to the gen-set for operation on generator supply only. When the start command is given, the gen-set will start and synchronize the generator breaker to the mains. - Page 10 Back synchronizing OFF (Open Transition) When the start command is given, the gen-set will start. When the frequency and voltage is OK, the mains breaker is opened and the generator breaker is closed. Now the generator supplies the load, until the stop command is given.
- Page 11 Auto mode description The unit automatically starts the gen-set and switches to generator supply at a mains failure after an adjustable delay time. It is possible to adjust the unit to change to gen-set operation in two different ways. 1. The mains breaker will be opened at gen-set start-up.
- Page 12 Auto mode description The unit automatically starts the gen-set and switches to generator supply at a mains failure after an adjustable delay time. It is possible to adjust the unit to change to gen-set operation in two different ways: 1. The mains breaker will be opened at gen-set start-up.
- Page 13 General semi-auto mode description The unit can be operated in semi-automatic mode. Semi-auto means that the unit will not initiate any sequences automatically, as is the case with the auto mode. It will only initiate sequences, if external signals are given.
- Page 14 The test mode function is activated by selecting test with the MODE push-button on the display or by activating a digital input, if one of them is configured to ‘test’. The test mode will only test synchronizing, if the ‘Sync. to mains’ function is enabled. If this is the case, the gen-set will start, and the unit will synchronize and close the generator breaker to let the gen-set run in parallel, until the test time expires.
-
Page 15: Flowcharts
If the digital inputs are used to change the mode, then it is important to know that the input configured to block mode is a constant signal. So, when it is ON the unit is in a blocked state, and when it is OFF, it returns to the mode it was in before block mode was selected. - Page 16 MEC 320 GENSET CONTROLLER Mode shift Start Mode shift enabled Load take over and AMF mains failure initiate AMF sequence initiate mains mains OK timer MB close continue in return timed out sequence selected mode sequence PM079 Rev 0 07/06/08...
- Page 17 MEC 320 GENSET CONTROLLER MB open sequence Start MB closed load take over mains failure deload MB load = 0 load too high alarm open MB alarm ' MB MB opened open failure' PM079 Rev 0 07/06/08 Thomson Technology...
- Page 18 MEC 320 GENSET CONTROLLER GB open sequence Start stop conditions is GB closed failclass Soft open shutdown deload DG load< open set ramp down point timer expired open GB GB opened Alarm PM079 Rev 0 07/06/08 Thomson Technology...
- Page 19 MEC 320 GENSET CONTROLLER Stop sequence Start stop conditio ns OK GB open seq OK AUTO mode cooldown timer run run coil stop relay deactivate activate stop ' stop' relay relay genset alarm stopped PM079 Rev 0 07/06/08 Thomson Technology...
- Page 20 MEC 320 GENSET CONTROLLER Start sequence Start start condition start prepare timer Start relay ON start relay timer genset started timeout run feedback off relay ON Alarm detected stop relay timer f/U OK timed out max start ready to close...
- Page 21 MEC 320 GENSET CONTROLLER MB close sequence Start is MB open voltage on mains/bus voltage on gen GB closed direct close OK GB open back sync ON sequence sync timer alarm sync. alarm GB open sync MB runout failure failure...
- Page 22 MEC 320 GENSET CONTROLLER GB close sequence Start is GB open Start seq OK single DG application voltage on busbar island mode All GBs OFF voltage on bus MB close TB Present TB open MB open direct closing Sync GB...
- Page 23 MEC 320 GENSET CONTROLLER Load take over Start Activate start input start sequence GB close sequence Mains load ramp-up = 0 kW genset load MB open genset sequence operation deactivate start input MB close GB open stop sequence sequence sequence...
- Page 24 MEC 320 GENSET CONTROLLER Automatic Mains Failure Start mains failure #6595: start eng+open MB open MB start sequence start sequence open MB GB close GB close sequence sequence mains ok MB close time out sequence PM079 Rev 0 07/06/08 Thomson Technology...
- Page 25 MEC 320 GENSET CONTROLLER Test sequence Start select test mode start sequence test timer timer run out engine running stop sequence freq/voltage OK engine stopped Sync of GB allowed return to running mode, menu 6544 sync GB ramp up to P...
-
Page 26: Sequences
These sequences are automatically initiated if the auto mode is selected, or if the commands are selected in the semi-auto mode. In the semi-auto mode the selected sequence is the only sequence initiated (e.g. press the START push-button: The engine will start, but no subsequent synchronizing is initiated). - Page 27 As soon as the gen-set is running, no matter if the gen-set is started based on the primary or secondary feedback, the running detection will be made based on all 4 types.
- Page 28 MEC 320 GENSET CONTROLLER Running feedback error: Run coil Start prepare Crank Run coil Start attempts Primary Running feedback Secondary Running feedback Engine running Alarm Alarm PM079 Rev 0 07/06/08 Thomson Technology...
- Page 29 It is not possible to change the running mode to ‘block’ as long as the gen-set is running. If the tacho input is to be used to remove the starter, it has to be set up in menu 6161. If the digital input is to be used as running feedback, then terminal 115 has to be used.
- Page 30 MEC 320 GENSET CONTROLLER Stop sequence The drawings illustrate the stop sequence. Stop sequence/RUN coil Cooling-down time COOL Run coil Running feedback Stop sequence/STOP coil Cooling-down time Stop coil Running feedback PM079 Rev 0 07/06/08 Thomson Technology...
- Page 31 A stop failure alarm will occur, if the running feedback or the generator voltage and frequency are still active. The stop failure timer is adjusted in 6220 Stop failure . Output A (OA) and output B (OB) in this menu indicate the relay output(s) that will be activated at a stop failure alarm.
- Page 32 MEC 320 GENSET CONTROLLER Before closing the breakers it must be checked that the voltage and frequency are OK. The limits are adjusted in 2040 Sync. blackout . MEC 320 without back Synchronization: The GB can only be closed, if the mains breaker is open.
- Page 33 Mains OK MB On GB On Gen start seq Gen stop seq Gen running Gen f/U OK Mains failure Mains OK detected The breaker sequences react depending on the breaker positions and the frequency/voltage measurements. PM079 Rev 0 07/06/08 Thomson Technology...
- Page 34 MEC 320 GENSET CONTROLLER The conditions for the ON and OFF sequences are described in the table below: Conditions for breaker operations Sequence Condition GB ON, direct closing Running feedback Generator frequency/voltage OK MB open MB ON, direct closing Mains frequency/voltage OK...
-
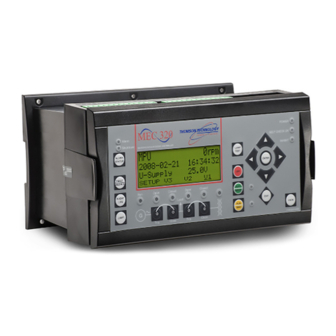
Page 35: Display Unit And Menu Structure
Display unit The display has 4 different lines, each with 20 characters, and holds a number of push-button functions. Display dimensions are H x W = 115 x 220 mm (4.528” x 9.055”). - Page 36 MEC 320 GENSET CONTROLLER The push-buttons are placed as follows: ALARM STATUS: Shifts the display three lower lines to show the alarm list. RESET: Reset alarms on the controller. EVENT LOG: Shifts the display three lower lines to show the event and alarm list.
- Page 37 MEC 320 GENSET CONTROLLER LED functions The display unit holds 10 LED functions. The colour is green or red or a combination in different situations. Alarm/ShutDown: LED flashing indicates that unacknowledged alarms are present. LED fixed light indicates that ALL alarms are acknowledged.
- Page 38 MEC 320 GENSET CONTROLLER The display LEDs are indicating as follows: Alarm/Shutdown: Flashing: Unacknowledged alarms present. Fixed: Acknowledged alarms present. Power: Indicates auxiliary supply ON. Self check OK: Indicates self check OK. Alarm inh.: Indicates alarm inhibit active. Auto Mode.
-
Page 39: Menu Structure
Changing of parameter settings is password protected. Entry window When the unit is powered up, an entry window appears. The entry window is the turning point in the menu structure and as such the gateway to the other menus. It can always be reached by pressing the EXIT push-button 3 times. - Page 40 MEC 320 GENSET CONTROLLER View menu The view menus (V1, V2 and V3) are the most commonly used menus of the unit. First display line Second and third display line Operational status or measurements Measurements relating to operational status Fourth display line Selection of setup and view menus In the view menus various measured values are on display.
- Page 41 The selectable values and measurements are presented in the table on page 44 in this handbook. If the text ‘no text’ is selected in all 3 lines in a window, it will not be displayed. This is to get a continuous displaying, if a window is not to be used.
- Page 42 Line 2 and line 3 show measurements. * The default window is automatically selected after the generator breaker closure when the gen-set is in normal operation, e.g. fixed power mode after the ramping up. PM079 Rev 0 07/06/08...
- Page 43 MEC 320 GENSET CONTROLLER View menu example The following is an example of a configured view menu system. In this example 4 of 15 windows have been configured in view 1. ML 2- AGC V. 2.10.0 MANUAL 150A 440V MEC 320...
- Page 44 MEC 320 GENSET CONTROLLER Setup menu The setup menu system is used for parameter setup of the unit, and if the user needs detailed information that is not available in the view menu system. So, this menu can be used for both daily use and setup purposes.
- Page 45 SYNC REG BIN AIN OUT GEN MAINS COMM PM Setup example The following example illustrates how a specific setting is changed in the setup menu. In this case Reverse power is the selected parameter. PM079 Rev 0 07/06/08 Thomson Technology...
-
Page 46: Mode Overview
In auto mode the unit will operate automatically, and the operator cannot initiate any sequences manually. Semi-auto In semi-auto mode the operator has to initiate all sequences. This can be done via the push- button functions, modbus commands or digital inputs. When started in semi-automatic mode, the gen-set will run at nominal values. -
Page 47: Mode Selection
MEC 320 GENSET CONTROLLER Block When the block mode is selected, the unit is not able to initiate any sequences, e.g. the start sequence. Block mode must be selected, when maintenance work is carried out on the gen- set. Mode selection The following drawings illustrate how the mode selection is carried out. -
Page 48: Password
A parameter cannot be entered with a too low ranking password. But the settings can be displayed without password entry. Each parameter can be protected at a specific password level. To do so, the PC utility software must be used. Enter the parameter to be configured and select the correct password level. - Page 49 Parameter access To get access to adjust the parameters, the password level must be entered: If the password level is not entered, it is not possible to enter the parameters. The customer password can be changed in menu 9116 page 115.
-
Page 50: Additional Functions
This chapter describes the additional functions. Short time parallel The purpose of the short time parallel function is to be able to define a maximum paralleling time between the generator and the mains supply. The function is typically used, if there are local requirements to maximum allowed paralleling time. -
Page 51: Time Dependent Start/Stop
Auto mode must be activated for this function. Up to 8 commands can be used for either start or stop. The settings are set up through the PC utility software. Each command can be set for the following time periods: Individual days (MO, TU, WE, TH, FR, SA, SU) •... - Page 52 LIMIT Start increase The gen-set is derated when the control value is lower than the set point (in the example above the control value is an mA signal). The derate characteristic is selected in 6260 Pnom derate . Setting OFF:...
-
Page 53: Fail Class
MEC 320 GENSET CONTROLLER Fail class All activated alarms must be configured with a fail class. The fail classes define the category of the alarms and the subsequent alarm action. Six different fail classes can be used. The tables below illustrate the action of each fail class when the engine is running or stopped. -
Page 54: Service Timers
If the measured value on the input is outside the normal dynamic area of the input, it will be detected, as if the wire has made a short circuit or a break. An alarm with a configurable fail class will be activated. - Page 55 MEC 320 GENSET CONTROLLER Principle The illustration below shows that when the wire of the input breaks, the measured value will drop to zero. Then the alarm will occur. Input signal (mA, ° C, b, %) Wire failure Upper failure...
-
Page 56: Vdo Inputs
<200 Alarm situation If the VDO input is used as a level switch, then be aware that no voltage must be connected to the input. If any voltage is applied to the VDO inputs, then it will be damaged. Refer to the Application Notes for further wiring information. - Page 57 >1.7k Alarm situation If the VDO input is used as a level switch, then be aware that no voltage must be connected to the input. If any voltage is applied to the VDO inputs, then it will be damaged. Refer to the Application Notes for further wiring information.
- Page 58 The configurable type is configurable with 8 points. VDO usage The VDO inputs are used as alarm inputs and can be configured in the following menus: VDO input 104: Lubricating oil pressure – alarm settings in menus 4170/4180. VDO input 105: Cooling water temperature – alarm settings in menus 4190/4200.
-
Page 59: Language Selection
The 8 curve settings for the configurable VDO inputs cannot be changed in the display, but only in the PC utility software. The alarm settings can be changed both in the display and in the PC utility software. In the PC utility software the configurable inputs are adjusted in this dialog box: Adjust the resistance of the VDO sensor at the specific measuring value. - Page 60 In the PC utility software the language is configured in the Translations menu. Activate the menu by pressing the Translations icon (see below): All configurable entries are indicated in the left side column. The list can be scrolled with page DOWN/UP.
- Page 61 The symbol ‘#####’ indicates the measured value (in this case the actual RPM). There is a maximum of 20 characters/text. The symbol ##### is included and will in this case use up 5 characters. It is not possible to change the number of characters in the measurement symbol (#####).
-
Page 62: Texts In Status Line
MEC 320 GENSET CONTROLLER Translation status To give an overview of the translated menus, a status indication can be given for each parameter. The check mark is green, and the cross is red. Symbols The following symbols can be used for this function: “... - Page 63 Idle run If the ‘Idle run’ function is active, this info. will appear to inform the user that the gen- set will not stop, until a timer has expired. Idle run ###.#min. If the timers in the ‘Idle run’...
- Page 64 Volt./freq. OK in ###s As soon as the voltage and frequency on the gen-set are OK, this text is shown until it is allowed operate generator breaker. Cooling down ###s When the cooling down period is started, this info.
-
Page 65: Service Menu
The purpose of the service menu is to give information about the present operating condition of the gen-set. The service menu is entered using the ‘JUMP’ push-button (9120 Service menu) . Use the service menu for easy trouble shooting in connection with the event log (see page 35). Entry window The entry shows the possible selections in the service menu. -
Page 66: Event Log
MEC 320 GENSET CONTROLLER Event log The event log holds up to 150 events, and they can be viewed in the display or in the PC utility software. When more than 150 events have occurred, each new event will overwrite the oldest event following the ‘first in –... -
Page 67: Counters
Counters for various values are included, and some of these can be adjusted if necessary, for instance if the unit is installed on an existing gen-set or a new circuit breaker has been installed. The table shows the adjustable values and their function:... -
Page 68: Procedure For Parameter Setup
MEC 320 GENSET CONTROLLER 7. Procedure for parameter setup This chapter deals with the procedure to be followed when the parameters of the unit are set up from the initial point of finding the individual parameter description in this handbook to the actual setup. -
Page 69: Parameter Descriptions
The third and fourth columns indicate the minimum/maximum set point available for this setting. The sixth column indicates the default set point of the unit from the factory. When it is necessary, additional information will be supplied after the table in order to make the individual parameter descriptions as informative as possible. -
Page 70: Parameter List
Small differences due to the character of the parameters may exist between the individual tables. It is also possible to configure the parameters by using the PC utility software. It will be possible to make the same configurations as described above. -
Page 71: Overview List
6040 Transformer bus. p.86 6050 Engine type p.86 Regulation 6060 Gen-set modes p.87 2510 Frequency controller p.76 6070 Date and time (internal clock) setting p.87 2520 Power controller p.76 6080 Counters p.87 2530 Power ramp up p.76 6090 Service timer p.87... -
Page 72: Protection
MEC 320 GENSET CONTROLLER Protection 1010 Reverse power Setting Min. Max. Third Factory setting setting setting setting 1011 Reverse power Set point -50.0% 0.0% -5.0% 1012 Reverse power Timer 0.1 s 100.0 s 10.0 s 1013 Reverse power Relay output A... -
Page 73: Control
Example: and U = 50 Hertz and 400 volts. With factory settings the breaker is able to close, if the frequency is between 47 and 53 Hertz and the voltage is between 380 and 420 volts. PM079 Rev 0 07/06/08... -
Page 74: 2070 Gb General Failure
R0 (none) dependent R0 (none) The general failure alarms cannot be disabled. 2090 Breaker failure alarms The fail class of the breaker open and close failure alarms can be adjusted in this menu. Setting Min. setting Max. setting Factory setting... -
Page 75: 2120 Breaker Sequence
MEC 320 GENSET CONTROLLER 2120 Breaker sequence Setting Min. setting Max. setting Factory setting 2121 Breaker seq. Break Close GB Close GB+TB Close GB 2122 Breaker seq. Timer 0.0 s 999.0 s 5.0 s 2123 Breaker seq. Run 90 0 RPM... -
Page 76: 2510 Frequency Controller
The time duration of this point is determined by the delay time setting. If the delay function is not needed, set this time to 0. Power % settings relate to nominal generator power. -
Page 77: 2640 Relay Control
MEC 320 GENSET CONTROLLER 2640 Relay control Setting Min. setting Max. setting Factory setting 2641 Relay control GOV ON time 10 ms 3000 ms 500 ms 2642 Relay control GOV per. time 50 ms 15000 ms 2500 ms 2690 Delay regulation Setting Min. -
Page 78: Input/Output
MEC 320 GENSET CONTROLLER Input/output This menu consists of parameters for configuration of the inputs and outputs. Binary input setup 3260 Dig. input no. 110 Setting Min. Max. Third Factory setting setting setting setting 3261 Dig. input no. 110 Timer 0.0 s... -
Page 79: 3310 Running Feedback (Binary Input 115)
3314 Run. feedback Enable 3315 Run. feedback Fail class Alarm (1) Trip MB (6) Warning (2) 3316 Run. feedback Type 3320 Ext. engine failure (binary input 116) Setting Min. Max. Third Factory setting setting setting setting 3321 Engine failure Timer 0.0 s... -
Page 80: Analogue Input Setup 4090 4
MEC 320 GENSET CONTROLLER Analogue input setup 4090 4…20mA input 98.1 The input is not configurable in the peak shaving mode, load takeover mode and mains power export, because it is used as a mains power input. Setting Min. Max. -
Page 81: 4130 Fuel Level 1 (4
4…20mA input 102.1 Set point 120% 4132 4…20mA input 102.1 Timer 0.0 s 600.0 s 120.0 s 4133 4…20mA input 102.1 Relay output A R0 (none) Option R0 (none) dependent 4134 4…20mA input 102.1 Relay output B R0 (none) R0 (none) 4135 4…20mA input 102.1 Enable... -
Page 82: 4220 Vdo
Trip/stop (4) 4300 Running detection This set point is used to define the level where the gen-set is recognised as running. When this RPM level is reached, the automatic running detection is enabled (6150 Running status) . Also take notice of the menu ‘remove starter’ set point (6160 Remove starter) . -
Page 83: 4320 Overspeed 2
R0 (none) 4325 Overspeed 2 Enable 4326 Overspeed 2 Fail class Alarm (1) Trip MB (6) Shutdown (5) 4370 Wire failure analogue input 98 Setting Min. setting Max. setting Factory setting 4371 W. fail. ana. 98 Output A R0 (none) Option... -
Page 84: 4430 Wire Failure Vdo Input 106
MEC 320 GENSET CONTROLLER 4430 Wire failure VDO input 106 Setting Min. setting Max. setting Factory setting 4431 W. fail. VDO 106 Max. 100% 100% 4432 W. fail. VDO 106 Min. 4433 W. fail. VDO 106 Output A R0 (none) -
Page 85: Output Setup
MEC 320 GENSET CONTROLLER Output setup 5090 Relay 9 The relay 9 is available, if options D1 are not selected and analogue governor outputs are not used. Setting First/min. Second/max. Third Factory setting setting setting setting 5091 Relay 9 Function... -
Page 86: System
6033 Transformer gen. Current prim. 9000A 1000A 6034 Transformer gen. Current sec. If no voltage transformer is present, the primary and secondary side values are set to generator nominal value. 6040 Transformer bus. Setting Min. setting Max. setting Factory setting 6041 Transformer bus. -
Page 87: 6060 Gen-Set Modes
20000 6090 Service timer The function of the service timer enables the user to get an alarm when service of the gen-set is needed. The timer is reset when the alarm is acknowledged or when the timer is disabled and enabled again. -
Page 88: 6110 Battery Low Voltage Alarm
990.0 s 20.0 s The setting is the maximum time the horn relay activates at an alarm. If the setting is adjusted to 0 s, the horn relay will be activated continuously until the alarm is acknowledged. 6150 Running status Setting Min. -
Page 89: 6180 Start Attempts
FP cool down 0.0 s 990.0 s 30.0 s The number of start attempts adjusted in menu 6184 Fire start attempt, is used when the digital input ‘fire pump’ is used instead of the setting 6181. 6190 f/U OK Setting Min. -
Page 90: 6310 Idle Running
MEC 320 GENSET CONTROLLER 6310 Idle running Setting Min. setting Max. setting Factory setting 6311 Idle running Start timer 0.0 min 999.9 min 300.0 min 6312 Idle running Enable start timer 6313 Idle running Stop timer 0.0 min 999.9 min 300.0 min... -
Page 91: Mains Setup
6514 Daytime period Stop minute 0 min 59 min 0 min 6520 Start gen-set The set point refers to the mains power set points in 6500 Mains power . Setting Min. setting Max. setting Factory setting 6521 Start generator Set point... -
Page 92: 6590 Mains Failure Voltage
Low voltage 100% 6594 Mains failure U High voltage 100% 120% 110% 6595 Mains failure U Mains fail. control Start eng. + Start eng. Start eng. + open MB open MB 6600 Mains failure frequency Setting Min. setting Max. setting Factory... -
Page 93: Jump Menus
The service menu can only be entered using the ‘JUMP’ push-button. This menu is used in service situations. In the alarm selection you can see all the alarm timers and their remaining time if they are counting. The input and output selections show the present status of the inputs and outputs. E.g. mode inputs, relay outputs and load sharing lines.
Need help?
Do you have a question about the MEC 320 - GENSET CONTROLLER and is the answer not in the manual?
Questions and answers