Table of Contents
Advertisement
Quick Links
Advertisement
Table of Contents

Related Manuals for TESTO 926


Summary of Contents for TESTO 926
- Page 1 926 温度测量仪 本品已获《中华人民共和国制造计量器具许可证》 粤制:03000253 号 操作手册 目录 一般说明 安全说明 预定的用途 产品描述 显示和控制元件 接口 电压供应 调试 操作 连接探头 开/关仪器 显示灯 设置 测量 维护与保养 问与答 技术数据 附件/备用件...
- Page 2 www.64817.com 一般说明 本节提供使用本文档的重要信息。 本文档包含安全有效地使用本产品必须用到的信息。 请在使用本产品之前,仔细通读本文档,并熟悉本产品的操作。请将本文档放在手头, 以便你在需要时可以查阅。 标识 标识 意义 说明 注意 提供有用的提示和信息。 , 1, 2 目标 表示经由描述的步骤所要达到的目标。步骤编号的地方,你 必须始终遵守给出的顺序! √ 条件 在按照描述执行一个动作时必须满足的条件。 >, 1, 2,... 步骤 执行步骤。步骤编号的地方,你必须始终遵守给出的顺序! 文本 显示文本 在仪器显示器上显示的文本。 按钮 控制按钮 按下该按钮。 功能按钮 按下该按钮。 结果 表示上一步的结果。 交叉参照 请参照更广泛或更详细的信息。...
- Page 3 安全说明 1. 安全说明 本节描述安全使用本产品必须服从和遵守的一般规则。 避免人员受伤/设备损坏 不要在有电部件上或其附近使用本测量仪器和探头进行测量。 > 不要将测量仪器/探头与溶剂存放在一起,并且不要使用任何干燥剂。 > 本产品安全/质保有效性的声明 仅在技术数据中规定的参数范围内操作测量仪器。 > 始终以正确的方式及其预定的用途使用测量仪器。不要使用外力。 > 不要将手柄和馈线置于 70℃以上温度下,除非它们明确允许用于高温。探头上给出 > 的温度仅与传感器的测量范围相关。 仅当文档中明确表明是为了维护和修理目的时,才可打开仪器。 > 仅执行文档中描述的维护和修理工作。按照规定的步骤执行维护和修理工作。为了 安全起见,仅使用 Testo 的原装备件。 正确处置申明 将损坏的可充电电池/用完的电池送到为其提供的收集点。 > 在本产品使用寿命结束时,将产品寄回 Testo。我们将保证以环境友好的方式处置这 > 些产品。...
- Page 4 24 2.预定的用途 2. 预定的用途 本节描述本产品预定的使用范围。 仅将本产品用于为其设计的那些应用。如果你有任何疑问,请向 Testo 咨询。 testo 926 是一款用于测量温度的精密型测量仪器。 本产品用于下列任务/应用: 食品工业 实验室 本产品不能应用于下列区域: 有爆炸危险的区域。 用于医疗用途的诊断测量。...
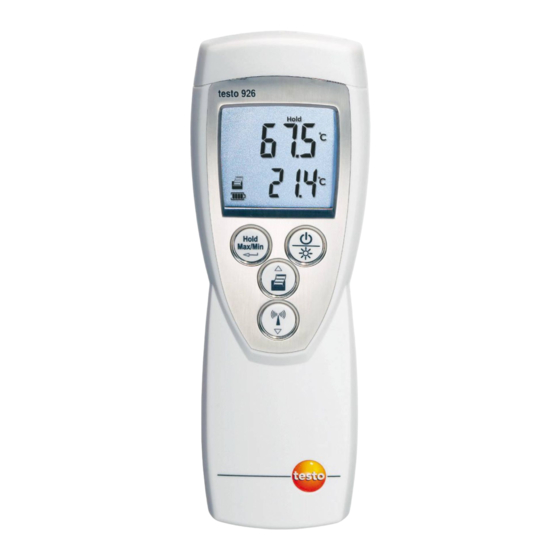
- Page 5 3.产品描述 3. 产品描述 本节描述本产品组件及其功能的概况。 3.1 显示和控制元件 概述 ① 红外接口,探头插口 ② 显示屏 ③ 控制按钮 ④ 背面:电池盒和无线电模块室 按钮功能 按钮 功能 打开仪器; 关闭仪器(按键并保持) 开/关背光灯 保持读数、显示最大值/最小值 打开/退出配置模式(按键并保持) 在配置模式里: 确认输入 在配置模式里: 选择选项,增加数值(按住不放,快速增加数值) 打印数据 切换接线探头和无线电探头 在配置模式里:选择选项, 降低数值(按键不放,快速降低数值)...
- Page 6 6 3.产品描述 重要显示 显示 意义 电池容量(仅对电池/可充电电池的操作) : 电池符号 4 段亮:仪器电池完全充满 电池符号都不亮:仪器电池差不多用完 (闪烁) 打印功能:将数据发送到打印机 报警上限:超出时闪烁 报警下限:超出时闪烁 测量通道号:无线电探头( “无线电波”的格数表示信号的强弱) 3.2 接口 红外接口 经由仪器头部的红外线接口,可以将测量数据发送到 Testo 打印机。 探头插口 可插式探头可以经由该探头插口连接到仪器上。 无线电模块 无线电探头只能在获得许可的国家内使用(见无线电探头应用信息) 3.3 电压的提供 经由 1 块 9V 电池(交付时提供的)或充电电池来提供电压。不能在仪器中给充电电池充 电。...
- Page 7 4 调试 4. 调试 本节描述调试本产品所需的步骤。 撕下显示器上的保护薄膜: > 仔细撕下保护薄膜。 放入电池/可充电电池: 按照箭头方向推动仪器背面的电池盒盖子,来打开盒盖。 将电池/可充电电池(9V 电池)放入电池盒中。注意电池极性! 按箭头相反的方向推入电池盒的盖子 - 仪器自动打开,配置模式启动 设置日期,时间和测量单位 设置仪器 设置日期 时间 见章节 的 插入无线电模块(附件) : 只能在已获许可的国家内使用无线电探头(见无线电探头的应用信息) 仪器关闭 1 向下推动仪器背面的无线电模块盒的盖子,移去盖子 2 放入无线电模块 3 合上无线电模块盒,并关闭...
- Page 8 5 操作 5. 操作 本节描述使用本产品时经常执行的步骤。 5.1 连接探头 可插式探头 在打开测量仪器之前,必须连接可插式探头,以便仪器识别探头。 > 将探头的插头插入测量仪器的探头插口。 无线电探头 无线电探头仅在获得许可的国家内才可使用(见无线电探头的应用信息) 。 使用无线电探头需要无线电模块(附件) 。在打开测量仪器之前,必须放入无线电模块, 以便测量仪器识别该探头。 每个无线电探头有一个必须在配置模式下进行设置的探头 ID(标识号) 。 设置仪器 见章节 。 5.2 开/关仪器 打开仪器: > 按 。 打开测量视图:显示当前读数,如果无可用的读数,显示----。...
- Page 9 5. 操作 关闭仪器: 按住 (大约 2 秒) ,直到显示熄灭。 > 5.3 显示灯 开/关显示灯: √ 打开仪器。 > 按下 。 5.4 设置仪器 1 打开配置模式 √ 仪器打开并处于测量视图下。Hold,Max or Min 处于未激活状态 > 按住 不放(大约 2 秒) ,直到显示发生变化。 可以使用 按钮切换到下一功能。 随时都可以退出配置模式, 只要按住 不 放(约 2 秒) ,直到切换到其他视图。在配置模式下已作的更改可以得到保存。 2 设置报警功能...
- Page 10 5.操作 选择 On(打开) : 按 ▲ ▼ 选择报警上限 并用 确认。 按 ▲ / ▼ 设置报警下限 ,并用 确认。 3 注册无线电探头 无线电探头仅在已获许可的国家内才可使用(见无线电探头的应用信息) 。 对于无线电探头的使用,需要在仪器内安装无线电模块(附件) 。 调试 见章节 如果未安装无线电模块 自动关机设置 继续操作 每个无线电探头有一个探头 ID(RF ID) 。它由序列号的最后 3 位数字和无线电探头中滑 动开关的位置(H 或 L)组成。 √ 配置模式开启,RF ID 和 Auto(自动)闪烁 √...
- Page 11 5.操作 - 一旦找到无线电探头,探头 ID 显示出来。如果未找到探头,NONE 亮起。 如果没有发现无线电探头,可以是由于下列原因: 无线电探头没有打开,或无线电探头的电池用完。 无线电探头在测量仪器范围之外。 干扰源影响无线电发射(例如,在发射器和接收器之间的钢筋混凝土、金属物体、 墙或其它障碍物,其它相同频率的发射器,强电磁场) 。 > 如果需要纠正无线电发射故障的可能原因。按 重新启动无线电探头搜索功能 4 自动关机设置 √ 打开配置模式,Auto Off(自动关机)亮起。 > 用 选择需要的选项,然后用 确认 - On: 如果 10 分钟内不按按钮,仪器将自动关机。例外:当记录的读数显示在显示屏 上时(Hold 保持或 Auto Hold 自动保存亮起) - OFF: 仪器不会自动关闭...
- Page 12 5.操作 5 设置自动保持 Auto Hold: 自动保持 Auto Hold 功能仅在连接可插式探头时,才能被激活。 √ 配置模式开启, Auto Hold(自动保持)亮起 1 用 选择需要的选项,然后用 确认 - OFF(关闭) :读数不能被自动记录 - On(打开): 读数稳定以后被自动记录下来(在时间评估设置中, 读数变化<0.2℃/0.4℉) 选择 OFF(关闭) : 设置打印最大 最小值 继续操作 选择 On: 2 使用 来设置评估时间的大小(以秒为单位) ,然后用 确认 6 设置打印最小/最大值 √ 配置模式开启, MaxMin 和 亮起...
- Page 13 5.操作 8 设置测量单位 √ 设置模式被打开,℃或℉闪烁 > 用 选择需要的选项,然后用 确认 9 复位 √ 设置模式被打开,RESET 亮起 > 用 选择需要的选项,然后用 确认 - No: 仪器未复位 - Yes: 仪器复位。仪器被复位到出厂设置。无线电探头 ID 设置不会被复位。 - 仪器返回到测量视图...
- Page 14 34 6.测量 6. 测量 本节描述用本产品执行测量所需的步骤。 √ 打开仪器,进入测量视图 执行测量 置入探头,读取数据。打开 Auto Hold 自动保持功能 自动保持功能 Auto Hold 仅在连接了可插式探头后,才可被激活。 测量时,Auto Hold 闪烁 如果读数在预设的评估时间内稳定下来,就会发出信号,以记录读数。 > 按 重新开始测量 当报警功能被打开时,一旦报警限值被超过或未达到: - Alarm(报警)亮起,发出信号 - 如果读数低于上限或者高于下限,Alarm 熄灭 修改测量通道的显示: 可以在可插式探头和无线电探头 之间切换 改变显示:按 > 保持读数,显示最大/最小值: > 记录当前读数。显示最大值和最小值(从仪器最后一次打开开始) 。...
- Page 15 6.测量 按键 数次,直到显示出需要的数值为止。 轮流显示以下数值: Hold:记录的读数 Max: 最大值 Min: 最小值 当前读数 - 除了记录值,最大和最小值外,第 2 行显示当前读数。 复位最大值/最小值: 复位所有测量通道的最小或最大值。 该功能仅在 Auto Hold(自动保持)打开时不能使用 按 几次,直到显示最大值或最小值。 按住 不放。 - 显示值闪烁两次,所有最大值和最小值复位到当前读数 打印读数: 屏幕显示(当前读数,记录读数或最大值/最小值)数值可以打印出来 前提:配备德图打印机(附件) 打开最大值/最小值打印功能,在打印当前读数和记录读数时,同时打印最大值和 最小值 设置仪器 见章节 可设置仪器,以便在屏幕上显示要打印的数值。 按...
- Page 16 7. 维护与保养 本节描述有助于维护本产品的功能并延长其使用寿命的步骤。 清洁外壳: > 如果外壳脏了, 用潮湿的布 (肥皀水) 清洁外壳。 不要使用侵蚀性清洁剂或溶液! 更换电池/可充电电池: √ 关闭仪器。 松下仪器背面的两颗螺丝,并取下电池室盖。 拿出用完的电池/可充电电池,并将新电池/可充电电池(3 个小型)放入电池室 中。注意电池极性! 放回电池室盖,按箭头方向推进...
- Page 17 本节给出经常问到的问题的答案。 问题 可能的原因 可能解决办法 亮 仪器电池几乎用完。 更换仪器电池。 仪器自动关闭 打开了自动关机功能。 关闭自动关机功能。 电池剩余容量太低。 更换电池。 显示:----- 探头未插入。 关闭仪器、 连接探头并再次打开仪器。 与无线电探头联系的无线电 打开无线电探头,如果需要再次注册 中断。 无线电探头。 请与你的经销商或 Testo 客户服务中 探头断开。 心联系。 显示:uuuuu 达不到允许的测量范围。 保持允许的测量范围。 显示:ooooo 超出允许的测量范围。 保持允许的测量范围。 仪器设置不再正 电源长时间中断。 重新输入仪器设置。 确 如果我们未能回答你的问题,请与你的经销销或 Testo 客户服务中心联系。详细联系方式 可在保修卡上或网站 www.testo.com.cn中找到。...
- Page 18 20 ... +50°C / -4 ... +122°F 操作温度 -40 ... +70°C / -40 ... +158°F 存放温度 1 节 9V 电池/充电电池 电源 电池寿命(开/关背光 连接热电偶探头:近 200 小时/近 68 小时 连接无线电探头:近 45 小时/33 小时 灯) 保护等级 配保护软套(选配)和连接探头:IP65 EC 标准 89/336/EEC 1 年 保修期 * 系统精确度受使用探头质量的影响! 以上所列为 testo 926 本机精确度。...
- Page 19 无线电探头手柄,包括 TC 适配器,获许可 for e. g . FR,GB, BE 0554 0193 热电偶空气/浸入式探头尖端,连接无线电探头手柄 0602 0293 适配器,连接热电偶探头至无线电手柄 0554 0222 热电偶探头,K 型 防水浸入式/插入式探头,K 型热电偶 0602 1293 0602 1993 防水表面探头,带扩展测量尖端,用于平整表面,K 型热电偶 坚固空气探头,K 型热电偶 0602 1793 附件 0516 0220 保护软套 德图红外打印机,包括 1 卷热敏打印纸和 4 节电池 0554 0547 关于所有附件和备用件的完整清单,请查阅产品目录和宣传册,或查阅我们的网站: www.testo.com...
-
Page 21: Table Of Contents
926 Temperature measuring instrument Bedienungsanleitung Instruction manual Mode d’emploi Content General notes ............22 Safety advice............23 Intended purpose ..........24 Product description ..........25 Display and control elements ........25 Interfaces ..............26 Voltage supply ..............26 Commissioning ..........27 Operation ............28 Connect the probe ............28 Switching the instrument on / off ........28... -
Page 22: General Notes
General notes General notes This chapter provides important advice on using this documentation. The documentation contains information that must be applied if the product is to be used safely and efficiently. Please read this documentation through carefully and familiarise yourself with the operation of the product before putting it to use. -
Page 23: Safety Advice
Ensure correct disposal Take faulty rechargeable batteries/spent batteries to the collection points provided for them. Send the product back to Testo at the end of its useful life. We will ensure that it is disposed of in an environmentally friendly manner. -
Page 24: Intended Purpose
This chapter gives the areas of application for which the product is intended. Use the product only for those applications for which it was designed. Ask Testo if you are in any doubt. testo 926 is a compact measuring instrument for measuring temperatures. -
Page 25: Product Description
3. Product description Product description This chapter provides an overview of the components of the product and their functions. 3.1 Display and control elements Overview Infrared interface, probe socket(s) Display Control buttons Radio module compartment, battery compartment (rear) Key functions Functions Switch instrument on;... -
Page 26: Interfaces
3.2 Interfaces Infrared interface Measurement data can be sent to a Testo printer via the infrared interface on the head of the instrument. Sensor socket(s) Plug-in measuring probes can be connected via the probe socket(s) on the head of the instrument. -
Page 27: Commissioning
4. Commissioning Commissioning This chapter describes the steps required to commission the product. Removing t t he p p rotective f f ilm o o n t t he d d isplay: Pull the protective film off carefully. Inserting a a b b attery/rechargeable b b attery: To open the battery compartment on the rear of the instrument, push the lid of the battery compartment in the direction of the arrow and remove. -
Page 28: Operation
5. Operation Operation This chapter describes the steps that have to be executed frequently when using the product. 5.1 Connect the probe Plug-in probes Plug-in probes must be connected before the measuring instrument is switched on so that they are recognised by the instrument. -
Page 29: Switching The Display Light On / Off
5. Operation Switching t t he i i nstrument o o ff: Press and hold (for approx. 2s) until the display goes out 5.3 Switching the display light on / off Switching t t he d d isplay l l ight o o n / off: The instrument is switched on. - Page 30 5. Operation OFF was selected: Continue with objective O REGISTER THE RADIO PROBE On was selected: to set the value for the upper alarm threshold ( ) and confirm with to set the value for the lower alarm threshold ( ) and confirm with To r r egister t t he r r adio p p robe: Radio probes may only be used in countries in which they have been Type Approved (see application infor-...
- Page 31 5. Operation YES was selected: - Automatic probe detection is started. Auto flashes while the instrument looks for a radio probe that is switched on. - Once a radio probe is found, the probe ID is displayed. If no probe is found, NONE lights up. Possible reasons why probes are not found: ·...
- Page 32 5. Operation To s s et A A uto H H old: The Auto Hold function is only active on plug-in measuring probes. Configuration mode is opened, Auto Hold is lit. Select the desired option (5, 10, 15, 20s) with confirm with ·...
- Page 33 5. Operation To s s et t t he u u nit o o f m m easurement: Configuration mode is opened, °C or °F flashes. Select the desired unit of measurement with confirm with To r r eset: Configuration mode is opened, RESET is lit. Select the desired option with and confirm with ·...
-
Page 34: Measuring
www.64817.com 6. Measuring Measuring This chapter describes the steps that are required to perform measurements with the product. The instrument is switched on and is in measurement view. Taking a a m m easurement: Put the probe in position and read off the readings. With the Auto Hold function on: The Auto Hold function is only active on plug-in measuring probes. - Page 35 The readings shown on the display (current reading, recorded reading or max./min. reading) can be printed out. A Testo printer is required (accessory part). With the Max./Min. print function switched on, the maximum and minimum values are printed out as well as the current reading or recorded reading.
-
Page 36: Care And Maintenance
www.64817.com 7. Care and maintenance Care and maintenance This chapter describes the steps that help to maintain the functionality of the product and extend its service life. Cleaning t t he h h ousing: Clean the housing with a moist cloth (soap suds) if it is dirty. -
Page 37: Questions And Answers
· Reset date and time. no longer correct interrupted for a longer time If we are unable to answer your question, please contact your dealer or Testo Customer Service. Contact details can be found on the guarantee card or on the Internet under... -
Page 38: Technical Data
www.64817.com 9. Technical data Technical data Characteristic Value Parameters Temperature (°C/°F) Measuring range -50.0...+400°C / -58.0...+752.0°F Resolution 0.1°C / 0.1°F (-50.0...+199.9°C / -58.0...+391.8°F) 1°C / 1°F (rest of range) Accuracy ±0.3°C / ±0.6°F (-20.0...+70.0°C / -4.0...+158.0°F) ±(0.7°C+5% o. r. )/ ±(1.3°F+5% o. r. )(rest of range) Probe connections 1x Omega TC socket for temperature probe type T (Cu-CuNi), radio module (accessory part) -
Page 39: Accessories / Spare Parts
0603 1993 Robust affordable air probe, TC type T 0603 1793 Miscellaneous TopSafe testo 925/926, protects from impact and dirt particles 0516 0220 Testo printer with IRDA and infrared interface, 1 roll thermal paper and 4 round cell batteries 0554 0547 Radio probes may only be used in countries in which they have been Type Approved (see application information of the radio probe).
Need help?
Do you have a question about the 926 and is the answer not in the manual?
Questions and answers