
Related Manuals for Crestron HD-MD2X1-8K


Summary of Contents for Crestron HD-MD2X1-8K
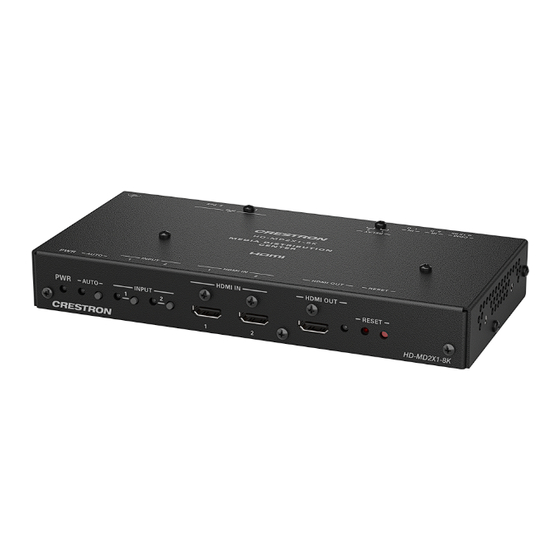
- Page 1 HD-MD2X1-8K 2x1 8K AV Switcher and Smart Display Controller Product Manual Crestron Electronics, Inc.
- Page 2 Other trademarks, registered trademarks, and trade names may be used in this document to refer to either the entities claiming the marks and names or their products. Crestron disclaims any proprietary interest in the marks and names of others. Crestron is not responsible for errors in typography or photography.
-
Page 3: Table Of Contents
Contents Overview Specifications Dimension Drawing Installation In the Box Install the Device Mount on a Wall Mount Under a Table Install in a Rack Connect the Device Configuration Accessing the Web Configuration Interface Action Save Changes Revert Reboot Restore Update Firmware Download Logs Manage Certificates Manage EDIDs... - Page 4 Current User Users Groups 802.1x Configuration Resources Crestron Support and Training Programmer and Developer Resources Product Certificates 4 • Contents Product Manual — Doc. 9465A...
-
Page 5: Overview
Overview The HD-MD2X1-8K is a 2x1 8K AV Switcher and Smart Display Controller that provides a variety of options for controlling displays without a control processor. Ideal for unified communications, digital signage, and presentation spaces, the HD-MD2X1-8K can be configured to automatically power displays on and off based on schedule, room occupancy, or video sync detect. - Page 6 HTTPS, the HD-MD2X1-8K provides a true enterprise-grade AV switcher. XiO Cloud® Service Support The HD-MD2X1-8K is compatible with the XiO Cloud service, which is an IoT (Internet of Things) platform for remotely provisioning, monitoring, and managing Crestron devices across an enterprise or an entire client base.
-
Page 7: Specifications
Specifications Product specifications for the HD-MD2X1-8K are provided below. Video Input Signal Types HDMI with HDR10, HDR10+. Dolby Vision™, Deep Color, 8K60 4:4:4 support (DVI and Dual-Mode DisplayPort™ interface compatible) Output Signal Types HDMI with HDR10, HDR10+, Dolby Vision, Deep Color, and 8K60 4:4:4 support (DVI compatible) - Page 8 Ethernet PoE (1) 8-pin RJ-45 connector, female; 100BASE-TX/1000BASE-T Ethernet port; PoE Class 3 powered device (PD) port, 8.2 W Maximum Ground (1) 6-32 screw, chassis ground lug Controls and Indicators (1) LED; Amber indicates that the device is booting; Green indicates that the device is operational. INPUT 1 and 2 (2) LEDs;...
- Page 9 Compliance Regulatory Model: M202116002 Product Manual — Doc. 9465A Contents • 9...
-
Page 10: Dimension Drawing
Dimension Drawing 10 • Contents Product Manual — Doc. 9465A... -
Page 11: Installation
Installation Refer to the sections below to install the HD-MD2X1-8K. In the Box Qty. Description HD-MD2X1-8K Additional Items Mounting bracket (2057072) Screw, Philips, 04-40, 1/4 in. (2007158) Wall anchor, plastic (2043585) Screw, combo head, 06-32, 3/4 in. (2009211) 4-pin connector (2003576) -
Page 12: Install The Device
Install the Device The HD-MD2X1-8K can be mounted on a wall, under a table, or on a rack. Mount on a Wall To mount the HD-MD2X1-8K on a wall, follow the instructions below. 1. Using the included 1/4 in. screws, attach the mounting brackets to the device. -
Page 13: Mount Under A Table
Mount Under a Table To mount the HD-MD2X1-8K under a table, follow the instructions below. 1. Using the included 1/4 in. screws, attach the mounting brackets to the device. 2. Using wood screws (not included), mount the device to the underside of the table. -
Page 14: Install In A Rack
To install the HD-MD2X1-8K in a rack, follow the instructions below. 1. Using the included 1/4 in. screws, attach a mounting bracket to the device. 2. Using rack screws (not included), attach the HD-MD2X1-8K to a rack rail. 14 • Contents... -
Page 15: Connect The Device
Connect the Device Make connections to the HD-MD2X1-8K as shown below. Front Panel Connections Rear Panel Connections Product Manual — Doc. 9465A Contents • 15... -
Page 16: Configuration
Configuration The HD-MD2X1-8K is configured through a web interface. This section provides the following information: Accessing the Web Configuration Interface on page 17 Action on page 18 Status on page 27 Settings on page 32 Security on page 50 802.1x Configuration on page 55 16 •... -
Page 17: Accessing The Web Configuration Interface
To access the web configuration interface: 1. Connect the HD-MD2X1-8K to the network. 2. Use the Device Discovery tool in Crestron Toolbox™ software to discover the HD-MD2X1- 8K and its IP address on the network. 3. Select Web Configuration in Device Discovery or enter the IP address into a web browser. -
Page 18: Action
Upload Configuration Manage Schedule Save Changes Select Save Changes to save any changes made to the configuration settings. Revert Select Revert to revert the device back to the last saved configuration settings. 18 • HD-MD2X1-8K Product Manual — Doc. 9465A... -
Page 19: Reboot
Reboot Certain changes to the settings may require the HD-MD2X1-8K to be rebooted to take effect. To reboot the device, follow the procedure below. 1. Select Reboot in the Actions drop-down menu. The Confirmation message box appears. 2. Select Yes, Reboot Now to reboot the device. The Reboot message box appears. -
Page 20: Download Logs
Use the Manage Certificates dialog to add, remove, and manage certificates used in 802.1x and other protected networks. Select Manage Certificates in the Actions drop-down menu. The following certificate tabs are displayed: 20 • HD-MD2X1-8K Product Manual — Doc. 9465A... -
Page 21: Manage Edids
Root: The Root certificate is used by the HD-MD2X1-8K to validate the network's authentication server. The HD-MD2X1-8K has a variety of Root certificates, self-signed by trusted CAs (Certificate Authorities) preloaded into the device. Root certificates must be self-signed. Intermediate: The Intermediate store holds non self-signed certificates that are used to validate the authentication server. - Page 22 Built-in EDIDs are displayed in the Default EDIDs tab of the EDID management dialog. User EDIDs To add a custom EDID, follow the procedure below. 1. In the EDID Management dialog, select the User EDIDs tab and then select + Add EDID. 22 • HD-MD2X1-8K Product Manual — Doc. 9465A...
-
Page 23: Manage Device Drivers
3. Navigate to the desired EDID file (.cedid extension), select the file, and then select Open. 4. Select Upload and wait for the progress bar to complete. 5. Select OK. The EDID is now available for use on the HD-MD2X1-8K. NOTE: Any custom EDIDs will be listed (in alphabetical order) after the last built-in EDID. -
Page 24: Download Configuration
2. Navigate to the desired driver file, select the file, and then select Open. 3. Select Upload and wait for the progress bar to complete. 4. Select OK. The driver is now available for use on the HD-MD2X1-8K. Import from Cloud: Import a driver from the cloud. -
Page 25: Manage Schedule
Select Manage Schedule in the Actions drop-down menu to create and manage schedules for the connect display. Select Manage Schedule to open the Manage Schedule dialog. Add Schedules To add a new schedule for the connected display, follow the procedure below. Product Manual — Doc. 9465A HD-MD2X1-8K • 25... - Page 26 Delete: To delete schedules, select the box to the left of each schedule to be deleted and then select Delete. Edit: Select Edit to adjust the days, hours, and name for the corresponding schedule. Duplicate: Select Duplicate to make a copy of the schedule. 26 • HD-MD2X1-8K Product Manual — Doc. 9465A...
-
Page 27: Status
Status The Status tab is the first page displayed when starting the interface of the HD-MD2X1-8K. It displays general information about the HD-MD2X1-8K (such as Model Name, Serial Number, and Firmware Version), occupancy sensors, current network settings (such as Host Name and IP Address, etc.), input and output ports, as well as information about the connection to the control... -
Page 28: Occupancy Sensor
Select + Ethernet Models or + Digi-In Models for information about the corresponding sensors. Ethernet Models This section displays the name, model, serial number, firmware version, status, and occupancy state for any connected Ethernet occupancy sensor. 28 • HD-MD2X1-8K Product Manual — Doc. 9465A... -
Page 29: Input/Output
0x0@0 is displayed when the video signal is not being transmitted. Sink HDCP Capability: Indicates HDCP support for 1.4 or 2.x. Disabled by HDCP: Indicates if the video signal is disabled by HDCP (Yes or No). Product Manual — Doc. 9465A HD-MD2X1-8K • 29... -
Page 30: Network
The Network section displays network-related information about the HD-MD2X1-8K, including the Hostname, Domain Name, Primary Static DNS, and Secondary Static DNS. Adapter 1 The Adapter 1 section displays additional network-related information about the HD-MD2X1-8K, including DHCP status, IP Address, Subnet Mask, Default Gateway, Active Link status, and MAC Address. - Page 31 IP Address/Hostname: IP address of the control system. Room ID: Displays the Room ID Status: OFFLINE or ONLINE Product Manual — Doc. 9465A HD-MD2X1-8K • 31...
-
Page 32: Settings
Settings The Settings tab enables configuration of the HD-MD2X1-8K settings. Information displayed in the Settings tab is organized into the following sections: System Setup on page 33 Occupancy Sensor on page 37 Inputs on page 38 Outputs on page 39 Routing on page 48 32 •... -
Page 33: System Setup
Set the DHCP slider to enabled (right) or disabled (left) to specify whether the IP address of the HD-MD2X1-8K is to be assigned by a DHCP (Dynamic Host Configuration Protocol) server. Enabled: When DHCP is enabled (default setting), the IP address of the HD-MD2X1-8K is automatically assigned by a DHCP server on the local area network (LAN) for a predetermined period of time. - Page 34 To prevent accidental changes to device settings, the Front Panel section can be set to lock the front panel buttons on the HD-MD2X1-8K. By default, the front panel is unlocked, allowing the front panel buttons to function. When the front panel is locked, pressing any of the buttons has no effect.
- Page 35 1. Using the Crestron Auto Update Tool, generate a manifest file. The file is placed on an FTP (File Transfer Protocol) or SFTP (Secure File Transfer Protocol) server. 2. To enable auto update, move the Auto Update slider to the right position.
- Page 36 Time Zone: Select the appropriate time zone. Date: Enter the current date. Time: Enter the current time in 24-hour format. Control System Use the Control System section to configure a connection to a control system. 36 • HD-MD2X1-8K Product Manual — Doc. 9465A...
-
Page 37: Occupancy Sensor
Perform the following steps: 1. Select Encrypt Connection to configure security settings. For details, see Security. 2. Enter the IPID of the HD-MD2X1-8K in the IPID field. 3. Enter the IP address or hostname of the control system in the IP Address/Hostname field. -
Page 38: Inputs
2. Enter a name in the Name field. Inputs The Inputs section can be used to configure the HDMI input settings of the HD-MD2X1-8K by renaming one or more inputs, changing and applying EDID to specific inputs or to all inputs at once (Global EDID), and enabling or disabling HDCP (High-bandwidth Digital Content Protection) on individual inputs. -
Page 39: Outputs
Sink Connected: Yes, if connection is detected or No, if connection is not detected. Resolution: The resolution when video with valid resolution is detected. If no video is detected, the reported resolution will be 0x0@0. Product Manual — Doc. 9465A HD-MD2X1-8K • 39... - Page 40 The Connected Display section displays the Sink Connected, Manufacturer, and Serial Number of the connected device. Select Save CEDID to save the display's .cedid file to the Downloads folder of the host computer. 40 • HD-MD2X1-8K Product Manual — Doc. 9465A...
- Page 41 Automatic Power Trigger: Select one of the available triggers. Sync: The display powers on when sync is detected. Occupancy: The display powers on when occupancy is detected. Schedule: The display powers on based on the selected schedules. Product Manual — Doc. 9465A HD-MD2X1-8K • 41...
- Page 42 Output Timeout: Select 5, 10, 15, 30, 60, 90, or a custom value in seconds. Power Off: Select Test to test the driver's power off command. Power On: Select Test to test the driver's power on command. 42 • HD-MD2X1-8K Product Manual — Doc. 9465A...
- Page 43 Control is enabled, select the following settings: Delay: Select the delay value from the drop-down list. Valid values are 0, 3, 5, 7, 10, or 20 seconds. Command String: Enter the command. Select Test to test the command. Product Manual — Doc. 9465A HD-MD2X1-8K • 43...
- Page 44 RS-232 After selecting RS-232 in the Command Interface drop-down list, the following options become available. 44 • HD-MD2X1-8K Product Manual — Doc. 9465A...
- Page 45 Control is enabled, select the following settings: Delay: Select the delay value from the drop-down list. Valid values are 0, 3, 5, 7, 10, or 20 seconds. Command String: Enter the command. Select Test to test the command. Product Manual — Doc. 9465A HD-MD2X1-8K • 45...
- Page 46 Output Timeout: Select 5, 10, 15, 30, 60, 90, or a custom value in seconds. IR Settings: To load an IR file (extension .ir) to the HD-MD2X1-8K, select Load IR File. To delete the file, select Delete IR File. IR Commands: This table displays all available IR commands in the loaded IR file.
- Page 47 Control is enabled, select the following settings: Delay: Select the delay value from the drop-down list. Valid values are 0, 3, 5, 7, 10, or 20 seconds. Command String: Enter the command. Select Test to test the command. Product Manual — Doc. 9465A HD-MD2X1-8K • 47...
-
Page 48: Routing
Configure Auto Route Move the Auto Route slider to the right to enable or to the left to disable the automatic routing of video inputs. When automatic input routing is enabled, the HD-MD2X1-8K automatically routes the last connected input. Configure Priority Routing With Priority Routing, one input can be designated to take priority over the other. - Page 49 Manually Route a Local Input to the Output To manually route an input, select the output box below the input. That input will become the active input (represented by To clear the route, select the icon. Product Manual — Doc. 9465A HD-MD2X1-8K • 49...
-
Page 50: Security
Security Select the Security tab to configure security for users and groups and to allow different levels of access to the functions of the HD-MD2X1-8K. Select Encrypt and Validate, Encrypt, or OFF in the SSL Mode drop-down menu to select an encryption mode. -
Page 51: Users
Groups they are part of. (Edit User): Allows the adjustment of all fields set during the Create User process. (Delete User): Removes a user. Create a New User To create a new user, follow the instructions below. Product Manual — Doc. 9465A HD-MD2X1-8K • 51... -
Page 52: Groups
Select the Groups tab to view and edit group settings. The Groups tab can be used to add local and Active Directory groups, remove local and Active Directory groups, and preview information 52 • HD-MD2X1-8K Product Manual — Doc. 9465A... - Page 53 Active Directory server. However, because a user’s access level is inherited from a group(s), users within the deleted group will lose access rights associated with the group. Create Local Group To create a new local group, follow the procedure below. Product Manual — Doc. 9465A HD-MD2X1-8K • 53...
- Page 54 A group cannot be created or removed from the Active Directory server, but access can be granted to an existing group in Active Directory. Once the group is added, all members of that group will have access to the HD-MD2X1-8K. To add an Active Directory group, follow the procedure below.
-
Page 55: 802.1X Configuration
802.1x Configuration The HD-MD2X1-8K have built-in support for the 802.1X standard (an IEEE network standard designed to enhance the security of wireless and Ethernet LANs. The standard relies on the exchange of messages between the device and the network's host, or authentication server), allowing communication with the authentication server and access to protected corporate networks. - Page 56 4. If you enabled the Enable Authentication Server Validation option, this will enable the Select Trusted Certificate Authoritie(s) list box which contains signed Trusted Certificate Authorities (CAs) preloaded into the HD-MD2X1-8K. Select the check box next to each CA whose certificate can be used for server validation, as specified by the network administrator.
-
Page 57: Resources
Resources The following resources are provided for the HD-MD2X1-8K. NOTE: You may need to provide your Crestron.com web account credentials when prompted to access some of the following resources. Crestron Support and Training Crestron True Blue Support Crestron Resource Library Crestron Online Help (OLH) Crestron Training Institute (CTI) Portal... - Page 58 Crestron Electronics, Inc. Product Manual — Doc. 9465A 15 Volvo Drive, Rockleigh, NJ 07647 04/25/24 Tel: 888.CRESTRON Specifications subject to Fax: 201.767.7656 change without notice. www.crestron.com...
Need help?
Do you have a question about the HD-MD2X1-8K and is the answer not in the manual?
Questions and answers