
Related Manuals for ProLights ARCSPOT S FC


Summary of Contents for ProLights ARCSPOT S FC
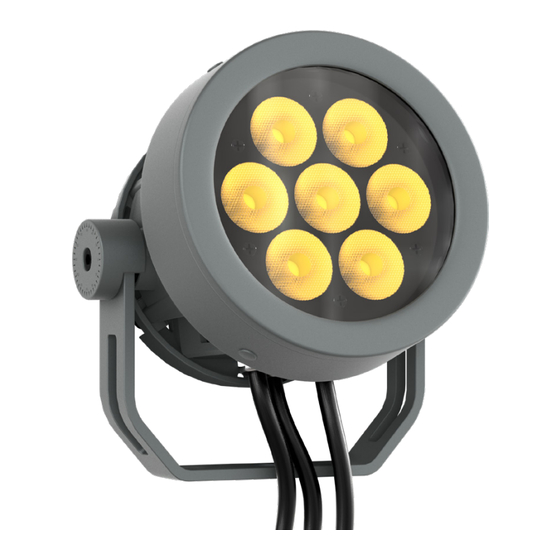
- Page 1 ARCSPOT S FC IP66 Spot featuring 1300 lumen with 7x 4W RGB+WarmWhite source, 10° native USER MANUAL English version REV.01-02/24 PRELIMINARY...
- Page 2 PROLIGHTS product are trademarks OWNED or licensed by Music & Lights S.r.l., its affiliates, and subsidiaries. PROLIGHTS is a registered trademark by Music & Lights S.r.l. All right reserved. Music & Lights – Via A. Olivetti, snc - 04026 - Minturno (LT) ITALY.
- Page 3 HONEYCOMB LOUVRE (CODE ARSHLOUVREGY/WH - OPTIONAL) ......24 LENS (CODE ASLENS15/25/45 - OPTIONAL) ..............25 13 - MAINTENANCE MAINTENANCE AND CLEANING THE PRODUCT............28 VISUAL CHECK OF PRODUCT HOUSING ..............28 14 - TEST OF IP66 RATING PROLIGHTS - ArcSpot SFC...
-
Page 4: Safety Information
• Do not reapply power until repairs have been completed. • Refer any service operation not described in this manual to PROLIGHTS Service team or an authorized PROLIGHTS service center. - Page 5 • Warning! Disconnect the fixture from AC mains power and allow to cool for at least 10 minutes before handling. • Only technicians who are authorized by PROLIGHTS or Authorised service partners are permitted to open the fixture. • Users may carry out external cleaning, following the warnings and instructions pro- vided, but any service operation not described in this manual must be referred to a qualified service technician.
- Page 6 • This device complies with Part 15 of the FCC Rules. Operation is subject to the fol- lowing two conditions: 1. This device may not cause harmful interference, and 2. This device must accept any interference received, including interference that may cause undesired operation. PROLIGHTS - ArcSpot SFC...
-
Page 7: Package Content
Check the updated accessories list, description and informations of the product at the following link: https://www.prolights.it/product/ARCSPOTSFC#accessories 2 - TECHNICAL DRAWING 147mm 106mm 130mm [5.8in] [4.2in] [5.1in] 127mm Ø198mm [5.0in] [7.8in] Fig. 01 Weight: 1,3 kg - 2,86 lbs PROLIGHTS - ArcSpot SFC... -
Page 8: Installation
NOTE: In external installations it is advisable to mount the product with the cables facing downwards to avoid water or humidity deposits which can compromise functionality in the long term. C6002 clamp 25 mm 60 mm 3xØ13 mm [1.0 in] [2.4 in] [Ø0.5 in] Fig. 02 PROLIGHTS - ArcSpot SFC... -
Page 9: Product Overview
4. DMX IN (4-p XLR): 1 = GND, 2 = sign-, 3 = sign+, 4 N/C, 5. 5. POWER IN: for connection to the Mains 100-240V~/50-60Hz. 6. DMX OUT (4-p XLR): 1 = GND, 2 = sign-, 3 = sign+, 4 N/C, 5. Fig. 03 PROLIGHTS - ArcSpot SFC... -
Page 10: Connection To The Mains Supply
• Connect the power connector into the Mains input socket (100-240 VAC-50/60 Hz). • The product is then ready for its operations and can be controlled through the available input sig- nals on board. • To disconnect power from the product, disconnect the Mains from the socket. PROLIGHTS - ArcSpot SFC... -
Page 11: Dmx Connection
Install a DMX termination plug on the last fixture on the link. If a splitter is used, terminate each branch of the link. NOTE: when not using the DMX input or DMX output connectors, you must seal the cable ends with the supplied caps. PROLIGHTS - ArcSpot SFC... -
Page 12: Connection Of The Dmx Line
The termination is prepared by soldering a 120Ω 1/4 W resistor between pins 2 and 3 of the male XLR connector, as shown in figure. Pin1 : GND - Shield (Black) Pin2 : - Signal (Yellow) Pin3 : + Signal (Red) Pin4 : Auto-addressing (White) Example: 5 pin XLR connector Fig. 06 PROLIGHTS - ArcSpot SFC... - Page 13 ... . DMX IN DMX OUT DMX IN DMX OUT DMX IN DMX OUT DMX IN DMX OUT DMX OUT DATAMASTER Fig. 04 - Example 12 DMX channels configuration Fig. 07 PROLIGHTS - ArcSpot SFC...
-
Page 14: Menu Level
HIGH LED MODE Delivering the full output on every BRIGHTNESS primary color. HIGH QUALITY Calibrated white output at 6000K, when all primary colors are set to full. PROLIGHTS - ArcSpot SFC... - Page 15 10000K MANUAL DIMMER:0-255 User generated color preset by assigning values to each primary color attribute. GREEN DIMMER:0-255 After enabled this mode, the unit will be automatically assigned as Master. BLUE DIMMER:0-255 WARM WHITE DIMMER:0-255 FACTORY DEFAULT PROLIGHTS - ArcSpot SFC...
-
Page 16: Rdm Functions
0x0121 DEFAULT_SLOT_VALUE 0x0122 SENSOR_DEFINITION 0x0200 Sensors SENSOR_VALUE 0x0201 CURVE 0x0343 CURVE_DESCRIPTION 0x0344 OUTPUT_RESPONSE_TIME 0x0345 OUTPUT_RESPONSE_TIME_ DESCRIPTION 0x0346 MODULATION_FREQUENCY 0x0347 MODULATION_FREQUENCY_ DESCRIPTION 0x0348 DEVICE_HOURS 0x0400 LAMP_HOURS 0x0401 LAMP_STRIKES 0x0402 Power/Lamp Settings LAMP_STATE 0x0403 LAMP_MODE 0x0404 DEVICE_POWER_CYCLES 0x0405 PROLIGHTS - ArcSpot SFC... - Page 17 5: 8000K CURRENT HOURS 0x82C5 POWER CONSUMPTION(AC 220V) 0x82EF 10-300 DEFAULT: 300 MAINTENANCE TIME:ALERT PERIOD 0x82DF DEFAULT: 0 MAINTENANCE TIME:ELAPSED TIME 0x82E0 ERROR MESSAGES 0x82EA 0: No Error 0: No CLEAN ALL DATA 0x82C8 1: Yes PROLIGHTS - ArcSpot SFC...
-
Page 18: Dmx Charts
RDM Model ID: 0xD141 RDM Personality ID List DMX Mode Footprint 12CH 12CH 13CH 13CH MODE PARAMETER 12CH 13CH DIMMER DIMMER FINE CCT FINE CROSSFADE GREEN BLUE WARM WHITE STROBE COLOR MACRO EFFECTS EFFECTS SPEED CONTROL RESERVED PROLIGHTS - ArcSpot SFC... - Page 19 6500 6600 33678 34588 6600 6700 34588 35498 6700 6800 35498 36408 6800 6900 36408 37319 6900 7000 37319 38229 7000 7100 38229 39139 7100 7200 39139 40049 7200 7300 40049 40959 7300 7400 40959 41870 PROLIGHTS - ArcSpot SFC...
- Page 20 9100 9200 57343 58253 9200 9300 58253 59164 9300 9400 59164 60074 9400 9500 60074 60984 9500 9600 60984 61894 9600 9700 61894 62804 9700 9800 62804 63715 9800 9900 63715 64625 9900 10000 64625 65535 PROLIGHTS - ArcSpot SFC...
- Page 21 16 bit value Function Note From From OPEN Default @ 255 STROBE FROM SLOW TO FAST OPEN PULSE IN FROM SLOW TO FAST CLOSE PULSE OUT FROM SLOW TO FAST OPEN RANDOM FROM SLOW TO FAST OPEN PROLIGHTS - ArcSpot SFC...
- Page 22 STEEL BLUE MEDIUM BLUE-GREEN PEACOCK BLUE MAGENTA DARK PINK MIDDLE ROSE LIGHT SALMON ENGLISH ROSE LIGHT ROSE ORANGE DEEP AMBER STRAW LIGHT AMBER SPRING YELLOW DARK YELLOW GREEN JUST BLUE SKY BLUE LAVENDER LIGHT LAVENDER PINK CARNATION PROLIGHTS - ArcSpot SFC...
- Page 23 6500K 7000K 8000K 9000K 10000K FULL ON Effects 8 bit value 16 bit value Function Note From From NO FUNCTION Default @ 0 FX 1 FX 2 FX 3 FX 4 FX 5 (FX 1 -4) PROLIGHTS - ArcSpot SFC...
- Page 24 STAND ALONE MASTER DMX STAND ALONE MASTER NO DMX STAND ALONE SLAVE STAND ALONE EFFECTS STAND ALONE STATIC COLORS STAND ALONE WHITE PRESETS STAND ALONE COLOR MACROS STAND ALONE MANUAL COLORS RESERVED RESET ALL CHANNEL CONTROLLED RESERVED PROLIGHTS - ArcSpot SFC...
-
Page 25: Accessories Installation
12 - ACCESSORIES INSTALLATION HALF SNOOT (CODE ARSHSNOOTGY - OPTIONAL) Place fixture on a stable surface. 1. Remove rubber caps (A). Insert the Half snoot (B). Fig. 08 2. Screw the supplied screws (C) to secure the accessory. PROLIGHTS - ArcSpot SFC... - Page 26 HONEYCOMB LOUVRE (CODE ARSHLOUVREGY - OPTIONAL) Place fixture on a stable surface. 1. Remove rubber caps (A). Insert the Honeycomb louvre (B). 2. Screw the supplied screws (C) to secure the accessory. Fig. 09 PROLIGHTS - ArcSpot SFC...
- Page 27 Place fixture on a stable surface. • Remove the rubber caps (A), then unscrew the metal front ring screws (B). • Remove the metal front ring (C). Fig. 10 NOTE: the installation images refers to ARCSPOTXS PROLIGHTS - ArcSpot SFC...
- Page 28 Turn the fixture with lenses upside and proceed as follows: • Unscrew the lenses holder screws (D). • Remove the lenses holder (E). NOTE: be careful to match the spaces in the same way as they are disassembled to close the product correctly. Fig. 11 PROLIGHTS - ArcSpot SFC...
- Page 29 Gently replace each lens as shown in figure, Fig. 12 PROLIGHTS - ArcSpot SFC...
-
Page 30: Maintenance
IP grade of the fixture. • All other service operations on the product must be carried out by PROLIGHTS, its approved service agents or trained and qualified personnel. - Page 31 It is recommended to verify IP grade using IPTESTBOX every time the bodies are removed for maintenance. Remove the gore valve from the rear cover. Connect the air hose to the IPTESTBOX by inserting the quick-connect fitting into the coupler. PROLIGHTS - ArcSpot SFC...
- Page 32 Insert the threaded end into the threaded valve hole socket. For the operating procedure using the instrument, refer to the IPTESTBOX user manual. Fig. 13 PROLIGHTS - ArcSpot SFC...
- Page 33 Note...
- Page 34 Note...
- Page 36 PROLIGHTS is a trademark of prolights.it Via A.Olivetti snc MUSIC & LIGHTS S.r.l. support@prolights.it 04026 - Minturno (LT) ITALY musiclights.it Tel: +39 0771 72190...
Need help?
Do you have a question about the ARCSPOT S FC and is the answer not in the manual?
Questions and answers