Table of Contents
Advertisement
Quick Links
INSTRUCTIONS FOR
INSTALLING AND USING
SINGLE AND TWIN
ALL ELECTRIC COOKERS
For all Electric 90cm and 100cm Cookers
Single and Twin Oven Models
IMPORTANT
INSTALLERS PLEASE NOTE - After installation and commissioning, page 8 of this
book must be completed before handing these instructions to the customer.
Advertisement
Table of Contents

Related Manuals for ILVE Britannia SIE9TLS


Summary of Contents for ILVE Britannia SIE9TLS
- Page 1 INSTRUCTIONS FOR INSTALLING AND USING SINGLE AND TWIN ALL ELECTRIC COOKERS For all Electric 90cm and 100cm Cookers Single and Twin Oven Models IMPORTANT INSTALLERS PLEASE NOTE - After installation and commissioning, page 8 of this book must be completed before handing these instructions to the customer.
-
Page 2: Table Of Contents
Britannia Living Ltd FOR NATIONWIDE SERVICE CONTACT Britannia House TEL: 01253 471130 Bristol Avenue FAX: 01253 471140 Blackpool FY2 0JF www.britannialiving.co.uk Dear Customer, Thank you for choosing Britannia. We feel that the experience of cooking should be as enjoyable as eating. We hope you will have as much pleasure from cooking on your Britannia as from eating the dishes you prepare. -
Page 3: Installation & Commissioning
INSTALLATION & COMMISSIONING GENERAL INFORMATION Please read the installation & commissioning instructions fully before commencing the installation. The cooker is heavy and should be handled/installed by two persons. Do not throw away any packaging until the installation is complete. The backsplash is packed between the polystyrene sheets that protect the top of the cooker. - Page 4 INSTALLATION & COMMISSIONING To fit the legs proceed as follows (See fig 1) Screw ‘A’ into the thread of the adjustable leg by at least two full turns. Now push the leg assembly through the keyhole which is sited in the chassis plate ‘B’.
- Page 5 INSTALLATION & COMMISSIONING ELECTRICAL CONNECTION CONTINUED Ratings - 90cm models As indicated on the rating plate Total: Hotplate: Front left 2200/750 watts dual zone Back left 1200 watts Front right 1200 watts Back right 1800 watts Central zone 2400/1600 watts dual elongated zone 3400 watts Single Ovens 5000 watts...
- Page 6 INSTALLATION & COMMISSIONING HOW TO INSTALL STAY CLEAN LINERS – MAIN OVEN (60cm module ovens) Stay clean liners are supplied as standard on certain models or are an optional extra. These are simple to fit and can easily be installed by the installer or user. They consist of two side panels and a back panel.
- Page 7 INSTALLATION & COMMISSIONING HOW TO FIT TELESCOPIC SLIDING OVEN TRAYS Telescopic sliding oven trays are an optional extra. These are simple to fit and can easily be installed by the installer or user. They consist of new oven side runners and two additional wire shelves.
- Page 8 INSTALLATION & COMMISSIONING INSTALLATION CHECK LIST TO BE COMPLETED BY THE INSTALLER PLEASE TICK Cooker checked for being level. All electric components checked for operation. Hotplate zones and ovens. Check that auto programmer has been left in manual mode. Has customer been instructed on use? Has customer been given all documentation? TO BE FILLED OUT IN BLOCK CAPITALS PLEASE Installed by:...
-
Page 9: Understanding The Cooker Controls
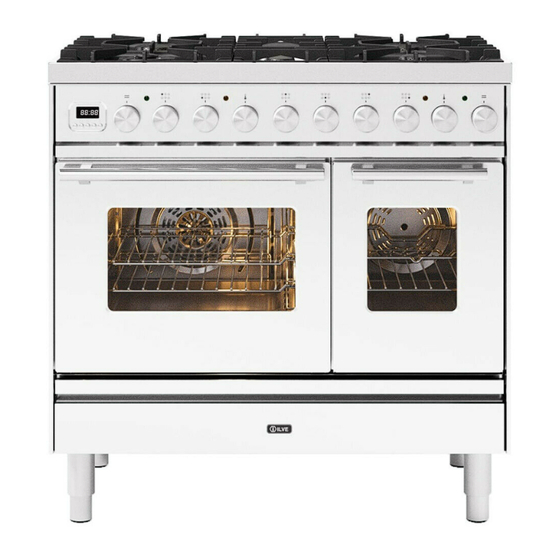
HOW TO USE 1. UNDERSTANDING THE COOKER CONTROLS 90CM SINGLE OVEN MODELS 90CM TWIN OVEN MODELS 100CM TWIN OVEN MODELS 1. Automatic clock programmer 2. Green neon – indicating power on to oven 3. Orange neon – oven thermostat indication light 4. -
Page 10: How To Use The Ceramic Hotplate
HOW TO USE HOW TO USE THE ELECTRIC CERAMIC HOTPLATE GENERAL INFORMATION Your ceramic hotplate is hard wearing and with normal use and care will remain in good condition for many years. The electric ceramic hotplate has five or six heating zones dependant on model. The elements used are the extremely reliable ribbon heaters which give a fast response and very efficient heat transference to the pan. -
Page 11: Suitable Pans And Pan Diameters
HOW TO USE SUITABLE PANS FOR THE CERAMIC HOTPLATE Always use pans that are suitable for use on ceramic hotplates. To obtain the best results from your ceramic hotplate you should also use pans of the correct size. Unsuitable pans can cause the safety cut-out to operate and can lead to less efficient cooking. - Page 12 HOW TO USE SUITABLE PANS FOR THE CERAMIC HOTPLATE (continued) PAN DIAMETERS - 90CM MODEL Front left zone (inner) 120-150mm Front left zone (entire) 200-250mm Front right zone 150-180mm Back left zone 150-180mm Back right zone 180-200mm Central zone (circular section) 180-200mm Central zone (entire elongated section) Oval pans/casseroles PAN DIAMETERS - 100CM MODEL...
- Page 13 HOW TO USE HOW TO OPERATE THE CERAMIC HOTPLATE (continued) To operate the entire area on a dual element zone proceed as follows – Turn the control knob clockwise past the 12 setting and a click will be felt. Then turn the control knob anti-clockwise to the desired setting 0-12.
-
Page 14: How To Use The Main Electric Multifunction Oven
HOW TO USE WARNING: STEAM/DOOR OPENING Steam may be generated when cooking or grilling certain foods. As a precaution, always open the oven doors in two stages: Partially open the door about 100mm for 4-5 seconds. Fully open the door. Keep your head and face away from the door when opening HOW TO USE THE MAIN ELECTRIC MULTIFUNCTION OVEN Step 1A... - Page 15 HOW TO USE HOW TO USE THE MAIN ELECTRIC MULTIFUNCTION OVEN (continued) Oven selector knob functions (See fig. J) Oven light to assist viewing Conventional oven (upper & lower elements) Lower element only Upper element only Conventional grill Fan assisted grill Fan assisted oven (upper &...
-
Page 16: Main Oven Functions
HOW TO USE OVEN FUNCTIONS (MAIN OVEN) FUNCTION 1: OVEN LIGHT ONLY The light can be turned off to save energy via the following: Select the oven function you wish to use. Once in use, advance the oven selector knob one click forwards and then two clicks backward. - Page 17 HOW TO USE OVEN FUNCTIONS (MAIN OVEN) continued FUNCTION 6: FAN ASSISTED GRILLING Fan assisted grilling is conducted with the oven door closed. The grill directs heat downwards towards the food and the fan circulates hot air around and below the food. This is an ideal function to cook chops, mixed grills etc. and we also suggest that high water content foods such as pre-packed bacon, sausage or chicken pieces should be cooked on this function to reduce condensation.
- Page 18 HOW TO USE OVEN FUNCTIONS (MAIN OVEN) continued FUNCTION 9: QUICKSTART FAST PRE-HEAT SYSTEM Quickstart is a fast pre-heat system available in the main oven. It is always advisable to pre-heat the oven before use whatever the cooking temperature. First turn oven selector knob ‘J’ to function 9. Turn thermostat knob ‘K’ to the desired temperature.
-
Page 19: How To Use The Second Oven
HOW TO USE HOW TO USE THE SECOND OVEN Turn oven selector knob (fig. L) to the desired function. Turn temperature control knob (fig. M) to the desired temperature. ensure all Important note: Before using the second oven for the first time packing material has been removed from oven cavity and turn the oven onto Function 1, select a temperature of 200˚C and allow the oven to run for 1½... -
Page 20: How To Use The Rotisserie
HOW TO USE HOW TO USE THE SECOND OVEN (continued) FUNCTION 4 HOW TO USE THE ROTISSERIE (See fig. N) When using the rotisserie function please take care because the oven area will be hot, we strongly recommend that oven gloves/mitts are worn to prevent burns. Place the enamelled oven tray ‘D’... -
Page 21: Temperature Conversion Chart
HOW TO USE TEMPERATURE CHART TEMPERATURE CONVERSION CHART Centigrade ˚C Fahrenheit ˚F Gas Mark ¼ ¼ ½ ½ The above chart shows approximate figures and is for guidance only. Temperatures may have to be adjusted to suit individual recipes. If using your cooker in the true fan or fan assisted mode you will need to reduce the centigrade temperature by 20˚C when following recipes written for conventional cooking. -
Page 22: Oven Cooking Chart
15. Oven Cooking Chart CONVENTIONAL TRUE FAN OR FAN FOOD TIME COOKING °C ASSISTED °C FISH 40-50 mins Whole fish e.g. 160 true fan trout Fillets and steaks 160 true fan 15-20 mins Whole salmon 15 mins per 450g (1 lb) + 15 160 true fan 990g-2.3kg (2-5 mins... - Page 23 15. Oven Cooking Chart FOOD CONVENTIONAL TRUE FAN OR FAN TIME COOKING °C ASSISTED °C DESSERTS Crème Caramel 150 true fan Large 4 eggs = 1 hr. Individual = 40 mins Rice pudding 130 true fan 2 hrs Chocolate soufflé 180 true fan 35 mins Fruit Crumble...
-
Page 24: How To Use The Programmer
HOW TO USE 16A. AUTOMATIC PROGRAMMER – MODELS FITTED WITH ANALOGUE TYPE Important note: The programmer will only control the main electric oven on twin oven models. Manual operation Turn the knob ‘E’ clockwise until the “hand” symbol appears in the window ‘D’ and the pointer ‘C’... - Page 25 HOW TO USE 16B. AUTOMATIC PROGRAMMER – 5 BUTTON ELECTRONIC LED What the symbols (above the buttons) indicate-: = minute minder = automatic cooking time = end of cooking time + – = timer settings What the symbols in the display window indicate:- = automatic/semi automatic programme selected Pot symbol = manual operation Bell symbol = minute minder selection...
- Page 26 HOW TO USE Semi-automatic cooking (A) E.g. you have started cooking and wish to set a cooking duration time for the oven to switch off automatically. Press the button then use the + - buttons to select the cooking duration. After setting the “...
-
Page 27: Do's And Don'ts
17. DO’S AND DON’TS read the instructions carefully before using your cooker for the first time. allow the ovens to heat up for 1 hours before using for the first time in order to dispel any smells created from the new oven insulation. This should be done without the introduction of food to the oven. - Page 28 17. DO’S AND DON’TS (continued) cover the grill pan wire mesh insert with aluminium foil. DON’T cook directly on the oven base, always place utensils onto the wire DON’T shelves. line the oven interior with aluminium foil as this can cause a heat reaction DON’T which may damage the vitreous enamel.
-
Page 29: Cleaning
18. CLEANING GENERAL After use and while the cooker is still warm, not hot, it should be wiped with a damp cloth using warm soapy water. With regular cleaning your cooker will remain in good condition. Always disconnect the electricity supply to the oven before cleaning. To keep the cooker looking at its best, wipe any spills as soon as they occur, this will prevent them from burning on and becoming more difficult to remove. - Page 30 18. CLEANING (continued) OVEN DOORS & REMOVAL OF INNER GLASS PANES The oven door exterior including the glass should be wiped with a damp cloth using warm water and a mild detergent. Obstinate marks on the glass can be removed using a cream cleaner.
- Page 31 18. CLEANING CONTINUED OVEN DOOR REMOVAL To give better access into the oven for cleaning, the oven doors are removable. To remove the oven door proceed as follows: Open the oven door fully Lift the catch “C” on both the left hand and the right hand hinges.
-
Page 32: Oven Bulb Replacement
18. CLEANING CONTINUED OVEN WITH STAY CLEAN LINERS Stay clean liners are supplied on certain models or are an optional accessory. These fit to the sides and rear of the oven. The liners are coated with a fat-repelling microporous enamel and help eliminate the splashes that occur during cooking. To maintain an efficient self cleaning action always use high sided dishes and casseroles. -
Page 33: Troubleshooting
20. TROUBLESHOOTING The oven will not operate. Is there a power failure? Is the cooker turned on at the wall mounted box? Turn on the cooker to check the mains supply. Confirm that power is arriving at the cooker by noting that the clock on the automatic programmer is working. If the clock is not working check the fuse/circuit breaker. - Page 34 20. TROUBLESHOOTING (continued) The grill is not operating correctly. The dual element located in the oven roof has two functions – the outer element is used when top heat is required, the inner element is the grill function. If you found the grill to be slow check that you selected the grill function and not top heat function.
-
Page 35: Guarantee
FOR NATIONWIDE SERVICE UK – Tel: 01253 471130 Fax: 01253 471140 GUARANTEE What the Guarantee covers... Our service division will repair or replace free of charge any defect or component that is due to faulty material or workmanship, provided that such a defect occurs within 2 years of date of purchase and that: Our service division is notified promptly of any defects.
Need help?
Do you have a question about the Britannia SIE9TLS and is the answer not in the manual?
Questions and answers