
Related Manuals for ILVE PROFESSIONAL P09


Summary of Contents for ILVE PROFESSIONAL P09
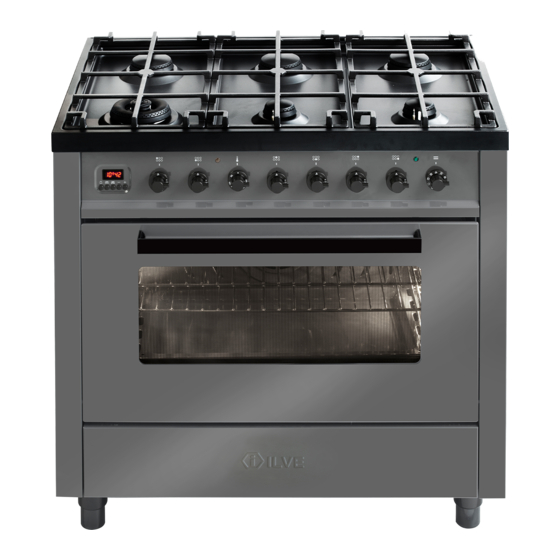
- Page 1 RANGE COOKER USER MANUAL PROFESSIONAL – PROLINE – SERIE K – MAJESTIC 06 - 07 - 08 - 09 - 10 - 12 - 15 USER – Use and Maintenance In the UK: PROFESSIONAL = ROMA / MILANO PROLINE = TORINO cod.
- Page 2 INDEX IMPORTANT SAFETY WARNINGS Cooking function setting (E3 - H3) First system startup of the oven Cooking process (E3 - H3) Models with induction zones Mod. oven E3 with TFT touch(functions list) Precautions before use Mod. oven H3 with TFT touch(functions list) Using the Appliance Mod.
-
Page 3: Important Safety
USER IMPORTANT SAFETY WARNINGS Characteristics As well as being shown on the cover, the data plate is of the applied to the oven door frame and is visible with the door appliances open. CAUTION These warnings refer to different types of appliances. Pay attention in properly identifying the type you own (see the data plate). - Page 4 IMPORTANT SAFETY WARNINGS When using a gas appliance, heat and dampness are generated inside the premise. A good aeration of the kitchen must be guaranteed by keeping the natural aeration vents open or by installing a mechanical aera- tion device (hood). An intensive and prolonged utilization of the appliance may result in the need of supplementary aeration, such as opening a window or increasing the power of the hood (if present).
- Page 5 USER IMPORTANT SAFETY WARNINGS The appliance must be used only for the purposes for which it was intended. Any other use (for example, hea- ting a room) is incorrect and therefore dangerous. The manufacturer declines all responsibilities for damage caused by similar incorrect uses. The appliance is not destined to be activated by means of anexternal timer or a remote control.
- Page 6 IMPORTANT SAFETY WARNINGS must not be made by children without surveillan- CAUTION: During the utilization of the appliance some parts may become very hot. Keep out of reach of children. Absolutely do not touch the elements inside the oven during the utilization. Before cleaning the appliance or carrying out maintenance, disconnect the power supply by removing the plug from the socket or switching off the switch.
- Page 7 USER IMPORTANT SAFETY WARNINGS kept away from the appliance. Should you use small household appliances near the cooking top, please make sure that the electrical cable is not in contact with hot parts of the appliance. To assure the right function of gas appliance, make sure that the rooms are ventilated.
- Page 8 IMPORTANT SAFETY WARNINGS Use only the meat temperature probe recommended for this oven Be careful: fat spillage, objects or oils on the appliance may cause a fire. The appliance must be used by responsible people Be careful: the use of inappropriate or unsuitable pro- tections can cause fires and/or damage.
- Page 9 USER IMPORTANT SAFETY WARNINGS Do not cover the burners or the hob with tinfoil. Do not use the appliance’s surface as a work top, sharp objects might scratch it. Be careful: do not use frying pans, saucepans, grills or sto- nes for grilling of a greater size than the maximum ones indicated for each single burner;...
- Page 10 IMPORTANT SAFETY WARNINGS - First system startup of the oven When using the oven for the first time, let it work empty for about 1 hour (230 °C), possibly leaving the kitchen win- dows open. When you first turn the oven on, a bad smell is emitted due to production residues such as grease, oils or resins.
- Page 11 USER IMPORTANT SAFETY WARNINGS - Models with induction zones Read • Only qualified technicians should install the appliance. carefully The technician will not be held responsible for any da- before using mages caused by electrical malfunctions. • The hob must be installed in the appropriate inset. •...
- Page 12 IMPORTANT SAFETY WARNINGS - Models with induction zones Using the • After use, switch off the cooking area using its control appliance device and do not rely on the pan detector. • WARNING: leaving the appliance unattended with objects, grease and oils can be dangerous and can cause a fire.
- Page 13 USER IMPORTANT SAFETY WARNINGS - Models with induction zones avoid the possibility of electric shock. • WARNING: the appliance is not designed to work with an external timer or with a remote-control system • WARNING: do not use steam appliances to clean the Precautions •...
-
Page 14: Important Safety Warnings
IMPORTANT SAFETY WARNINGS - Models with induction zones In case of • When a malfunction occurs turn off and disconnect malfunction the appliance. • If cracks appear on the glass or it is broken, disconnect the appliance and contact your authori- zed service centre. - Page 15 USER INSTRUCTIONS FOR USE - First system startup of the hob BE CAREFUL: keep children and disabled people away during the operation. Do not use the ap- pliance as a heating source. General notes to keep the appliance efficient and safe, maintenance must be entrusted to speciali- zed technicians or to the after-sales service staff.
- Page 16 INSTRUCTIONS FOR USE - First system startup of the hob Recommended pans ac- cording to burner size: Diameter Ø (cm) Burners 12 ÷ 20 Meduim 20 ÷ 24 Large oval pans (380 x 185) Fish buner TC/DCC 22 ÷ 28 Ring DUAL 12 ÷...
- Page 17 USER INSTRUCTIONS FOR USE – Use of a gridiron Gridiron If you want to use a grill, there are a few things to consider: • it is possible to preheat the grill to the maximum burner power for no more than 10 minutes;...
- Page 18 INSTRUCTIONS FOR USE – Positioning placement of the burners Positioning of the BE CAREFUL: always check that the burners are properly positioned), with a uniform burners flame that is not noisy. BURNERS RIGHT WRONG Medium Large Dual Ring Fish burner Always check that the screws below the burner are fixed...
- Page 19 USER INSTRUCTIONS FOR USE – Positioning placement of the burners Positioning of the BE CAREFUL: always check that the burners are properly positioned, with a uniform burners flame that is not noisy. BURNERS RIGHT WRONG Medium Large Dual Ring...
- Page 20 INSTRUCTIONS FOR USE – Use of the Coup feu COUP FEU Fig. B Fig. A Fig. C Functioning The large “Coup feu” solid cast iron plate made of concentric rings allows you to rest the pan (or even several pans) directly on the surface (fig. B, C). It is heated by means of a gas burner (fig.
- Page 21 USER INSTRUCTIONS FOR USE – Use of the gas fry-top FRY-TOP A GAS A = cooking area B = drip tray Fig. 14 Fig. 15 Functioning of the ap- The fry-top (fig. 14) consists of a stainless-steel plate, suitable for contact with food pliance ] with a uniformity of temperature on the cooking surface and with a very low heat loss.
- Page 22 INSTRUCTIONS FOR USE – Correct use of the fry-top PROFESSIONAL PD10 PD09 P15F P15FS MAJESTIC MD10 M15F M15FS PRO LINE LD10 LD09...
- Page 23 USER INSTRUCTIONS FOR USE – Use of the inductive electric plate INDUCTIVE ELECTRIC PLATE ATTENTION! The ceramic hob remains hot for a long time after use. Do not touch the hob with your hands or let children near it. The residual heat indicator will remain on until the hob has cooled down.
- Page 24 INSTRUCTIONS FOR USE – Use of the inductive electric plate First switching on Clean the hob’s surfaces with a damp cloth. Switching on one A cooking area is turned on by turning the relative knob clockwise. On the hob’s display cooking area the set power level (from 1 to 9) appears.
- Page 25 USER INSTRUCTIONS FOR USE – Use of the inductive electric plate Display Displayed value Description 1 - 9 ......Level of power - Select the cooking level A ........ Heat-up H ........ Residual heat - The cooking zone is hot Presence of pot - Absence of pot or unsuitable pot U ........
- Page 26 INSTRUCTIONS FOR USE – Use of the induction hob INDUCTION HOB A - ø145 - Cooking area ø 145mm Mod. PI06..(1400W / Booster 2200W) B - ø180 - Cooking area ø 180mm (1850W / Booster 3000W) C - ø210 - Cooking area ø 210mm Mod.
- Page 27 USER INSTRUCTIONS FOR USE – Use of the induction hob...
- Page 28 INSTRUCTIONS FOR USE – Use of the induction hob Before the first use Clean your hob with a damp cloth, and then dry the surface thoroughly. Induction There is a coil underneath each cooking zone which, when a pot is placed on it, generates a variable electromagnetic field, producing inductive power of a ferromagnetic substance on the bottom of the pot.
- Page 29 USER INSTRUCTIONS FOR USE – Use of the induction hob Booster function The purpose of the booster function is to give more power to a determined area in or- der to reduce the necessary cooking time. This function is activated by turning the knob clockwise from position 0 (off) to the final position (* fig.
- Page 30 INSTRUCTIONS FOR USE – Use of the induction hob 4 zones models only The Key-lock function is activated, with the knobs in position 0, by turning the controls 2 and 3 in a counterclockwise direction. The letters [L][L][L][L] appear on the display. The Key-lock function is deactivated by repeating the same operation.
- Page 31 USER INSTRUCTIONS FOR USE – Use of the induction hob Heating function 42° AND Turn the knob (A) clockwise. Between the off position (0) and the power position (1) 65° there is the position (u) which identifies the function for heating food at 42°. Only for 5 and 6-zone models: turn the knob (A) clockwise again.
- Page 32 INSTRUCTIONS FOR USE – Use of the induction hob Power management The power management, in case the booster function is being used, is performed in the following way: the level set cooking more recent priority over other areas. The acti- vation of a cooking zone is not shown on the display when prompted for a power too high.
- Page 33 USER INSTRUCTIONS FOR USE – Use of the electric oven multifunction MP/M3 (Pro Line) Description T (MP) T (M3) S. Selector T. Thermostat Command of the oven S. Multifunction electric oven selector T. Temperatures, from 50°C to 250°C (MP) - multifunction 30°C to 300°C (M3) , can be selected by using this knob.
- Page 34 INSTRUCTIONS FOR USE – Use of the electric oven multifunction MP/M3 (Pro Line) – Functions list Pos. Symbol Function Pizza cooking This function is particularly suitable for cooking pizza, focaccia and bread. The main source of heat is from the bottom heating element that works in combination with the oven’s other resistances. Normal static cooking It is the oven’s classic function particularly suited to cooking the following foods: pork chops, sausages, cod, braised beef, game, roast veal, meringues and biscuits, baked fruit, etc.
- Page 35 USER INSTRUCTIONS FOR USE – Use of the conventional electric oven (Pro Line) Description Choose one of the 4 cooking functions by turning the selector (S) and adjust the temperature (from 50˚C to 250˚C) with the thermostat (T). If your model has a pro- grammer, set it for cooking.
- Page 36 INSTRUCTIONS FOR USE – 5-button electronic programmer MP/M3 (Pro Line) Functions Cooking time • end of cooking • clock • timer • manual function Display Symbols indicating functions in progress: Timer Duration and manual function Automatic program [–]/[+] [–]/[+] Button legend Button for timer and buzzer Automatic cooking duration End of cooking time...
- Page 37 USER INSTRUCTIONS FOR USE – 5-button electronic programmer MP/M3 (Pro Line) Semiautomatic opera- Select the duration function (button ) and set the time with the +/- buttons. The “A” tion with cooking dura- symbol and the symbol appear. The oven switches on. When the hour of the day tion coincides with the final time, viewable through the end of cooking button , the oven...
- Page 38 INSTRUCTIONS FOR USE – 5-button electronic programmer E3/H3 (Nostalgie, Professional Plus) Button legend Set minute minder Setting the cooking start time Set end time cooking [–]/[+] [ - ] Decreases the selected parameter [–]/[+] [–]/[+] [ + ] Increases the selected parameter Display •...
- Page 39 USER INSTRUCTIONS FOR USE – 5-button electronic programmer E3/H3 (Nostalgie, Professional Plus) Appliance operation At first control turning on, the display shows the flashing clock that increases by one unit every minute. The oven cannot operate and the possible operations to release it are: “Setting the clock”...
- Page 40 INSTRUCTIONS FOR USE – 5-button electronic programmer E3/H3 (Nostalgie, Professional Plus) Cooking over mode At the end of timed cooking, the oven switches off all loads, a triple intermittent acoustic signal is activated of average intensity, the display shows”End”, the cavity symbol flashes.
- Page 41 USER INSTRUCTIONS FOR USE – 5-button electronic programmer E3 (Nostalgie, Professional Plus) – List of functions on electric multifunction oven Pos. Symbol Function Pizza Cooking This function is particularly suitable for cooking pizzas, focaccias and bread. The main source of heat comes from the lower heating element which works in combination with the other furnace resistances.
- Page 42 INSTRUCTIONS FOR USE – 5-button electronic programmer E3/H3 (Nostalgie, Professional Plus) Cooking inspection If you need to inspect the food being cooked, you can open the oven door. In this case the lights come on and the cooking process stops. Closing the door reactivates the previously set function.
- Page 43 USER INSTRUCTIONS FOR USE – 5-button electronic programmer E3 (Nostalgie, Professional Plus) – List of functions on static electric oven Upper & lower elements Is the classical function of the electric oven and particularly adapted for cooking: pork chops, sausages, dried salt-cured cod, pot roast, game, roast veal, meringues and biscuits, baked fruit, etc.
- Page 44 IINSTRUCTIONS FOR USE – 5-button electronic programmer H3 (Nostalgie, Professional Plus) – Functions list H3 S. Selector T. Thermostat Pos./Pr. Symbol Function Light oven With this function it comes only turned on the inside light of the oven in permanent way without activating any other load.
- Page 45 USER IINSTRUCTIONS FOR USE – 5-button electronic programmer H3 (Nostalgie, Professional Plus) – Functions list gas oven H3 Cooking ventilated grill Particularly fast and deep with notable energy saving, this function is suitable for many foods what: cutlet of 7/PR7 pig, sausages, skewers of pig or mixed, game, potato dumplings to the Roman, etc.
- Page 46 INSTRUCTIONS FOR USE – Gas oven H3 Safety Keep children far from the appliance during the operation. The safety norms are not always able to cover every type of accident. Don’t use the appliance as a source of heating. General notes To maintain the appliance efficient and sure, maintenance must be submitted to spe- cialized technicians or to the personnel of the service assistance in guarantee.
- Page 47 USER INSTRUCTIONS FOR USE – Display TFT touch (Majestic) – Icon legend Break Home Start Light °C - °F Timer Screen lock Exit - Terminate Settings Clock Settings Confirm Settings Meat probe Switch off Knob present in some models. (It allows to set and confirm the functions of the TFT in addition Flame presence to the Touch display)
- Page 48 INSTRUCTIONS FOR USE – Display TFT touch (Majestic) – Settings Home: display homepage. 3 options Allows you to proceed to the screen setting of the cavity Allows you to set the timer Gives you direct access to the settings Settings Choice of degree scale (°C or °F).
- Page 49 USER INSTRUCTIONS FOR USE – Mod. oven E3 - H3 - static with TFT touch (Majestic) – Cooking function setting 11:48 Set the cooking time and Choose the cooking the programmed start function °C Cavity selection (only for multiple cavity models) Light (on or off) Home...
- Page 50 INSTRUCTIONS FOR USE – Mod. oven E3 - H3 - static with TFT touch (Majestic) – Cooking process 11:48 °C CAVITY SET Once the cavity has been set (cooking function, 12:58 temperature and timer), confirm to start the preheating. At this point the display will switch to the preheating mode MODALITÀ...
- Page 51 USER INSTRUCTIONS FOR USE – Mod. oven E3 with TFT touch (Majestic) – Functions list Pizza cooking This function is particularly suitable for cooking pizza, focaccia and bread. The main source of heat is from the bottom heating element that works in combination with the oven’s other resistances. Normal static cooking It is the oven’s classic function particularly suited to cooking the following foods: pork chops, sausages, cod, braised beef, game, roast veal, meringues and biscuits, baked fruit, etc.
- Page 52 INSTRUCTION FOR USE – Mod. oven H3 with TFT touch (Majestic) – Functions list Cooking from under (burner gas) It is the function of the rapid and intense cooking of various dishes; it is suitable for: fish to the bag, braised ve- getables, skewers, duck, chicken, etc.
- Page 53 USER INSTRUCTIONS FOR USE – Mod. oven static with TFT touch (Majestic) – Functions list Upper & lower elements Is the classical function of the electric oven and particularly adapted for cooking: pork chops, sausages, dried salt-cured cod, pot roast, game, roast veal, meringues and biscuits, baked fruit, etc. Lower element This setting is most suitable for finishing cooking, particularly pastries (biscuits, meringues, desserts, puff pastry, fruit cakes, etc.) and other foods.
- Page 54 INSTRUCTIONS FOR USE – Accessories turn-spit Slide the meat to be cooked onto the spit, blocking it with the special forks. Place the (only on some models) spit on the special supports previously inserted in the drip pan and insert it in the spit-ro- ast horn.
-
Page 55: Cleaning And Maintenance
USER CLEANING AND MAINTENANCE – Replacing the bulb Procedure to follow Should the oven light not work, disconnect the appliance from the mains, remove the lamp protection glass and replace the bulb. The new bulb must, naturally, be sui- table for use at high temperatures and has the characteristics for such use. Losen whit a flathead screwdriver Remove the glass cover Pull out the light... -
Page 56: Door Removal
CLEANING AND MAINTENANCE – Door removal Procedure to follow For ease of intensive cleaning it is practical to dismantle the door following these instructions: - open the door - mow the hook C to the hince zone D, following the speps (only on some models) - Page 57 USER CLEANING AND MAINTENANCE – Cleaning the door and glasses Procedure to follow The oven door is composed of 3 sheets of plate glass (two in some cases). The plate glass parts may be cleaned using absorbent kitchen paper and an ordinary non-abrasive detergent.
- Page 58 CLEANING AND MAINTENANCE – Recommendations for cleaning the cooktop ATTENTION: Before carrying out any cleaning operations, disconnect the appliance from the mains and close the gas valve. The cooktop must be cleaned after it has been let cooling down. COOKTOP COMPONENT CLEANING METHOD WARNINGS...
- Page 59 USER CLEANING AND MAINTENANCE – Recommendations for cleaning the oven and the front panel OVEN COMPONENT CLEANING METHOD WARNINGS Oven inside It is recommended to clean the oven Do not use vapor cleaner to clean the after every use. Dirt is cleaned more easily interior of the oven.
- Page 60 CLEANING AND MAINTENANCE – Maintenance and cleaning of total black burners with nanotechnological coating ATTENTION! Some cleaning and washing methods are recommended in order to preserve the quality of the coating. • Allow the product to cool down at room temperature before cleaning it. It is recommended not to dip it in cold water when it is still hot.
-
Page 61: Problem Solving
USER PROBLEM SOLVING – Guide for the resolution ATTENTION: • During the guarantee period repairs can only be carried out by the authorized after-sales service. • Before repairing, unplug the appliance from the power supply, that is, unplug the power cable or use the appropriate switch. •... - Page 62 PROBLEM SOLVING – Induction hob malfunction Anomaly Causes The appliance and the hob do not swi- - The hob has not been properly connected to the electrical network. tch on - The protection fuse is broken - Activates the key-lock function. The “U”...
- Page 63 USER PROBLEM SOLVING – TFT display errors System errors The following errors are detected: The error code syntax is: “E YY X”, where: YY = error code x = cavity number when error occurred or ‘ 0 ‘ for general errors Description Error ID Cavity probe in open circuit...
- Page 64 PROBLEM SOLVING – Children Lock How to resolve Symbol that represents the children lock ATTENTION: If this symbol shows up in your oven, do not worry. The children lock may have accidentally been selected. The oven is equipped with a safety feature which prevents the unwanted startup of the oven.
-
Page 65: Cooking Chart
USER COOKING CHART – Convection oven (purely indicative values) DISH TEMP. C° MIN. MEATS 40/50 Roast beef 170-180 Roast ox 170-190 40/60 Roast veal 160-180 65/90 Roast lamb 140-160 100/130 Rare roast beef 180-190 40/45 Roast hare 170-180 80/100 Roast rabbit 160-170 80/100 Roast turkey... - Page 66 COOKING CHART – Static oven (purely indicative values) MIN. DISH TEMP. C° MEATS 60/80 Roast beef 50/60 Roast ox 60/80 Roast veal 40/50 Roast lamb 50/60 Rare roast beef 40/50 Roast hare 40/50 Roast rabbit 50/60 Roast turkey 60/70 Roast goose 45/60 Roast duck 40/45...
- Page 67 USER COOKING CHART Inside food temperature (°C) COKING CHART Food Temperature (°C) Beef • Roastbeef / beef fi llet rare 40-45 medium 50-55 well done 60-65 • Roast meat 80-85 Pork • Loin 65-70 • Roast / bacon 80-85 • Neck 80-85 •...
Need help?
Do you have a question about the PROFESSIONAL P09 and is the answer not in the manual?
Questions and answers