Summary of Contents for ILVE Professional Plus Series
Page 1
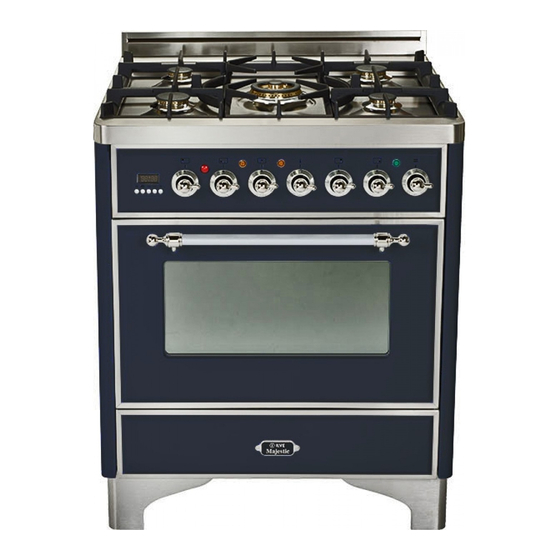
U s e r I nst r uct i on s, In s ta lla ti on , ma in ten an c e fo r • C O O K E R S • Ma j estic • Profe s s io n a l • Qu ad r a Ma jestic •...
Page 2
IMP ORTA NT - P LE ASE READ AND FOLL OW • Before beginning, please read these instructions completely and carefully. • Do not remove permanently affi xed labels, warnings, or plates from the product. This may void the warranty. •...
Page 3
Keeping appliance area clear and free from combustible materials, gasoline and other fl ammable vapors and liquids. I M P O R T A N T I N S T R U C T I O N All Appliances: Do Not Leave Children Alone - Children should not be left alone or unattended in area where appliance is in use. They should never be allowed to sit or stand on any part of the appliance.
I N S T A L L A T I O N I N S T R U C T I O N S This appliance shall only be installed by an authorized person. This appliance shall be installed in accordance with the manufactures installation instructions, IMPORTANT: this appliance must be installed in accordance with the norms in force of the country concerned.
B A S E F E E T Legs are packed in carton box. Legs should be installed near to where the appliance is to be used, as they are not secure for long transit. After unpacking the range, raise it about a foot to remove the bottom shipping skid. Keep the unit raised to permit legs to be screwed into our couplings and lower it gently to keep any undue strain from the legs and internal mounting hardware.
BA C KG U A R D INS TA L L ATIO N INS T R UCT ION Pl e a se f o llo w the f o llow in g in st all at i on i nstru cti on s i n s e q u e n c e : 1 .
Page 7
P R O X I M I T Y T O S I D E C A B I N E T I N S T A L L A T I O N 1. This range may be installed directly adjacent to existing [33 15/32” - 36 20/32”] high base cabinets. IMPORTANT: The top border of the worktop should be at the same level of the adjacent cabinets counter top.
EL E CT RI C A L CONNECTION T he a pp li a n c e s h a ll b e conn ect ed t o a si n gl e ph as e e l e c tri c li n e ra te d a t 1 2 0 /2 0 8 Va c or 1 2 0/2 40Va c a n d 6 0 Hz frequ ency.
P ERFO RMA NCE CHE CKL IST All bu r n e rs a re te s t e d b ef ore le avin g t he fact ory. Th e re a re n o a d j u s tm e n ts fo r th e b u r n e rs if co nn ec te d a c c o rd i ng t o t h e i nf or mat i on on the rat in g p la te .
Page 10
AD AP TATIO N OF THE PRESSU RE R EG UL AT O R F O R US E W ITH DIFFER E NT TY PE O F G AS T he pre s s u re re g u la t or su ppl i ed w i t h t h e app l i a nc e i s a c o n v e rt ib le ty p e p re s s u re re gu la t or fo r u se wit h Na t ur al G a s at a n omi nal out l et p ressu re o f 5 ”w.c .
Page 11
CHANGING THE INJECTORS AND ADJUSTING THE AIR TABL E 2 Bur n e r G a s I NP U T O R IF IC E S IMM E R P R IMA RY B Y-PA S S RATE S IZ E R AT E A IR O R IF IC E...
Page 12
A1) Bu r n e r s o f th e hob 1. Remove the grill, the caps and the burners from the worktop. 2. Lift the worktop. 3. Unscrew the screw “F” and remove the pipe “R”. 4. Unscrew the injectors (U) and replace them with those suitable for the gas used, supplied with the cooker. See TABLE 2. 5.
A DJ U ST I N G THE MINIMU M GAS F LO W When installing the cooker you must check that the minimum gas fl ow of the burners on the hob and in the oven is correctly regulated. If the type of gas is changed it is indispensable to adjust the minimum fl ow. The regulating procedure is as follows.
OV EN C LE A NING A ND CA RE It is advised to clean the oven after each use. The dirt comes off more easily, preventing it from being burnt repeatedly at high temperatures. Wait until the chamber is lukewarm. Remove all the extractable parts and wash them separately in hot water and non abrasive detergent.
Page 15
Self- cl ean i n g p a n e l s If the oven is equipped with self-cleaning catalytic panels, at normal cooking temperatures (430°F) the catalytic enamel favours the transformation of splashes of fat into a light powder residue. This powder may be removed with a damp cloth once the oven has cooled.
Page 16
US ER M A NUAL IM PORTANT: keep children away from the appliance when it operates. The oven door becomes very hot. Safety rules do not always cover any type of accident. The appliance must not be used for heating purposes. If other electric appliances are connected to outlets placed near the appliance, make sure that the connection cables will not be trapped in the oven door while operating.
US E O F THE EL ECTRONIC PR O GR AM M ER RE MAR K: To know what the electronic programmer drive see ELEC TR O N I C P RO G R A M M ER TA B LE (at the end of the booklet). ATTE N T I O N : D O N O T U SE ELECT RONI C PROGRAM MER W HE N VEN TI L ATED G A S FU N C TI O N IS S ELEC T.
Page 19
8. SE MI- AUT O MAT I C FU N C TIO N W ITH END OF COOKI NG TI M E Choose the function end of cooking ( button) and set the fi nal time with the +/- buttons. The symbols “A” and the pot symbol appear.
Page 20
US E O F THE MULTIFU NCTIO N O V E N Turn the selector knob (S) and choose the function. Select the desired temperature from 100˚F to 500˚F turning the thermostat (T). If your oven is fi tted with a programmer then you have to switch it on. Ov en l i g h t To switch the light off...
Page 21
US E OF T HE STATIC OVE N 1 Uppe r & l o w e r e l e m e n t s This operates like a conventional electric oven and can be used accordingly. 2 Uppe r el e me n t Especially suitable for browning and to add the fi...
HOW TO USE THE GAS OVEN WITH GAS GRILL 1 Selecting ventilated gas function Turn the knob (A) and select the “ventilated cooking gas”. Then turn the knob (G) and select the desired temperature. The ignition of the oven burner takes place automatically after a few seconds. If this does not happen, switch off and repeat the operation. 2 Electric lighting of the gas oven Turn the knob (A) and select the “static cooking gas”.
Page 23
WA R NING The e ff e c t th a t t o p b u r ner f l am e siz e shoul d be ad just ed so i t does n ot extend beyond the edge of t he cooki ng ut ensil. This is an i n s tr u c ti o n bas ed o n sa fet y c onsi derat i o ns.
I NSTRU CT ION S FOR USE O F T HE GA S F RY- T OP The Fry-Top is composed of a special stainless steel plate (20/64” thick), specially designed to have temperatures evenly distributed over the whole surface so that it may be exploited to the full. The plate also has hygienic advantages. Another merit is the high heat accumulation of the plate, with very low heat loss.
Page 25
GA S B ARB E C UE Replace the burner cap A with the protected barbecue burner cap B. Before positioning the barbecue plate, ensure that the burner cap has been fi tted correctly and test lighting of the burner. To use the appliance, light the fl ame below the plate by means of the corresponding knob (see “Lighting the burners”) and ensure that the fl...
FA N O V EN COOKING C HART ME AT S TEMP ERATURE [ °F ] POS I TIO N T IM E [m i n] Roast beef 340 - 360 2 – 3 40 - 50 Roast ox 340 – 370 2 –...
Page 27
NATURA L CO NVE CTION OVEN CO OK ING CHART ME AT S TE MP ERATURE [ ° F ] POSI TI O N TI M E [m i n] Roast beef 2 – 3 60 - 80 Roast ox 450-500 2 –...
Page 28
EL E CT RI C A L SKE TCH ES KEYS KEYS KEYS BLACK EARTH WIRE ROTISSERIE UPPER HEATING ELEMENT BROWN EARTH WIRE COOLING FAN LOWER HEATING ELEMENT EARTH WIRE SELECTOR GRILL HEATING ELEMENT WHITE EARTH WIRE OVEN THERMOSTAT CIRCULAR HEATING ELEMENT YELLOW EARTH WIRE PROGRAMMER BARBECUE HEATING ELEMENT...
Page 29
MULTIFUNCTION MODELS ONLY Big Solid Top Burner...
Page 42
E LE CT R ICA L A ND GA S P OW ER TAB LE GAS POWER (Btu/h) ELECTRICAL POWER (kW/240V) COOK TOP GAS OVEN ELECTRICAL UP(F/L/W/N/S)60MP 43500 UP(F/L/W/N/S)60VG 55000 UP(F/L/W/N/S)60VGG 64000 UP(F/L/W/N/S)70MP 43500 UP(F/L/W/N/S)70VG 55000 UP(F/L/W/N/S)70VGG 64000 UM70MP_UM(T/CA)70MP 43500 UM70VG_UM(T/CA)70VG 55000 UM70VGG_UM(T/CA)70VGG...
Page 43
GAS POWER (Btu/h) ELECTRICAL POWER (kW/240V) COOK TOP GAS OVEN ELECTRICAL UQDC100SWMP 52000 UP(F/L/W/N/S)1207VG 95000 UM1207VG_UMT1207VG 95000 UP(F/L/W/N/S)1207VGG 108500 UM1207VGG_UMT1207VGG 108500 UP(F/L/W/N/S)1207MP 80000 UM1207MP_UMT1207MP 80000 UP(F/L/W/N/S)120FVG 95000 UM120FVG_UMT120FVG 95000 UP(F/L/W/N/S)120FVGG 108500 UM120FVGG_UMT120FVGG 108500 UP(F/L/W/N/S)120FMP 80000 UM120FMP_UMT120FMP 80000 UP(F/L/W/N/S)120SVG 77500 UM120S5VG_UMT120S5VG 77500 UP(F/L/W/N/S)120SVGG 91000...
Page 44
GAS POWER ELECTRICAL POWER COOK TOP WITH DUAL GAS OVEN ELECTRICAL UP(F/L/W/N/S)76DMP 50500 UM76DMP_UM(T/CA)76DMP 50500 UP(F/L/W/N/S)76DVG 65500 UM76DVG_UM(T/CA)76DVG 65500 UP(F/L/W/N/S)76DVGG 79000 UM76DVGG_UM(T/CA)76DVGG 79000 UP(F/L/W/N/S)60DMP 43500 UP(F/L/W/N/S)60DVG 55000 UP(F/L/W/N/S)60DVGG 64000 UP(F/L/W/N/S)70DMP 43500 UP(F/L/W/N/S)70DVG 55000 UP(F/L/W/N/S)70DVGG 64000 UM70DMP_UM(T/CA)70DMP 43500 UM70DVG_UM(T/CA)70DVG 55000 UM70DVGG_UM(T/CA)70DVGG 64000 UP(F/L/W/N/S)90PDVG 69000...
Page 45
GAS POWER ELECTRICAL POWER COOK TOP WITH DUAL GAS OVEN ELECTRICAL UQDC100SDWMP 52000 UP(F/L/W/N/S)1207DVG 95000 UM1207DVG_UMT1207DVG 95000 UP(F/L/W/N/S)1207DVGG 108500 UM1207DVG_UMT1207DVGG 108500 UP(F/L/W/N/S)1207DMP 80000 UM1207DMP_UMT1207DMP 80000 UP(F/L/W/N/S)120FDVG 95000 UM120FDVG_UMT120FDVG 95000 UP(F/L/W/N/S)120FDVGG 108500 UM120FDVG_UMT120FDVGG 108500 UP(F/L/W/N/S)120FDMP 80000 UM120FDMP_UMT120FDMP 80000 UP(F/L/W/N/S)120SDVG 77500 UM120S5DVG_UMT120S5DVG 77500 UP(F/L/W/N/S)120SDVGG 91000...
Page 46
GAS POWER ELECTRICAL POWER COOK TOP WITH DOUBLE GAS OVEN ELECTRICAL DUAL BURNER UM906DDVG_UM(T/CA)906DDVG 84500 UM906DDVGG_UM(T/CA)906DDVGG 98000 UM906DDMP_UM(T/CA)906DDMP 69500 UPD(F/L/W/N/S)1006DDVG 81000 UMD1006DDVG_UMTD1006DDVG 81000 UPD(F/L/W/N/S)1006DDVGG 90000 UMD1006DDVGG_UMTD1006DDVGG 90000 UPD(F/L/W/N/S)1006DDMP 69500 UMD1006DDMP_UMTD1006DDMP 69500 UQDC1006DDWVG 81000 UQDC1006DDWVGG 90000 UQDC1006DDWMP 69500 UP(F/L/W/N/S)1207DDVG 95000 UM1207DDVG_UMT1207DDVG 95000 UP(F/L/W/NS)1207DDVGG 108500...
Page 47
GAS POWER ELECTRICAL POWER COOK TOP WITH DOUBLE GAS OVEN ELECTRICAL DUAL BURNER UPS(F/L/W/N/S)120FDDVGG 108500 UPS(F/L/W/N/S)120FDDMP 80000 UMS1207DDVG_UMTS1207DDVG_UMCSA1207DDVG 95000 UMS1207DDVGG_UMTS1207DDVGG_UMCSA1207DDVGG 108500 UMS1207DDMP_UMTS1207DDMP_UMCSA1207DDMP 80000 UMS120FDDVG_UMTS120FDDVG_UMCSA120FDDVG 95000 UMS120FDDVGG_UMTS120FDDVGG_UMCSA120FDDVGG 108500 UMS120FDDMP_UMTS120FDDMP_UMCSA120FDDMP 80000 UP(F/L/W/N/S)150SDDVG 93000 UM150SDDVG_UM(T/CA)150SDDVG 93000 UP(F/L/W/N/S)150SDDVGG 106500 UM150SDDVGG_UM(T/CA)150SDDVGG 106500 UP(F/L/W/N/S)150SDDMP 78000 UM150SDDMP_UM(T/CA)150SDDMP 78000 UP(F/L/W/N/S)150FDDVG 105500...
Page 48
Superior Marketing sales@superiormktg.com 1870 Bath Ave Suite 3, Brooklyn, NY 11214 718 249-1215...
Need help?
Do you have a question about the Professional Plus Series and is the answer not in the manual?
Questions and answers
How do you set the clock on a 90cm oven