Table of Contents
Advertisement
Available languages
Available languages
Quick Links
Advertisement
Table of Contents

Subscribe to Our Youtube Channel
Related Manuals for Create Wind Clear Rattan


Summary of Contents for Create Wind Clear Rattan
- Page 1 Wind Clear Rattan User manual | Manual de instrucciones...
-
Page 4: Table Of Contents
IND E X ENGLISH ESPAÑOL Location and installation requirements Requisitos de ubicación e instalación Mechanic tips Consejos mecánicos Electrical Tips Consejos eléctricos Security instructions Instrucciones de seguridad Parts list Lista de piezas Remote control Mando a distancia Installation instructions Instrucciones de instalación Installation Preparation Preparación de la instalación Installing the mounting bracket... - Page 5 I NDE X ITALIANO DEUTSCH Requisiti di posizione e installazione Standort- und Installationsanforderungen Consigli del meccanico Tipps für Mechaniker Suggerimenti elettrici Elektrische Tipps Istruzioni di sicurezza Sicherheitshinweise Elenco delle parti Liste der Einzelteile Telecomando Fernbedienung Istruzioni per l'installazione Installationsanleitung Preparazione all'installazione Installationsvorbereitung Installazione della staffa di montaggio Einbau der Montagehalterung...
-
Page 6: English
ENGL ISH Thank you for choosing our ceiling fan. Before using the appliance, and to ensure the best use, carefully read these instructions. The safety precautions enclosed herein reduce the risk of death, injury and electrical shock when correctly adhered to. Keep the manual in a safe place for future reference, along with the completed warranty card, purchase receipt and package. -
Page 7: Security Instructions
• To reduce the risk of fire, or motor damage, do not use a solid state speed control with this fan. Use only CREATE speed controls. Note: Important safety precautions and instructions in this manual are not intended to cover all conditions and situations that may occur. -
Page 8: Parts List
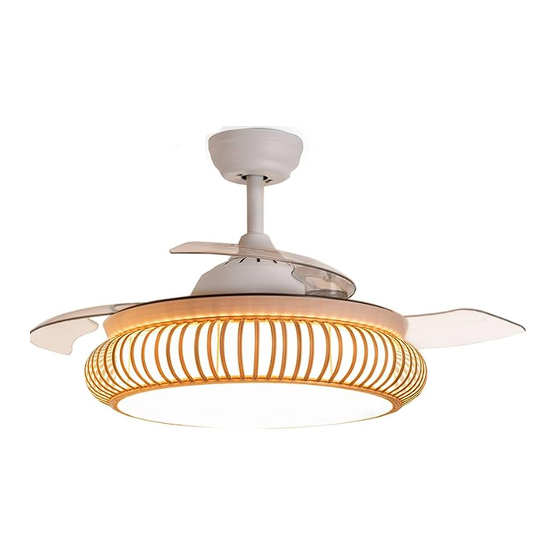
PARTS LIST Rosette Bar of Trim Support extension mounting Connection panel Decorative lamp shade Light plate Tulip Fan body Remote control & Screws Driver REMOTE CONTROL 1. Light 2. ON/OFF button 3. Timer 4. Color temperature control 5. Fan intensity control 6. -
Page 9: Installation Instructions
LIGHT COLOUR TEMPERATURE Turns the fan light on and off regardless of Toggles between the three types of availa- whether the fan is running or not. ble light colour temperatures (warm, neu- tral, and cool). ON/OFF FAN INTENSITY Turns the fan on or off completely, regardless Increase or decrease the rotation speed of of whether it has the light on or off. -
Page 10: Installing The Mounting Bracket
IN STALLIN G THE MOUNT I NG B R ACKE T Before installing the mounting bracket you should check the ceiling where the fan is to be installed and check if it is suitable for it. Concrete ceiling Wood roof Drill 2 holes with an 8mm drill bit, accord- Attach the mounting bracket to the wood ing to the length of the expansion bolts. -
Page 11: Choice Of Fan Height
C H OICE OF FAN HE I GHT • Choose the suspension bar that best suits your situation. • Remove the bolt from the bar by removing the pin and thread the canopy (roof trim) and motor canopy through the hanger bar. Next, route the fan motor wires through the inside of the hanger bar. -
Page 12: Installation Of The Light Plate
IN STAL L ATION O F THE T RIM AND LI GHT PL AT E 1. Fit the trim by aligning the holes with the 2. Remove the 4 screws from the centre of holes in the engine. Use 4 screws to at- the fan body. -
Page 13: Check The Installation
* Only for models with Wi-Fi The CREATE app is available for both Android and iOS (search for the app on Google Play or App Store or scan the QR code below). There may be additional costs depending on the provider. -
Page 14: How To Connect To The App
7. While connecting, make sure your router, mobile phone and device are as close as possi- ble. Finally, the ceiling fan will be successfully added to your CREATE application. In compliance with Directives: 2012/19/EU and 2015/863/EU on the restriction of the use of dangerous sub- stances in electric and electronic equipment as well as their waste disposal. -
Page 15: Requisitos De Ubicación E Instalación
E SPAÑOL Gracias por elegir nuestro ventilador de techo. Antes de utilizar este electrodoméstico y para asegurar su mejor uso, por favor, lea detenidamente las instrucciones. Las medidas de seguridad aquí indicadas reducen el riesgo de incendio, descarga eléctrica y lesiones cuando se siguen correctamente. -
Page 16: Instrucciones De Seguridad
• No exponga el ventilador de techo a la lluvia o la humedad. No accione el ventilador de techo en exteriores ni con las manos húmedas. • Utilice únicamente piezas de recambio CREATE. • Para reducir el riesgo de sufrir lesiones corporales, fije el ventilador directa- mente a la estructura portante del edificio siguiendo estas instrucciones y utilice solamente los accesorios suministrados. -
Page 17: Lista De Piezas
LISTA DE PIEZAS Florón Barra Barra de Embellecedor Soporte extensión de montaje Panel de conexión Pantalla de lámpara Placa de luz Tulipa decorativa Cuerpo del ventilador Mando a distancia Tornillería & Driver MANDO A DISTANCIA 1. Luz 2. Botón ON / OFF 3. -
Page 18: Instrucciones De Instalación
TEMPERATURA DE COLOR Enciende y apaga la luz del ventilador, Alterna entre los tres tipos de temperatura independientemente de si el ventilador de color de la luz disponibles (cálida, neutra está en marcha o no. y fría). ENCENDIDO/APAGADO INTENSIDAD DEL VENTILADOR Enciende o apaga el ventilador por com- Aumenta o disminuye la velocidad de giro de las aspas del ventilador. -
Page 19: Instalación Del Soporte De Montaje
INSTAL ACIÓN DE L SO P O RT E D E MO NTA JE Antes de instalar el soporte de montaje debe comprabar el techo en el que se va a insta- lar el ventilador y comprobar si es apropiado para ello. Techo de hormigón Techo de madera Realice 2 orificios con una broca de 8 mm,... -
Page 20: Elección De La Altura Del Ventilador
E LECCIÓN DE L A ALT UR A D E L VE NT I L A D OR • Elija la barra de suspensión que más se adapte a su situación. • Retire el perno de la barra, quitando el pasador y pase el florón (embellecedor del te- cho) y el florón del motor a través de la barra de suspensión. -
Page 21: Instalación Del Panel De Conexión
IN STAL ACI ÓN DE L E MB E LLECE DO R Y PA NE L DE C O NE XI ÓN 1. Coloque el embellecedor alineando los 2. Retire los 4 tornillos de la parte central orificios con los agujeros del motor. Utili- del cuerpo del ventilador. -
Page 22: Comprobar La Instalación
Este aparato se utiliza a través de su red doméstica. Como requisito imprescindible, debe tener una red wifi siempre conectada a su router de 2.4 Gh y la aplicación gratuita CREATE. (Los proveedores de internet actualmente ofrecen tanto 5Gh como 2.4Gh simultáneamente.) Le recomendamos que desconecte el aparato de la red eléctrica cuando esté... -
Page 23: Cómo Conectarse A La App
7. Mientras se conecta, asegúrese de que su router, teléfono móvil y dispositivo estén lo más cer- ca posible. Finalmente, el ventilador de techo se agregará con éxito a su aplicación CREATE. En cumplimiento de las directivas: 2012/19 / UE y 2015/863 / UE sobre la restricción del uso de sustancias peligrosas en equipos eléctricos y electrónicos, así... -
Page 24: Português
PORT U G UÊ S Obrigado por escolher o nosso ventilador de teto. Antes de utilizar o dispositivo e para asse- gurar uma boa utilização do mesmo, leia cuidadosamente estas instruções. Seguir estas precauções de segurança corretamente reduz o risco de morte, ferimentos ou choque elétrico. -
Page 25: Instruções De Segurança
• Não exponha o ventilador de teto à chuva ou umidade. Não opere o venti- lador de teto ao ar livre ou com as mãos molhadas. • Use apenas peças de reposição CREATE. • Para reduzir o risco de lesões corporais, fixe o ventilador diretamente na estrutura de suporte do edifício seguindo estas instruções e use apenas... -
Page 26: Lista De Peças
LISTA DE PEÇAS Roseta Barra Barra de Aparar Apoiar Extensão Montagem Painel de conexão Abajur decorativo Placa de luz Abajur Corpo do ventilador Controle remoto e Parafusos controlador CONTROLE REMOTO 1. Luz 2. Botão ligar / desligar 3. Cronômetro 4. Controle de temperatura de cor 5. -
Page 27: Instruções De Instalação
TEMPERATURA DE COR Liga e desliga a luz do ventilador, Alterna entre os três tipos de temperatura de independentemente de o ventilador estar cor de luz disponíveis (quente, neutro e frio). funcionando ou não. LIGAR / DESLIGAR FAN INTENSITY Liga ou desliga o ventilador completamente, Aumente ou diminua a velocidade de independentemente de estar com a luz acesa rotação das pás do ventilador. -
Page 28: Instalando O Suporte De Montagem
INSTAL AN D O O S UP O RT E D E MO NTAGE M Antes de instalar o suporte de montagem, verifique o teto onde o ventilador será instalado e verifique se é adequado para ele. Teto de concreto Telhado de madeira Faça 2 furos com uma broca de 8 mm, de Fixe o suporte de montagem ao teto de ma-... -
Page 29: Escolha Da Altura Do Ventilador
E SC OLHA DA ALTU R A D O VE NT IL ADO R • Escolha a barra de suspensão que melhor se adapta à sua situação. • Remova o parafuso da barra removendo o pino e rosqueie a capota (guarnição do teto) e a capota do motor através da barra de suporte. -
Page 30: Instalação Da Placa De Luz
INSTAL AÇÃO DA PL ACA D E LU Z 1. Encaixe a guarnição, alinhando os orifí- 2. Retirar os 4 parafusos do centro do cor- cios com os orifícios do motor. Utilize 4 po da ventoinha. Aparafusar o painel de parafusos para o fixar ao corpo do motor. -
Page 31: Verifique A Instalação
Este aparato se utiliza a través de su red doméstica. Como requisito imprescindible, debe tener una red wifi siempre conectada a su router de 2.4 Gh y la aplicación gratuita CREATE. (Los proveedores de internet actualmente ofrecen tanto 5Gh como 2.4Gh simultáneamente.) Le recomendamos que desconecte el aparato de la red eléctrica cuando esté... -
Page 32: Cómo Conectarse A La App
7. Mientras se conecta, asegúrese de que su router, teléfono móvil y dispositivo estén lo más cer- ca posible. Finalmente, el ventilador de techo se agregará con éxito a su aplicación CREATE. En cumplimiento de las directivas: 2012/19 / UE y 2015/863 / UE sobre la restricción del uso de sustancias peligrosas en equipos eléctricos y electrónicos, así... -
Page 33: Français
F R A NÇ AIS Nous vous remercions d’avoir choisi notre ventilateur de plafond. Avant d’utiliser cet appareil élec- troménager et pour garantir une utilisation optimale, lire attentivement les instructions. Les mesures de sécurité visées ici réduisent le risque d’incendie, d’électrocution et de bles- sures lorsqu’elles sont correctement suivies. -
Page 34: Consignes De Sécurité
à l'extérieur ou avec les mains mouillées. • N'utilisez que des pièces de rechange CREATE. • Pour réduire le risque de blessures corporelles, fixez le ventilateur direc- tement à la structure de support du bâtiment en suivant ces instructions et utilisez uniquement le matériel fourni. -
Page 35: Liste Des Pièces
LISTE DES PIÈCES Rosette Bar de Garniture Soutien extension Montage Panneau de connexion Abat-jour décoratif Plaque lumineuse Abat-jour Corps de ventilateur Télécommande et contrôleur TÉLÉCOMMANDE 1. Lumière 2. Bouton marche/arrêt 3. Minuteur 4. Contrôle de la température de couleur 5. Contrôle de l'intensité du ventilateur 6. -
Page 36: Instructions D'installation
LUMIÈRE TEMPÉRATURE DE COULEUR Alterna tra i tre tipi di temperature di colore Allume et éteint la lumière du ventilateur, della luce disponibili (calda, neutra e fredda). que le ventilateur soit en marche ou non. INTENSITÉ DU VENTILATEUR ALLUMÉ ÉTEINT Allume ou éteint complètement le ventila- Augmente ou diminue la vitesse de rota- teur, que la lumière soit allumée ou non. -
Page 37: Installation Du Support De Montage
IN STAL L ATI ON DU SUP P O RT D E MO NTAG E Avant d'installer le support de montage, vous devez vérifier le plafond où le ventilateur doit être installé et vérifier s'il est adapté. Plafond en béton Toit en bois Percez 2 trous avec une mèche de 8 mm, en Fixez le support de montage au plafond en... -
Page 38: Choix De La Hauteur Du Ventilateur
C HO IX D E L A HAU TEUR D U VE NT I L AT EU R • Choisissez la barre de suspension qui convient le mieux à votre situation. • Retirez le boulon de la barre en retirant la goupille et enfilez l'auvent (garniture de toit) et l'auvent du moteur à... -
Page 39: Installation De La Plaque Lumineuse
INSTALL ATION D E L A P L AQUE LUMI NE USE 1. Ajustez la garniture en alignant les trous 2. Retirez les 4 vis situées au centre du sur ceux du moteur. Utilisez 4 vis pour corps du ventilateur. Vissez le panneau la fixer au corps du moteur. -
Page 40: Vérifier L'installation
CONNEXION À L'APPLICATION * Uniquement pour les modèles avec Wi-Fi L'application CREATE est disponible pour Android et iOS (recherchez l'application sur Goo- gle Play ou App Store ou scannez le code QR ci-dessous). Il peut y avoir des frais supplémen- taires selon le fournisseur. -
Page 41: Comment Se Connecter À L'application
Android C O M ME N T SE CONNECT E R À L'APP LICAT I ON 1. Installez l'application CREATE et créez un compte utilisateur. 2. Définissez un mot de passe de connexion et connectez-vous à l'application. 3. Cliquez sur « Ajouter un appareil » (+), puis cliquez sur la catégorie du ventilateur de plafond. -
Page 42: Italiano
I TA LIA NO Grazie per aver scelto il nostro ventilatore da soffitto. Prima di utilizzare questo elettrodome- stico e al fine di garantirne il miglior uso, leggere attentamente le istruzioni. Se seguite in modo corretto, le misure di sicurezza qui indicate riducono il rischio di incendio, scarica elettrica e lesioni. -
Page 43: Istruzioni Di Sicurezza
• Non esporre il ventilatore a soffitto a pioggia o umidità. Non azionare il ventilatore da soffitto all'aperto o con le mani bagnate. • Utilizzare solo CREATE pezzi di ricambio. • Per ridurre il rischio di lesioni personali, fissare il ventilatore direttamen- te alla struttura portante dell'edificio seguendo queste istruzioni e utiliz- zare esclusivamente la ferramenta in dotazione. -
Page 44: Elenco Delle Parti
ELENCO DELLE PARTI Rosetta Barra Barra di Embelle Supporto Estensione montaggio Ordinare cedor Pannello di connessione Paralume decorativo Piatto luminoso Paralume Corpo del ventilatore Telecomando e Viti controller TELECOMANDO 1. Leggero 2. Tasto ON/OFF 3. Timer 4. Controllo della temperatura del colore 5. -
Page 45: Istruzioni Per L'installazione
LUCE TEMPERATURA COLORE Alterna tra i tre tipi di temperature di co- Accende e spegne la luce della ventola lore della luce disponibili (calda, neutra e indipendentemente dal fatto che la ventola fredda). sia in funzione o meno. INTENSITÀ DELLA VENTOLA ACCESO SPENTO Accende o spegne completamente la ven- Aumentare o diminuire la velocità... -
Page 46: Installazione Della Staffa Di Montaggio
INSTALL A Z I ON E DE LL A STAF FA DI MON TAG G I O Prima di installare la staffa di montaggio è necessario controllare il soffitto dove verrà in- stallato il ventilatore e verificare se è adatto a questo. Soffitto in cemento Tetto in legno Praticare 2 fori con una punta da 8 mm, in... -
Page 47: Scelta Dell'altezza Della Ventola
SC E LTA DE LL'ALTEZ Z A D E LL A VE NTO L A • Scegli la barra di sospensione più adatta alla tua situazione. • Rimuovere il bullone dalla barra rimuovendo il perno e infilare il tettuccio (rivestimento del tetto) e il tettuccio del motore attraverso la barra di sospensione. -
Page 48: Installazione Della Piastra Luminosa
INSTAL L A Z ION E D E L L A PI AST R A LUMI NOSA 1. Montare il rivestimento allineando i fori 2. Rimuovere le 4 viti dal centro del corpo con quelli del motore. Utilizzare 4 viti del ventilatore. -
Page 49: Controllare L'installazione
CONNESSIONE ALL'APP *Solo per modelli con Wi-Fi L'app CREATE è disponibile sia per Android che per iOS (cerca l'app su Google Play o App Store o scansiona il codice QR qui sotto). Potrebbero esserci costi aggiuntivi a seconda del fornitore. -
Page 50: Come Connettersi All'app
Android C O M E CON N E T TE RSI ALL'AP P 1. Installa l'app CREATE e crea un account utente. 2. Imposta una password di accesso e accedi all'app. 3. Fare clic su "Aggiungi dispositivo" (+) e quindi fare clic sulla categoria del ventilatore da soffitto. -
Page 51: Standort- Und Installationsanforderungen
D EU TSC H Vielen Dank, dass Sie sich für unseren Deckenventilator entschieden haben. Bevor Sie dieses elek- trische Haushaltsgerät verwenden und um die optimale Bedienung sicherzustellen, lesen Sie bitte diese Anleitung aufmerksam durch. Die hier angegebenen Sicherheitsvorkehrungen verringern bei ordnungsgemäßer Einhaltung das Brandrisiko, das Risiko von elektrischen Entladungen und von Verletzungen. -
Page 52: Sicherheitshinweise
• Setzen Sie den Deckenventilator weder Regen noch Feuchtigkeit aus. Be- treiben Sie den Deckenventilator nicht im Freien oder mit nassen Händen. • Verwenden Sie nur CREATE-Ersatzteile. • Um das Verletzungsrisiko zu verringern, befestigen Sie den Ventilator gemäß dieser Anleitung direkt an der tragenden Struktur des Gebäudes und verwenden Sie nur die mitgelieferten Befestigungsteile. -
Page 53: Liste Der Einzelteile
LISTE DER EINZELTEILE Rosette Ein Riegel Trimmen Die Unterstützung Verlängerung Montage Anschlussfeld Dekorativer Leichte Platte Lampenschirms Lampenschirm Lüfterkörper Fernbedienung und Schrauben Controller FERNBEDIENUNG 1. Licht 2. An / aus Schalter 3. Timer 4. Farbtemperaturregelung 5. Steuerung der Lüfterintensität 6. Umkehrfunktion 7. -
Page 54: Installationsanleitung
HELL FARBTEMPERATUR Schaltet zwischen den drei verfügbaren Li- Schaltet das Lüfterlicht ein und aus, una- chtfarbtemperaturtypen um (warm, neutral bhängig davon, ob der Lüfter läuft oder nicht. und kühl). LÜFTERINTENSITÄT AN AUS Schaltet den Lüfter vollständig ein oder aus, una- Erhöht oder verringert die Rotationsges- bhängig davon, ob das Licht an ist oder nicht. -
Page 55: Einbau Der Montagehalterung
E IN BAU DE R MONTAGE H ALT E RUNG Vor der Installation der Montagehalterung sollten Sie die Decke überprüfen, an der der Ven- tilator installiert werden soll, und prüfen, ob sie dafür geeignet ist. Betondecke Holzdach Bohren Sie 2 Löcher mit einem 8-mm-Bohrer, Befestigen Sie die Montagehalterung mit 4 entsprechend der Länge der Spreizdübel. -
Page 56: Wahl Der Lüfterhöhe
WA H L D E R LÜ F TE RHÖ HE • Wählen Sie die Aufhängestange, die am besten zu Ihrer Situation passt. • Entfernen Sie die Schraube von der Stange, indem Sie den Stift entfernen, und führen Sie die Haube (Dachverkleidung) und die Motorhaube durch die Kleiderstange. Führen Sie als Nächstes die Kabel des Lüftermotors durch die Innenseite der Aufhängestange. -
Page 57: Installation Der Lichtplatte
INSTAL L ATI ON DE R L I CH T PL AT T E 1. Montieren Sie die Verkleidung, indem Sie 2. Entfernen Sie die 4 Schrauben in der die Löcher mit den Löchern im Motor aus- Mitte des Lüftergehäuses. Schrauben richten. -
Page 58: Überprüfen Sie Die Installation
VERBINDUNG ZUR APP * Nur für Modelle mit WLAN Die CREATE-App ist sowohl für Android als auch für iOS verfügbar (suchen Sie bei Google Play oder im App Store nach der App oder scannen Sie den untenstehenden QR-Code). Je nach Anbieter können zusätzliche Kosten anfallen. -
Page 59: So Stellen Sie Eine Verbindung Zur App Her
SO ST E LLE N SI E E I NE VE RB I NDUNG ZU R A PP H E R 1. Installieren Sie die CREATE-App und erstellen Sie ein Benutzerkonto. 2. Legen Sie ein Login-Passwort fest und melden Sie sich bei der App an. -
Page 60: Nederlands
N E DE R L A ND S Bedankt voor het kiezen van onze plafondventilator. Lees de instructies aandachtig door voor- dat u dit apparaat gebruikt en om er zeker van te zijn dat u het optimaal gebruikt. De hier vermelde veiligheidsmaatregelen verminderen het risico op brand, elektrische schok- ken en letsel als ze correct worden opgevolgd. -
Page 61: Beveiligingsinstructies
Steek nooit vreemde voorwerpen tussen de draai- ende ventilatorbladen. • Gebruik bij deze ventilator geen solid-state snelheidsregeling om het ri- sico op brand of motorschade te verminderen. Gebruik alleen CREATE snelheidsregelaars. Opmerking: Belangrijke veiligheidsmaatregelen en instructies in deze handleiding zijn niet bedoeld om alle omstandigheden en situaties te dek- ken die zich kunnen voordoen. -
Page 62: Onderdelen Lijst
ONDERDELEN LIJST Rozet Staaf Reep Trimmen Steun Verlenging Montage Aansluitpaneel Decoratieve Aansluitpaneel Lampenkap lampenkap Ventilator lichaam Afstandsbediening Schroeven en controller AFSTANDSBEDIENING 1. Licht 2. Aan / uit knop 3. Timer 4. Kleurtemperatuurregeling 5. Controle van de ventilatorintensiteit 6. omgekeerde functie 7. -
Page 63: Installatie Instructies
LICHT KLEURTEMPERATUUR Schakelt het ventilatorlicht in en uit, on- Schakelt tussen de drie beschikbare geacht of de ventilator draait of niet. typen lichtkleurtemperatuur (warm, neu- traal en koel). AAN UIT VENTILATORINTENSITEIT Schakelt de ventilator volledig in of uit, on- Verhoogt of verlaagt de rotatiesnelheid van de ventilatorbladen. -
Page 64: De Mon Tag E B Eu Ge L I Nstalle Re N
DE MON TAG E B EU GE L I NSTALLE RE N Voordat u de montagebeugel installeert, moet u het plafond waar de ventilator moet worden geïnstalleerd, controleren en controleren of het daarvoor geschikt is. Betonnen plafond Houten dak Boor 2 gaten met een boor van 8 mm, af- Bevestig de montagebeugel aan het houten hankelijk van de lengte van de expansie- plafond met 4 schroeven van minimaal 7... -
Page 65: Keuze Van Ventilatorhoogte
K E U Z E VAN V E N TI L ATO RHOOGT E • Kies de ophangstang die het beste bij uw situatie past. • Verwijder de bout van de stang door de pen te verwijderen en steek de kap (dakafwerking) en motorkap door de ophangstang. -
Page 66: Installatie Van De Lichtplaat
INSTALL AT IE VA N D E LI CH T PL A AT 1. Monteer de sierstrip door de gaten uit te 2. Verwijder de 4 schroeven uit het mid- lijnen met de gaten in de motor. Gebruik den van het ventilatorhuis. Schroef het 4 schroeven om hem aan de motorbehui- aansluitpaneel vast door de gaten uit te zing te bevestigen. -
Page 67: Controleer De Installatie
VERBINDING MET DE APP *Alleen voor modellen met Wi-Fi De CREATE app is beschikbaar voor zowel Android als iOS (zoek de app op Google Play of App Store of scan onderstaande QR-code). Afhankelijk van de aanbieder kunnen er extra kosten zijn. -
Page 68: Hoe U Verbinding Maakt Met De App
Android HO E U VE R B I N D ING MA AK T ME T DE APP 1. Installeer de CREATE-app en maak een gebruikersaccount aan. 2. Stel een inlogwachtwoord in en log in op de app. 3. Klik op “Apparaat toevoegen” (+) en klik vervolgens op de categorie voor de plafondventilator. -
Page 69: Polski
POLSKI Dziękujemy za wybranie naszego wentylatora sufitowego. Przed rozpoczęciem korzystania z tego urządzenia i aby zapewnić jego najlepsze wykorzystanie, należy uważnie przeczytać instrukcję. Wymienione tutaj środki bezpieczeństwa zmniejszają ryzyko pożaru, porażenia prądem elektrycz- nym i obrażeń, jeśli są właściwie przestrzegane. Instrukcję należy przechowywać w bezpiecznym miejscu do wykorzystania w przyszłości, jak również... -
Page 70: Instrukcje Bezpieczeństwa
• Nie wystawiaj wentylatora sufitowego na działanie deszczu lub wilgoci. Nie używaj wentylatora sufitowego na zewnątrz lub mokrymi rękami. • Używaj tylko części zamiennych CREATE. • Aby zmniejszyć ryzyko obrażeń ciała, przymocuj wentylator bezpośred- nio do konstrukcji nośnej budynku zgodnie z niniejszą instrukcją i używaj tylko dostarczonego sprzętu. -
Page 71: Lista Części
LISTA CZĘŚCI Rozeta Bar z Przycinać Wspierać się Rozbudowa Montowanie Panel przyłączeniowy Dekoracyjny abażur Lekka płyta Klosza Korpus wentylatora Pilot i kontroler Śruby PILOT 1. Światło 2. Włącznik / wyłącznik 3. Regulator czasowy 4. Kontrola temperatury barwowej 5. Sterowanie intensywnością wentylatora 6. -
Page 72: Instrukcje Instalacji
ŚWIATŁO TEMPERATURA KOLORU Włącza i wyłącza światło wentylatora, nie- Przełącza pomiędzy trzema dostępny- zależnie od tego, czy wentylator pracuje, mi typami temperatury barwowej światła czy nie. (ciepłą, neutralną i chłodną). WŁ WYŁ INTENSYWNOŚĆ WENTYLATORA Całkowicie włącza lub wyłącza wentyla- Zwiększa lub zmniejsza prędkość obro- tową... -
Page 73: Instalowanie Wspornika Montażowego
IN STALOWAN IE WSP O RNI K A MO NTA ŻOWEG O Przed zamontowaniem uchwytu montażowego należy sprawdzić sufit, na którym ma być za- instalowany wentylator i czy jest do tego odpowiedni. betonowy strop Dach drewniany Wywierć 2 otwory wiertłem 8mm, zgodnie z Przymocuj wspornik montażowy do drew- długością... -
Page 74: Wybór Wysokości Wentylatora
W YBÓR W YSOKOŚCI WE NT YL ATO R A • Wybierz drążek zawieszenia, który najlepiej pasuje do Twojej sytuacji. • Wyjmij śrubę z drążka, wyjmując kołek i przełóż daszek (poszycie dachu) i osłonę silnika przez wieszak. Następnie poprowadź przewody silnika wentylatora przez wnętrze wiesza- ka. -
Page 75: Montaż Płytki Świetlnej
M O NTA Ż PŁY TK I ŚWI E T LNE J 1. Zamontuj osłonę, wyrównując otwory z 2. Wykręć 4 śruby ze środka korpusu wen- otworami w silniku. Za pomocą 4 śrub tylatora. Przykręć panel połączeniowy, przymocuj ją do korpusu silnika. Upewnij wyrównując otwory z otworami w silniku. -
Page 76: Sprawdź Instalację
POŁĄCZENIE Z APLIKACJĄ * Tylko dla modeli z Wi-Fi Aplikacja CREATE jest dostępna zarówno na Androida, jak i iOS (wyszukaj aplikację w Go- ogle Play lub App Store lub zeskanuj poniższy kod QR). W zależności od dostawcy mogą wy- stąpić dodatkowe koszty. -
Page 77: Jak Połączyć Się Z Aplikacją
7. Podczas łączenia upewnij się, że router, telefon komórkowy i urządzenie znajdują się jak najbliżej. Na koniec wentylator sufitowy zostanie pomyślnie dodany do aplikacji CREATE. Zgodnie z dyrektywami: 2012/19 / UE i 2015/863 / UE w sprawie ograniczenia stosowania niebezpiecznych substancji w sprzęcie elektrycznym i elektronicznym, a także ich usuwania. - Page 80 Made in P.R.C.
Need help?
Do you have a question about the Wind Clear Rattan and is the answer not in the manual?
Questions and answers