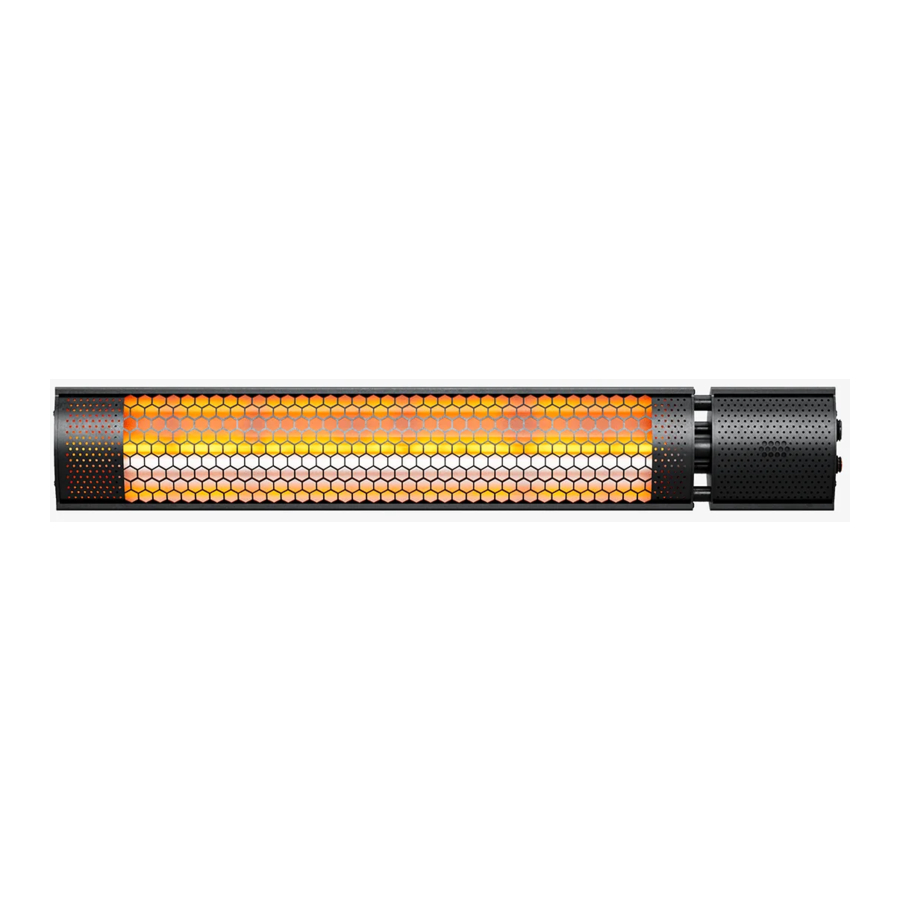
ProBreeze PB-H16 - Infrared Heater Manual
- Instruction manual (12 pages) ,
- Instruction manual (38 pages) ,
- Instruction manual (45 pages)
Advertisement
SPECIFICATION
| Model: | PB-H16 |
| Voltage: | 220-240V ~ |
| Frequency: | 50/60 Hz |
| Power: | 2000W Max |
| Product Dimensions: | 66*10.5*7.2 CM |
| Net Weight: | 1.7 KG |
Please Note: A minimum safety distance of 100cm / 3 feet should always be left in front of the heater. Do not place any objects, including furniture and clothes close to the heater.
SET UP
PARTS SUPPLIED

Ensure you have all the pieces listed. Do not proceed with set up and assembly of the heater if any components are missing.
- 4 pcs explosion screws (M6*60mm)
- 4 pcs cross-recessed hex screws (M6*10mm)
- 2 pcs hex screws (M6*12mm)
- 4 pcs hex nuts (M6)
- 8 pcs flat washers (M6)
- 8 pcs split lock washers (M5)
- 2 pcs wing nuts (M6)
- 4 pcs L shape brackets
EQUIPMENT REQUIRED
Note: some equipment may vary based on the assembly space

- Phillips screw driver
- 8mm spanner
- 10mm spanner
- Drill & masonry drill bit (8mm diameter).
- Ladder
- Hammer
- Pen or marker
- Ruler
SET UP & FIRST USE
Estimated Assembly Time: 30 minutes
Batteries: 2 x AAA batteries required. Not included.
IP 65 Approved when used with IP65 rated socket.

When drilling into walls always check that there are no hidden wires or pipes. Ensure that the screws and wall plugs being used are suitable for supporting the unit to be installed. If you are unsure it is recommended you contact a suitable qualified tradesperson.

Set up the heater outside, or in a large open area and well away from any obstructions such as tree branches.
Ensure the heater is not facing the ceiling or inflammable substances.
NOTE: Two dark points may appear on the surface of the heating elements during the first few minutes after the heater is turned on. This is normal and will not affect the performance of the heater.
ASSEMBLING INSTRUCTIONS

- The heater should always be installed horizontally, only using the mounting brackets supplied.
- Ensure the supply cable is well mounted and that it does not touch the reflector on the heater.
- Ensure the supply cable does not trail in front of the heater while it is in operation.
- The supply cable can be fixed to the metal mounting bracket behind the heater with plastic zip ties.
HOW TO ASSEMBLE THE UNIT
- Connect 2 L brackets (H) to the heater as shown. Do this using a Phillips screwdriver with 4 components of B, E & F (see order pictured).

- With remaining L brackets (H) connect explosion screws as shown. This can be done by hand, using components (A, D, E, F).


HOW TO ATTACH TO WALL/CEILING

- On the L shaped Brackets (H), measure the pitch between the pair of holes desired for use, with a ruler.
- Using a pen, mark the same distance where you are going to drill (determine hole depth before hand).
- Using power drill and 8mm masonry drill bit, drill holes.
ENSURE THERE ARE NO WIRES OR PIPES BEHIND WALL. - Fit explosion screws into wall, tighten nut D. Tighten each nut individually, a small amount each until unit is firmly anchored.
- Connect heater attached L Brackets to explosion screw L Brackets (fitted into wall) using components C & G as shown. Use 10mm spanner if necessary.
OPERATING ANGLE
WALL ANGLE
- Do not face heater at 90° towards ceiling.
![]()
- Only face downwards at maximum angle 135° see below.
![]()


CEILING ANGLE
- Do not face heater at 90° towards walls.
- Do not face fan directly down 180°. Only face at 135° angles.
OPERATING INSTRUCTIONS

- Switch On/Off Button- To switch on the heater, press the rocker switch to the On position
- Mode Switch Button - Press the mode button to alternate between three different modes. For each mode, the LED light indicator will illuminate a different colour:
- Red: The heater is in the standby mode.
- Green: The heater is in the low heat mode.
- Blue: The heater is the high heat mode.
- Remote Control


NOTE: Ensure the rocker switch is set to "ON" before using the remote.
CLEANING/MAINTANANCE & STORAGE
Always turn the heater OFF, unplug the power cord from the electrical outlet and allow the appliance to completely cool down before handling or cleaning it. Allow the heater to cool down for 2 hours (120 minutes) before cleaning.


Do not allow water or other liquids to run into the interior of the heater, as this could create a fire and/or electrical hazard.
Do not use any abrasive cleaners or solvents, as heater damage will occur.
The bulb inside the heater is not replaceable. Do not attempt to remove or disassemble the heater.
- Clean the exterior surface of the heater by wiping it with a soft, damp cloth. Dry the heater with a soft clean cloth.
- Clean the vents and openings of the heater with a vacuum cleaner, using the brush attachment to avoid any dust build-up.
- To store your product out of season, we recommend using the original or similar size box.
- Do not kink or wrap the power cord and plug around the appliance, as this may cause the insulation to weaken or split, particularly where it enters the appliance.
- Store the heater in a safe, clean and dry place when not in use.
SAFETY INSTRUCTIONS

To avoid the risk of electrical shock, fire or injury to people, always make sure the heater is unplugged from the electrical outlet before installing, relocating, servicing, or cleaning it.
This heater is for domestic outdoor use only. Do not use this heater indoors.

The heater head reaches high temperatures during operation. Do not touch the heater head when in use. Be aware that the heater head will remain hot for some time after use. Particular attention must be taken where children and vulnerable people are present.
![burn hazard]()
![shock hazard]()
Use this heater only as described in this manual. Any other use not recommended by the manufacturer may cause fire, electric shock, or injury to persons.- The appliance is not to be used by persons (including children) with reduced physical, sensory or mental capabilities, or lack of experience and knowledge, unless they have been given supervision or instruction.
- The heater must be installed at a minimum hight of 1.8m (180cm) from the floor and have a 40cm (400mm) clearance from the roof/ceiling.
- A minimum safety distance of 100cm should always be left in front of the heater.
- This heater must be securely fixed to a wall using the accessories supplied, prior to use.
- Children must be supervised not to play with the appliance.
- Children of less than 3 years should be kept away unless continuously supervised.
- Do not leave children alone or unattended in the area where the appliance is in use.
- Cleaning and user maintenance shall not be made by children unless continuously supervised.
- Do not cover the heater or use this heater to dry or heat clothes or other fabrics.
- Avoid sitting directly underneath the heater.
- This heater should be plugged into a mains power socket which is easily visible and reachable.
- Don't use this heater in a place where causticity or volatile air exists, i.e. dust, steam, gas, etc.
- The heater must not be located immediately below a socket outlet.
- Do not immerse in water or use this heater near water or in the immediate surroundings of a bath, shower, sauna, or swimming pool.
- Never leave the heater unattended while in use. Always turn the heater off and unplug when not in use.
- Do not place this heater near flammable materials, surfaces or substances. Keep combustible materials, such as furniture, pillows, bedding, papers, clothes, and curtains at least 3 feet /1m from the heater.
- Use the heater in a well-ventilated area.
- Always turn the heater OFF, unplug the power cord from the electrical outlet and allow the appliance to completely cool down before handling or cleaning it.
![burn hazard]()
![shock hazard]()
Never insert fingers or metal objects into the vents and openings of the heater as this may cause an electric shock, fire or damage the heater.- To avoid a circuit overload when using this heater, do not operate another high-wattage heater on the same electrical circuit.
![burn hazard]() Always plug the heater directly into a wall socket. Avoid using extension leads where possible as they may overheat and cause a risk of fire.
Always plug the heater directly into a wall socket. Avoid using extension leads where possible as they may overheat and cause a risk of fire.- Do not use this appliance with an external programmer, timer switch or any other device which would switch the device on automatically unless this has already been pre-built into the appliance by the manufacturer.
- Do not kink or wrap the power cord and plug around the appliance, as this may cause the insulation to weaken or split, particularly where it enters the appliance.
- Ensure the mains cable is fully extended before use and arrange it so that it is not in contact with any part of the appliance.
- Do not pull on the mains cable. Never move, carry or hang the appliance by the mains cable.
- Do not operate the appliance with any safety guards removed.
- Ensure that the power cord is located so that it will not be stepped on, tripped over, or otherwise subjected to damage or stress.
- Do not operate the appliance if there are signs of damage to the appliance, power cord, or any of the accessories.
- If the supply cord is damaged, it must be replaced by the manufacturer, its service agent or a similarly qualified person in order to avoid a hazard.
- Do not attempt to repair or adjust any electrical or mechanical elements in the appliance. Doing so may be unsafe and will void your warranty.
- Ensure that the mains supply (including voltage, frequency and power) complies with the rating label of the appliance.
- Do not use the appliance near petrol, paints, flammable gases, ovens, or other heating sources.
- Do not use the heater indoors or for heavy duty, commercial or industrial use. The unit is not safe for use on building sites, or in greenhouses, barns or stables where there is flammable dust.

NOTE: After receiving the product, please test the function before mounting on the wall.
Documents / ResourcesDownload manual
Here you can download full pdf version of manual, it may contain additional safety instructions, warranty information, FCC rules, etc.
Advertisement


Need help?
Do you have a question about the PB-H16 and is the answer not in the manual?
Questions and answers