Subscribe to Our Youtube Channel
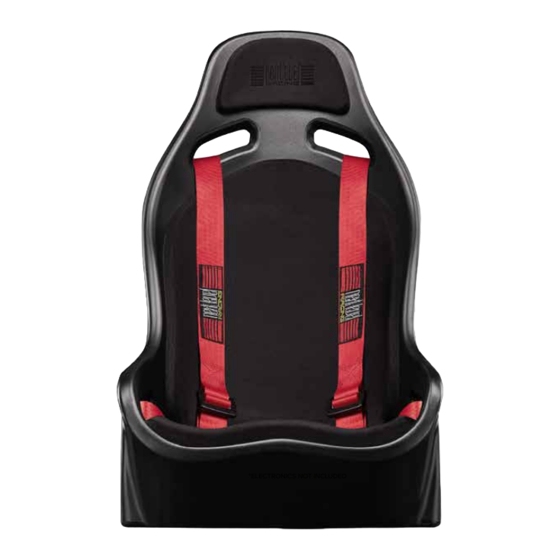
Summary of Contents for Next Level Racing ES1
- Page 1 T A K E R A C I N G T O T H E N E X T L E V E L ® Video Instruction: bit.ly/nlrbuild INSTRUCTION MANUAL *ELECTRONICS NOT INCLUDED...
- Page 2 T O T H E N E X T L E V E L® instruction booklet to fully optimize your product. N E X T L E V E L R A C I N G . C O M ASSEMBLY VIDEO bit.ly/nlrbuild @next_level_racing @nextlevelracingOfficial @nextlvlracing Next Level Racing support@nextlevelracing.com...
- Page 3 ES1 SEAT MOUNTING HOLE PATTERN/DIMENSIONS See below mounting hole patterns and dimensions for the ES1 seat. Useful if you need to bottom mount your seat or mount your seat in an unconventional way. WARNING CHOKING HAZARD - Small parts not for children under 3 years or any individuals who have a tendency to place inedible objects in their mouths.
- Page 4 Video Instruction: bit.ly/nlrbuild support@nextlevelracing.com (TALLER USERS) CONTENTS: PARTS: • • 2x M8 20mm Bolts UNIVERSAL SEAT BRACKET SET-UP PAGE: 06 - 08 • • 2x M8 Washers OPTIONAL SEAT SLIDER INSTALLATION PAGE: 09 - 11 GT TRACK DIRECT SEAT INSTALLATION PAGE: 12 - 15 •...
- Page 5 Seat Bracket bolt. Seat Brackets Not Included. Align the front holes on the seat brackets with one of the front threaded inserts on the ES1 Seat. Bolt through and secure using an M8 bolt and washer. Repeat on the other side.
- Page 6 Slide the seat sliders all the way to the front to access the front mounting holes. Align the front holes A) Align the holes on the harness mounting plates with threaded inserts on the back of the ES1 Seat. on the seat sliders with the threaded inserts at the bottom of the seat, bolt through and secure with 2 x M8 Low Profile Bolts.
- Page 7 Video Instruction: bit.ly/nlrbuild support@nextlevelracing.com PARTS: • • 2x M8 20mm Bolts GT TRACK DIRECT SEAT • • 2x M8 Washers INSTALLATION Align the hole on the harness mounting plates with one of the threaded inserts at the side of seat. Bolt through and secure with an M8 Bolt and Washer.
- Page 8 PARTS: PARTS: • • 1x ES1 Seat Align the threaded holes at the bottom of the seat with the front holes on the seat sliders. Slide the seat sliders all the way to the back to access the rear mounting holes on the seat sliders.
- Page 9 Video Instruction: bit.ly/nlrbuild support@nextlevelracing.com NOTES WARNING Please do not use power tools for assembly as over tightening can damage your seat and hardware. Make sure all mounting points are aligned correctly to avoid twisting your seat or frame. ASSISTANCE ASSEMBLY VIDEO bit.ly/nlrbuild If you require further support with your product please...
- Page 10 04 - Reportez-vous à l’image. A) Alignez les trous sur les plaques de montage du harnais avec les inserts filetés à l’arrière du siège ES1. B) Boulonnez et fixez avec un boulon M8 et une rondelle. Répétez de l’autre côté.
- Page 11 03 - Fare riferimento all’immagine. NOTA: selezionare un foro sul sedile per installare il bullone della staffa del sedile anteriore. Allineare i fori anteriori sulle staffe del sedile con uno degli inserti filettati anteriori sul sedile ES1. Avvitare e fissare...
- Page 12 シャーでボルトで固定します。 04 – Siehe das Bild. A) Richten Sie das Loch an der Gurtmontageplatte und den Schlitz an der Sitzhalterung mit einem der hinteren Gewindeeinsätze am ES1-Sitz aus. B) Durchschrauben und mit M8 Schraube und Unterlegscheibe sichern. Auf 02b-写真を参照してください。 (ショートユーザー)1)ハーネス取付板をシート下部のネジ穴に合わせます。 2)2 xM8ボルトとワッシャーでボルトで固定します。...
- Page 13 закрепите их болтами и закрепите двумя низкопрофильными болтами M8. ПРИМЕЧАНИЕ: ползунки сиденья в комплект не входят 04 - Consulte a figura. A) Alinhe os orifícios nas placas de montagem do chicote com inserções roscadas na parte traseira da sede ES1. B) Aparafuse e prenda com um parafuso M8 e uma arruela. Repita do outro lado.
- Page 14 04 – Resme bakın. A) Kablo demeti montaj plakasındaki deliği ve koltuk braketindeki yuvayı ES1 Koltuğundaki arka dişli eklerden biriyle hizalayın. B) Bir M8 Cıvata ve Pul ile cıvatalayın ve sabitleyin. Diğer tarafta tekrarlayın. 04 – Viz obrázek. A) Vyrovnejte otvor na montážní desce postroje a štěrbinu na držáku sedadla s jednou ze zadních závitových vložek na sedadle ES1. B) Prošroubujte a zajistěte šroubem a podložkou M8. Opakujte na druhou stranu.
- Page 15 04 - دعقملا يف ةيفلخلا ةبلولملا تافاضإلا دحأ عم دعقملا ةفيتك ىلع ةدوجوملا ةحتفلاو مازحلا تيبثت ةحول ىلع ةدوجوملا ةحتفلا ةاذاحمب مق )أ .ةروصلا ىلإ عوجرلاES1. ةلاسغلاو سابرتلا مادختساب هتبثو طبرا )بM8. ررك 04 – Spójrz na obrazek. A) Dopasuj otwór w płycie montażowej uprzęży i szczelinę we wsporniku siedziska z jedną z tylnych gwintowanych wkładek siedziska ES1. B) Przykręć i zabezpiecz śrubą M8 i podkładką. Powtórz po drugiej stronie.
- Page 16 support@nextlevelracing.com support@nextlevelracing.com...


Need help?
Do you have a question about the ES1 and is the answer not in the manual?
Questions and answers