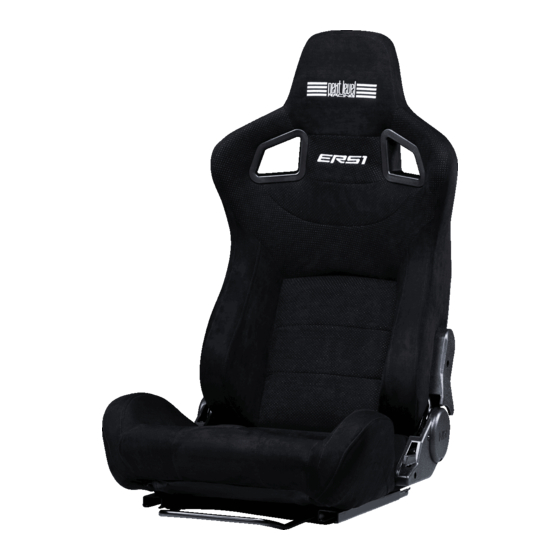
Summary of Contents for Next Level Racing ERS1
- Page 1 T A K E R A C I N G T O T H E N E X T L E V E L® Video Instruction: bit.ly/nlrbuild ERS1 SEAT INSTRUCTION MANUAL...
- Page 2 T O T H E N E X T L E V E L® instruction booklet to fully optimize your product. N E X T L E V E L R A C I N G . C O M ASSEMBLY VIDEO bit.ly/nlrbuild @next_level_racing @nextlevelracingOfficial @nextlvlracing Next Level Racing support@nextlevelracing.com...
- Page 3 Video Instruction: bit.ly/nlrbuild support@nextlevelracing.com PRE-RACE IN THE CHECKS *NOT TO SCALE WARNING • Please do not use power tools for assembly as over tightening can damage parts. • If in doubt consult the installation video or contact us on support@nextlevelracing.com •...
- Page 4 Video Instruction: bit.ly/nlrbuild support@nextlevelracing.com ERS1 SEAT TABLE OF CONTENTS ASSEMBLY ERS1 SEAT ASSEMBLY: PARTS: • • 1 x Seat Back PAGES: 07 - 09 ELITE COCKPIT SEAT INSTALLATION: PAGES: 09 - 11 Uninstall the M8 Dome Shaped Bolts and Washers pre-installed on the Seat Back.
- Page 5 Video Instruction: bit.ly/nlrbuild support@nextlevelracing.com PARTS: PARTS: SEAT RECLINER ADJUSTMENT Note: Peel off warning labels • • NIL • • NIL from the seat recliners. Lift both Seat Recliner Levers and adjust the Seat Back to the desired angle. Release the levers to lock Bolt through and secure with Dome Shaped Bolts and Washers previously uninstalled in Step 01.
- Page 6 Align the rear mounting holes on the seat slider with the T-Nuts in the rear 4040 extrusion. Place Steel Seat Spacer between the 4040 extrusion and the Seat Slider connected to the ERS1, bolt through the Seat Slider and Steel Spacer into the T-Nuts.
- Page 7 • • 2 x M8 20mm Low Profile Bolts Slide the ERS1 Seat all the way forward to access the rear holes on the Seat Sliders. Bolt through the Uninstall the rear Bolts securing the Seat Sliders to the frame.
- Page 8 If in doubt consult the installation video or contact us on support@nextlevelracing.com Slide the ERS1 Seat all the way back to access the front holes on the Seat Sliders. Make sure all mounting points are aligned correctly to avoid twisting your seat or fame.
- Page 9 Étape 06 - Reportez-vous à l’image. Alignez les trous de montage du curseur de siège ERS1 avec les inserts filetés sur le cadre GTTrack. Pièces : 1 x Assemblage de siège ERS1. Stap 07 – Raadpleeg de afbeelding. Schuif de ERS1-stoel helemaal naar voren om toegang te krijgen tot de achterste gaten op de stoelschuifregelaars. Bout door de achterste gaten en zet vast met 2 x M8 laagprofielbouten. Onderdelen: 2 x Étape 07 - Reportez-vous à...
- Page 10 Passaggio 07: fare riferimento all’immagine. Far scorrere il sedile ERS1 completamente in avanti per accedere ai fori posteriori sui cursori del sedile. Avvitare i fori posteriori e fissarli con 2 bulloni a basso profilo M8.
- Page 11 Schritt 07 – Siehe Bild. Schieben Sie den ERS1-Sitz ganz nach vorne, um an die hinteren Löcher der Sitzgleiter zu gelangen. Durch die hinteren Löcher schrauben und mit 2 x M8 Low Profile Schrauben befestigen.
- Page 12 Coloque o espaçador da sede de aço entre a extrusão 4040 e o controle deslizante da sede conectado ao ERS1, aparafuse através do controle deslizante do assento e do espaçador de aço nas porcas-T. Peças:...
- Page 13 T-Somunlara cıvatalayın. Parçalar: 2 x M8 20mm Düşük Profilli Cıvata, 2 x Çelik Koltuk Ara Parçası. Krok 03 – viz obrázek. Zarovnejte zadní montážní otvory na jezdci sedadla s T-maticemi v zadním výlisku 4040. Umístěte ocelovou podložku sedla mezi výlisek 4040 a jezdec sedla připojený k ERS1, přišroubujte jezdec sedla a ocelovou vložku Adım 04 –...
- Page 14 دعقم كيرحتب مق .ةروصلا ىلإ عوجرلا - 70 ةوطخلاERS1 × 2 ريماسم مادختساب هتبثو ةيفلخلا تاحتفلا لالخ نم طب ر ا .دعقملا تاقلزنم يف ةدوجوملا ةيفلخلا تاحتفلا ىلإ لوصولل مامأللM8 × 2 :ءازجألا .زوربلا ةضفخنمM8 20 .راظنالا ةضفخنم...
- Page 15 步骤 01 – 请参阅图像。卸下将 Elite 座椅支架固定到驾驶舱框架的螺栓和垫圈,然后拆下座椅支架。松开将座椅滑块组件固定到驾驶舱框架的棘轮手柄。 步骤 02 – 参考图片。向上提起座椅滑杆并将座椅一直向前滑动以接触座椅滑杆上的后部安装孔。 步骤 03 – 参考图片。将座椅滑块上的后安装孔与后 4040 挤压件中的 T 形螺母对齐。将钢制座椅垫片放在 4040 挤压件和连接到 ERS1 的座椅滑块之间,将座椅滑块和钢制垫片用螺栓固定到 T 形螺母中。零件:2 个 M8 20 毫米薄型螺栓,2 个钢制座椅垫片。 步骤 04 – 请参阅图像。将座椅一直向后滑动以接触前部安装孔。将座椅滑块上的前安装孔与前 4040 挤压件中的 T 形螺母对齐。将钢制座椅垫片放在 4040 挤压件和连接到 ERS1 的座椅滑块之间,将座椅滑块和钢...
- Page 16 support@nextlevelracing.com support@nextlevelracing.com...


Need help?
Do you have a question about the ERS1 and is the answer not in the manual?
Questions and answers