Table of Contents
Advertisement
Quick Links
Advertisement
Table of Contents

Related Manuals for ALIGATOR A910 Senior


Summary of Contents for ALIGATOR A910 Senior
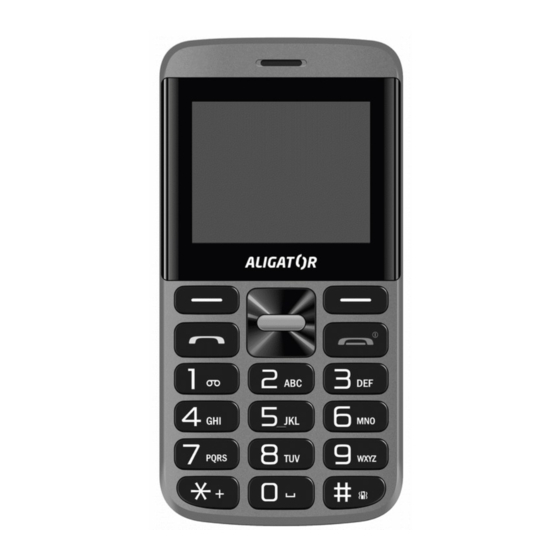
- Page 1 A910 Senior Instructions for use...
-
Page 2: Table Of Contents
Contents Important instructions......4 Putting into operation......6 Insert SIM, memory card and battery..6 Battery charging........7 Charging stand........8 Basic control........9 Switch On / Offf........9 Mobile phone controls......10 Icons on the screen......14 Navigation in menu......15 Keypad lock........16 Text insert..........16 Making calls........17 Dialing..........17 Contact list.........18 Dialing from contact list......19 Working with contacts......19 Speed dial..........20... - Page 3 Messages SMS and MMS....26 Reading of messages......27 Create and send SMS.......28 Working with messages.....29 FM Radio...........30 Torchlight...........30 Alarm clock ........31 Ringtone setttings – sound profiles. . .32 Change of ringtone......34 Calendar..........34 Calculator...........35 Bluetooth ...........36 Camera..........37 Camera setup........37 File manager........38 Mobile phone setup......38 Calls...........39 Telephone..........39 Display..........40...
-
Page 4: Important Instructions
Thank you for purchasing of the ALIGATOR mobile phone. Please read carefully this instruction for use before you start. Important instructions Do not switch on and do not use the mobile phone in the prohibited areas Do not use the mobile phone while driving the car ... - Page 5 of damage or explosion of the mobile phone) Do not put the battery at the fire and do not expose it to the temperature over +60°C (danger of explosion or fire) SAR – mobile phone meets the prescription for maximal emission of the electromagnetic radiation ...
-
Page 6: Putting Into Operation
It contains small parts that can be suffocated or may hurt ! Other informaton on our web site http://www.aligator.cz /en Putting into operation lnsert SIM, memory card and battery Slip your nail at the slot... -
Page 7: Battery Charging
3.Next, insert the battery. If the contacts are covered with protective tape, be sure to remove it. The battery must fit smoothly into the slots in the phone. 4.Finally, put the battery cover back on. ATTENTION! Turn off the phone and disconnect the charger when handling the battery, card or SIM card. -
Page 8: Charging Stand
Mobile phone will warn you by an acoustic signal and by message on the screen when the battery is almost discharged. In this case charge the battery as soon as possible. Sometimes, when the battery is completely discharged, the phone does not start charging when the charger is connected. -
Page 9: Basic Control
insert it so that the contacts on the bottom of the phone fit properly into the contacts in the stand. Basic control Switch On / Off To turn on/off, long press the red button until the phone turns on/off. (After turning on the device, you may be asked to enter the PIN code, after entering it, confirm with the left function button (2), see the picture below) -
Page 10: Mobile Phone Controls
Mobile phone controls... - Page 11 Description of controls Name Function starts contacts on standby mode -return from menu or exit current function Right other functions function button depend on context (actual function is displayed above the key) -displays Messages in standyby mode confirms selection in menu or activates selected Left function (OK)
- Page 12 - displays phone menu in standby mode. - moving up/down in Buttons menus and phone list Down / - center button to Central confirm the button selection or activate the selected function (OK) - volume control during call and playback - switch On/Off - stop or reject call - return from menu...
- Page 13 - switches the way you enter characters in text input mode - A long press activates / deactivates the vibration mode (Meeting profile) -In music player mode, it is used to move to the next track -Used to move right in some menus - inserts *,+, p, w when writing...
-
Page 14: Icons On The Screen
Earpho connector Jack 3,5mm for connect earphones / handsfree Connec - used for charging USB-C - powerful LED Torchlig flashlight is located on the top of phone Earpho - used to listen to a call Icons on the screen Signal strenght Alarm clock activated Unread SMS message... -
Page 15: Navigation In Menu
SOS mode activated Navigation in menu The phone menu is activated by pressing the button OK (3) or by navigation buttons up/down (3). You can then use the navigation buttons (3) to move between the items. Confirm selection - function activation or enter the submenu is usually done by pressing left button (2) or center button OK... -
Page 16: Keypad Lock
Keypad lock The phone is equipped with a keypad lock that prevents accidental button presses, e.g. when carried in a pocket. The keypad locks automatically after a set period of inactivity. To unlock or lock the keypad, first press the left button (2) and then the * button (8). -
Page 17: Making Calls
depending on the number of languages installed at the phone. Special characters can be entered by pressing the * button (8). Use the navigation buttons (3) to select the character and confirm with OK (2). The character is inserted at the text. Making calls Dialing Insert required phone number on the... -
Page 18: Contact List
to answer the call - press the green button (5) to reject the call – press the red button (4). to adjust the volume during a call – move the navigation button up / down (3). to listen handsfree, press during a call a center button OK (3). -
Page 19: Dialing From Contact List
Dialing from contact list The easiest way to display the contact list is to press the right button (1). You can now enter the first letter of the name you are looking for. After that, the list of matching contacts starts in alphabetical order. -
Page 20: Speed Dial
6. Delete more – enables to delete more contacts at once 7. Copy/move – enables to copy and move contacts between SIM cards and the phone 8. Import/export – enables to store contacts on MicroSD card in VCF format or to read them from the card 9. -
Page 21: Sos Calls And Sms
SOS call and SMS Launch of emergency call and SMS Press and hold the SOS button on the back side of your phone. An audible alarm sounds, then the phone will automatically dial the preset numbers from the list automatically until they can reach some of them. - Page 22 automatically answer incoming calls and automatically activate the hands-free function - hands-free listening. The mode is indicated by the SOS icon on the display. You can deactivate the SOS mode by turning the phone off and on or by holding down the SOS button on the back of the phone.
-
Page 23: Sos Locator - Positioning
SOS Locator – positioning Your phone is equipped with a special function that allows you, after pressing the SOS button, to determine the location of the phone and send it via SMS to recipients in the form of a link to view the map - if the recipient is using a regular phone with a web browser, just "click"... -
Page 24: Activating Of Sos Locator
SMS. It is sufficient to send just a command via SMS with a text SOSLOCATOR to your Aligator phone. Your ALIGATOR phone then responds by sending of the current position via SMS. Important: Your phone sends its... -
Page 25: Setting Sos Functions
Choose from the menu: Setting SOS Set. SOS SMS Send SMS resp. Setting SOS setting SOS call Setting SOS functions For detailed settings of SOS functions, select in the menu Setting SOS setting: 1. SOS regime – selection of SOS regimes ... -
Page 26: Call Register
4. SOS call – determines whether the phone will call preset SOS numbers after pressing the SOS button 5. SOS numbers – sets up to five numbers to which the phone will send an emergency SMS after activating the SOS button and try to call them. -
Page 27: Reading Of Messages
A notification will appear on the screen if you have a new, unread message. To view the message directly, just press the left button (2) and the message will be displayed. To leave viewing the message for later, press the right button (1). -
Page 28: Create And Send Sms
Delete all - deletes all received messages Call – dials the number of the message sender Move – moves the message to SIM1/SIM2/phone. Mark – marks messages for bulk operations. Organize - sort messages Export SMS - allows you to save SMS to storage 10. -
Page 29: Working With Messages
phone number or select it from the list with the left button Names (2). 4. Continue by pressing the left button Options(2) Send. 5. If you have both SIMs active, you will be prompted to choose a SIM Working with messages Select Messages in the phone's main menu. -
Page 30: Fm Radio
11. Message capacity – displays message memory status FM Radio Select in menu : FM Radio You can improve the reception of the radio by connecting headphones (not included in the standard delivery) or a charging cable - it serves as an antenna. -
Page 31: Alarm Clock
Alarm clock The phone is equipped with several independent alarms, each of them can be set separately. The alarm can be set to repeat, it is possible to define specific days when it should ring etc. Select in menu: Organizer Alarm clock A list of alarms will appear - the alarm can be selected using the navigation buttons. -
Page 32: Ringtone Setttings - Sound Profiles
Function Setting Off – alarm clock off Status On –alarm clock on The text that will be Messages displayed on the alarm clock Set time on the Time keypad Allows you to set the Ringing alarm clock tone Once – alarm rings 1x ... - Page 33 sound profiles. By switching the profile once, you can change all these settings at once. To set or switch the sound profile, choose Settings Sound profile in the main menu. profiles, select the desired profile, press the left Options button (2) and select Activate to switch to the selected profile or Settings to change the sound settings.
-
Page 34: Change Of Ringtone
Change of ringtone 1. Select in main menu Setting Sound profiles 2. select required profile (f.e. Normal) and select Settings 3. next select Ringtone and choose tone that you need to change 4.in the same way you can set other parametres of profiles (volume, vibration etc.) Calendar... -
Page 35: Calculator
2. View Tasks – displays saved events for the selected day 3. All tasks - displays all saved events 4. Delete today - allows you to delete events on the specified day 5. Delete all - allows you to delete all events 6. -
Page 36: Bluetooth
Press left button OK (2) The result is displayed Press the red button (4) to exit Bluetooth Bluetooth is a modern system that allows you to wirelessly connect various devices, such as a wireless handsfree and a telephone, a telephone and a computer, or two phones. -
Page 37: Camera
File transfer – settings for transferring files between the phone and other devices. Device name – the name by which your phone is identified by other devices Storage location – selection of storage for received files Camera To switch on : select in menu Camera After activating the camera, pictures can be taken by pressing the center button OK (3). -
Page 38: File Manager
2. Effect - used to set filters and effects for photos. 3. Settings – setting other properties, storage, etc. We recommend that you always choose a memory card as storage, as very few pictures can fit in the phone's memory. ATTENTION! Shooting may take a few moments, so hold still after pressing the shutter button. -
Page 39: Calls
Calls To set the phone call parameters, select in the menu: Settings Calls Dual SIM – setting which SIM card and how it will be used Call forwarding - forwarding settings. Requires operator´s support. Call waiting – activates / deactivates the call waiting function Hide ID –... -
Page 40: Display
Energy saving mode – battery saving settings by limiting some functions Reset settings - will reset the settings, you will need to enter the phone password - the default is 1234. Display Wallpaper - choose the background of the main screen Screen Saver - Set the screen saver animation Brightness –... -
Page 41: Network Setup + Connection
Phone locked - allows you to lock your phone with a password. The factory password is 1234. Edit phone password – changing the phone password Privacy - allows you to lock selected functions with a phone password Lock the display with the Exit button - after switching on, it allows you to lock the keypad manually by pressing the red... -
Page 42: Pc Connection
3. Data roaming – data services by roaming 4. Preferred card - the preferred SIM card for data services 5. Network selection – automatic or manual operator network selection 6. Network type – choosing which types of network the phone can use (2G/3G/4G) PC connection The phone is equipped with a standard... -
Page 43: Other Connection Modes
ATTENTION! Requires Windows 7 and higher! Special drivers may be required when using other operating systems. Other connection modes If you want the phone to only be charged when connected to the computer, press the "Back" button after connecting the cable and showing the connection menu. -
Page 44: Safety And Ecology
The ALIGATOR A910 mobile phone is intended for use in EU countries. Safety and ecology Used electrical equipment Mobile phone is an electronic appliance. It means it must NOT be manipulated as a common residential waste. Never throw the used device away at... -
Page 45: Declaration Of Conformity
Declaration of conformity ADART COMPUTERS s.r.o. hereby declares that the type of the radio device ALIGATOR A910 is in compliance with Directive 2014/53/EU. www.aligator.cz /en Copyright © ADART COMPUTERS s.r.o. Čimická 717/34, CZ-Prague (EU)
Need help?
Do you have a question about the A910 Senior and is the answer not in the manual?
Questions and answers