
Related Manuals for V-ZUG AdoraDish V4000 OptiLift


Summary of Contents for V-ZUG AdoraDish V4000 OptiLift
- Page 1 V-ZUG-Home Install the app, network your appliances and benefit from a wide range of useful functions. Operating instructions AdoraDish V4000 OptiLift Dishwasher...
- Page 2 Validity These operating instructions apply to: Modellbezeichnung Type Masssystem AdoraSpülen V4000 VGO AS4T-41174 EURO 60 AdoraSpülen V4000 VGBO AS4T-41175 EURO 60 Variations depending on the model are noted in the text. © V-ZUG Ltd, CH-6302 Zug, 2023...
-
Page 3: Table Of Contents
4 Wipe protection ........... 45 Symbols used ............ 4 EcoManagement .......... 46 General safety precautions ........ 4 Information ............ 46 Appliance-specific safety precautions.... 5 V-ZUG-Home 47 Instructions for use .......... 6 Conditions ............ 47 Using for the first time 8 Initial set-up ............ 47 Before using for the first time ...... 8... -
Page 4: Safety Warnings
Safety warnings Symbols used General safety precautions Unauthorized repairs could result in unforeseen dangers for the user, for which the manufacturer cannot ac- ▪ Read the operating instruc- cept liability. Repairs should only be tions before using the appli- undertaken by an authorized ser- vice technician, otherwise any sub- ance for the first time. -
Page 5: Appliance-Specific Safety Precautions
1 Safety warnings ently installed electrical install- ▪ CAUTION: Do not drop or in- ation in accordance with the sert any knives, forks or other installation regulations. pointed objects into the door ▪ If the mains cable of this ap- lock opening. -
Page 6: Instructions For Use
1 Safety warnings Note on use Instructions for use ▪ Use the childproof locking facility (see Caution: Risk of injury! page 44). When sliding the lower basket out or ▪ If the appliance is visibly damaged, do closing the appliance door, be care- not use it. - Page 7 1 Safety warnings Caution: Risk of burns! How to avoid damaging the appliance ▪ Do not wash objects that are soiled with ▪ Turn off the water tap during longer ab- inflammable or corrosive solvent, paint, sences. wax, chemicals (acids or bases) or iron ▪...
-
Page 8: Using For The First Time
Using for the first time The appliance must be installed and connected to the electricity supply by a quali- fied fitter/electrician in accordance with the separate installation instructions. Before using for the first time Before operating the newly installed appliance for the first time, the following steps should be taken: ▸... - Page 9 2 Using for the first time ▸ If the appliance door closes further: close the appliance door, loosen the screws slightly and check the adjust- ment again. ▸ Open the appliance door as far as it will go and check that it stays in this posi- tion.
-
Page 10: Appliance Description
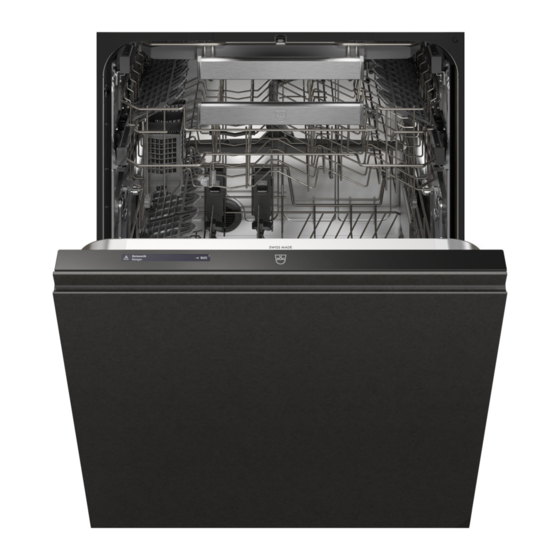
3 Appliance description Appliance description Construction Rinse agent reservoir «Large» cutlery basket * Detergent dispenser Upper basket with SoftSlide Operating and display elements and SoftClose Salt reservoir 10 Spray arms Swivelling lower basket 11 Filter system OptiLift with SoftClose 12 FunctionLight «Small»... -
Page 11: Operating And Display Elements
3 Appliance description Operating and display elements Main menu Buttons Display Programmes (see page 14) V-ZUG-Home Navigation elements EcoManagement (see page 17) Frequently used user settings (see page 17) Other user settings (see page 48) Programme selected Intensive 1h45 60°... -
Page 12: Functionlight
3 Appliance description Button state Non-selectable functions Function selected Selectable functions Non-selectable navigation elements Action elements Increase value Decrease value User setting activated User setting deactivated Cancel entry, confirm message Start permanent mode programme, empty storage tank Navigation elements Go back to the previous menu Display other functions in the menu Display other functions in the menu Display other selection options in the menu... - Page 13 3 Appliance description Final drying phase During the final drying phase, all 6 LEDs illuminate orange and pulsate between dimmed and undimmed. Delayed start / OptiStart When the appliance door is closed and a delayed start is started, all 6 LEDs illuminate dimmed white.
-
Page 14: Functions
4 Functions Functions Programmes Consumption values The programme time (h), water consumption (l) and energy consumption (kWh) are in- dicative values. The values can also vary according to the selection of additional func- tions, the load, the degree of soiling of the load, the type and amount of detergent, the water inlet temperature, the electrical connection and specific programme sequences (e.g. - Page 15 4 Functions Sprint * Programme phases Consumption values For light soiling, e.g. aperitif dish- ▪ Cleaning: 55 °C ▪ 0h20 ware and tea and coffee cups and ▪ Rinsing with rinse ▪ 8 l saucers. Not suitable for slowly dis- agent: 50 °C ▪...
-
Page 16: Setting Options
4 Functions Hygiene Programme phases Consumption values For items where hygiene require- ▪ Pre-rinsing: 55 °C ▪ 1h40 ments are high (e.g. baby bottles, ▪ Cleaning: 70 °C ▪ 16 l cutting boards...). Clean the filter ▪ Intermediate rinsing: ▪ 1.65 kWh system before starting the pro- 60 °C gramme. -
Page 17: Frequently Used User Settings
4 Functions RinsePlus The cleaning effect is improved through additional rinsing cycles and an extended clean- ing phase. If RinsePlus is turned on, the amount of water used with each programme is increased. This extends the programme time. DryPlus The temperature of both the final rinse and the SteamFinish are increased and the dry- ing time is extended. -
Page 18: Loading
5 Loading Loading Check that the spray arms can rotate freely. Moving parts All light-coloured parts trigger a movement. Loading tips for the lower basket Overloading the basket can damage the appliance! Do not exceed the maximum loading weight for the lower basket of 21 kg. Large items ▸... - Page 19 5 Loading Folding down the tines for larger loading area The rows of fold-down tines on the right-hand side can be folded down to create a larger loading area. ▸ Pull up the locking grip 1 at the side on the right.
- Page 20 5 Loading ▸ Pull up the button at the side for the fold- down tines 1. ▸ The row of fold-down tines folds down at an angle. ▸ Fold the rack down. ▸ Adjust the height of the rack: ▸ lower position: press the white tabs on the rack holder and push the rack down- wards until it engages.
- Page 21 5 Loading Thin glass is very vulnerable to damage. Place stemmed glasses carefully in the basket. Ensure the glasses are standing securely and not touching each other or other items. Standing glasses securely on the second row of fold-down tines To stand glasses securely on the second row of fold-down tines, fold the first row of fold-down tines down at an angle.
- Page 22 5 Loading Stabilizing drinking vessels with easy prongs ▸ Put easy prongs 1 over basket prongs. ▸ Arrange drinking glasses, baby bottles, vases and carafes. ▸ Use two easy prongs for wider vessels. Raising and lowering the lower basket The swivelling lower OptiLift basket can be gently raised to a comfortable height for easier loading and unloading.
- Page 23 5 Loading ▸ Empty/Load the lower basket. ▸ Make sure the spray arms are not ob- structed in any way. ▸ Lift the grip slightly. – The lower basket rises. ▸ Pull the grip forwards. ▸ Guide the lower basket down or with a small load push it down.
- Page 24 5 Loading ▸ Fold up the rack. ▸ Pull the rack holder away from the front. Attaching the rack ▸ Before attaching the rack: the rack cams must face upwards when it is attached. ▸ Hold the rack upright roughly in the middle of the two height positions.
- Page 25 5 Loading Loading the cutlery drawer * * Depending on model Risk of injury from being loaded incorrectly! Place knives and cutlery with sharp edges or points into the cutlery basket with the points facing downwards. Place cutlery upright in the cutlery basket. Sharp objects can damage the appliance! Do not insert any knives, forks or other pointed objects into the opening of the door lock.
-
Page 26: Loading Tips For The Upper Basket
5 Loading Loading tips for the upper basket Overloading the basket can damage the appliance! Do not exceed the maximum loading weight for the upper basket of 9 kg. Loading smaller items ▸ Arrange smaller items such as saucers, glasses, cups and dishes. ▸... - Page 27 5 Loading Small-parts holder for upper basket The small-parts holders can be attached in a number of spots in the upper basket. Your dishwasher comes with a pair of small-parts holders for use in the upper basket. The small-parts holders can be used to secure parts that are made of plastic such as plastic containers, lids, tumblers and baby bottles.
- Page 28 5 Loading Glass holder ▸ Pull the row of tines up until it engages. ▸ Rest glasses against the row of tines. Rack ▸ Fold the row of tines 1 down.
- Page 29 5 Loading ▸ Pull the rack up 2 and fold down 3. ▸ Secure stemmed glasses in the V-shape of the rack. Rest tall glasses against the rack. Thin glass is very vulnerable to damage. Place stemmed glasses carefully in the basket. Ensure the glasses are standing securely and not touching each other or other items.
- Page 30 5 Loading Removing the rack ▸ Pull the rack up as far as it will go. ▸ Remove the rack by pulling it upwards at the holder in the middle of the upper basket. Attaching the rack ▸ Before attaching the rack: the rack cams must face upwards when attached.
- Page 31 5 Loading Adjusting the upper basket Depending on the model, the height of the upper basket can be adjusted by around 2–4 cm. It can be inclined in various ways. ▸ Hold the upper basket at the sides by the grips 1 and raise it into the desired engaged position.
-
Page 32: Hints On Loading The Cutlery Drawer
5 Loading Inserting the upper basket ▸ Extend the rails 1 as far as they will go. ▸ Insert the safety bolts 2 on the right-hand side and then on the left. ▸ Push the upper basket gently down and engage. - Page 33 5 Loading ▸ Tall glasses: Raise the movable right side by 2 cm or push it into the middle. Risk of damage to tall glasses! If tall glasses hit the cutlery drawer frame, they could get damaged. Removing the cutlery drawer The cutlery drawer can be removed from the appliance for loading and unloading.
-
Page 34: Operation
6 Operation Operation Dish washing tips General note ▪ Do not overload the baskets. ▪ Dishes, pots and pans with heavily burned-on food debris stuck to them should be soaked in water first. ▪ Load beverage and food containers such as cups, glasses, pots, etc. with the opening facing downwards so that the water can drain off. -
Page 35: Selecting Detergent
6 Operation Selecting detergent General note Do not use washing-up liquid! Strong foaming can cause the appliance to malfunc- tion. Follow the dosage instructions printed on the detergent packaging exactly. Should you have any questions, please contact the detergent manufacturer. Using too high or too low a dosage can cause damage to the appliance. -
Page 36: Adding The Detergent
6 Operation Adding the detergent Ensure no cleaning agent gets into the opening of the door lock. This can cause the door lock to malfunction. Powder ▸ Open the detergent dispenser 2 by push- ing the release catch 1 in the direction of the arrow. -
Page 37: Selecting And Starting A Programme
6 Operation Holding a button depressed Holding a button depressed enables the user to easily ▪ save a programme as a favourite (see page 42). ▪ delete a favourite (see page 43). ▪ get information about a function (see page 46). ▪... -
Page 38: Adding Extra Dishes
6 Operation Changing programme selection ▸ Touch the button repeatedly until the start screen appears. – The selection made has been discarded. ▸ Make a new selection. Cancelling programme selection ▸ Touch the button repeatedly until the start screen appears. ▸... -
Page 39: Aborting A Programme Before Time
6 Operation Aborting a programme before time The dishes and water may be hot. Scalding hazard! ▸ Open the appliance door carefully. – This interrupts the programme. – The interrupted programme alternates in the display with the «Close the door» mes- sage. -
Page 40: Programme Options
7 Programme options Programme options Delayed start The delayed start allows you to wash during off-peak hours (e.g. at off-peak electricity rates). It can be set briefly after selecting a programme. A delayed start of between 30 minutes and 24 hours can be set. Setting the delayed start duration ▸... -
Page 41: Programme In Permanent Mode
7 Programme options Programme in permanent mode Only one programme can be used in permanent mode. When the appliance door is opened, the programme appears on the start screen and can be started immediately. A programme used in permanent mode can be deleted at any time. Saving a programme as permanent mode ▸... -
Page 42: Favourites
7 Programme options Favourites Up to 8 programmes with or without setting options can be saved as favourites. Pro- grammes saved as favourites appear on the start screen after the «Eco» programme and can be deleted at any time. Creating favourites without setting options This function is suitable for displaying programmes on the start screen that are not displayed on it by default. -
Page 43: Permanently Selecting Setting Options
7 Programme options Using favourites in permanent mode ▸ On the start screen, touch the button repeatedly until the desired favourite appears. ▸ Hold the button for the desired favourite, e.g. , depressed until the buttons appear in the display next to the favourite selected. ▸... -
Page 44: Childproof Lock
7 Programme options Temporarily turning off a permanent setting option ▸ Touch the desired programme, e.g. – The programme selected appears in the display. Intensive 1h15 65° ▸ Touch the button. – A selection of setting options appears in the display. ▸... -
Page 45: All In 1
7 Programme options Deactivating ▸ On the start screen, touch the button repeatedly until the user setting «Childproof lock» appears. ▸ Touch the button. ▸ Touch the button. – The childproof lock is deactivated. All in 1 Activating ▸ On the start screen, touch the button repeatedly until the user setting used «All in 1»... -
Page 46: Ecomanagement
7 Programme options EcoManagement ▸ Touch the button. – The energy and water consumption of the last programme appears in the display. Consumption of last programme 0.8 kWh ▸ Touch the button. – The average energy and water consumption of the last 25 programmes appears in the display. -
Page 47: Zug-Home
– A 6-digit PIN appears in the display of the household appliance. ▸ Enter the 6-digit PIN in the V-ZUG App and confirm the bluetooth pairing request. – The name of the active WLAN/Wi-Fi appears in the V-ZUG App and then you are prompted to enter the WLAN/Wi-Fi password. -
Page 48: User Settings
9 User settings User settings Changing the user settings The user settings can be changed at any time. ▸ On the start screen, touch the button repeatedly until «User settings» appears. ▸ Touch the button. – The user settings menu appears in the display. ▸... - Page 49 9 User settings Setting options Permanent selection Selection Touch a setting option to assign it automatic- ▪ : Energy saving ally to each programme (see page 43). The ▪ : SteamFinish * «Energy saving» and «SteamFinish» set- ▪ : Partial load ting options are not activated for the «Pre-rins- ▪...
- Page 50 : Deactivated (factory setting) trieve and change the user settings or retrieve various statistics about your household appli- ances. Further information on V-ZUG-Home and its availability can be found at home.vzug.com. EcoManagement Selection If the user setting is activated, EcoManage- ▪...
-
Page 51: Demo Mode
10 Demo mode Deleting favourites Selection Touch «Delete» and confirm the prompt to ▪ : Deleting delete all the favourites. Factory setting Selection With «YES», all user settings are reset to the ▪ YES factory settings. ▪ NO Service settings The service settings are only available for use by service staff. -
Page 52: Switching On
10 Demo mode 10.2 Switching on ▸ On the start screen, touch the button repeatedly until «User settings» appears. ▸ Touch the button. – The user settings menu appears in the display. ▸ Touch ▸ Touch to activate. ▸ Enter 6301. ▸... -
Page 53: Switching Off
10 Demo mode 10.3 Switching off ▸ On the start screen, touch the button repeatedly until «User settings» appears. ▸ Touch the button. – The user settings menu appears in the display. ▸ Touch ▸ Touch to deactivate. Service ▸... -
Page 54: Care And Maintenance
11 Care and maintenance Care and maintenance 11.1 Cleaning the interior and exterior With frequent use of programmes with low temperatures (under 55 °C) such as the Eco programme make sure to run the Machine care programme every now and again. Cleaning the interior Using the correct dosage of detergent will automatically clean the interior of the appli- ance. -
Page 55: Cleaning The Spray Arms
11 Care and maintenance 11.2 Cleaning the spray arms Upper spray arm ▸ Remove the upper basket. ▸ Release the bayonet fastener 1 in an anti-clockwise direction and remove. ▸ Remove the spray arm 2 from the shaft and rinse well under running water. -
Page 56: Refilling With Regeneration Salt
11 Care and maintenance Risk of cuts to hands Splinters of glass and very sharp bits can get deposited in the pump sump. Wear cut-resistant gloves when cleaning the pump sump. ▸ Remove coarse detritus from the pump sump. ▸ Replace the filter system and turn the fine filter 1 as far as it will go in a clockwise direction. - Page 57 11 Care and maintenance ▸ Wipe away any excess salt around the edge of the salt reservoir 4. ▸ Close the cover 3 on the salt reservoir and engage the latch. ▸ Push the lower basket 1 all the way back in. ▸...
- Page 58 11 Care and maintenance Approximate consumption of regeneration salt The consumption of regeneration salt depends on the hardness of the water supply. The lower the water hardness, the greater the number of wash cycles per kg of regeneration salt. Wash cycles per kg salt °fH °dH 1–5...
-
Page 59: Filling With Rinse Agent
11 Care and maintenance 11.5 Filling with rinse agent Never put detergent in the rinse agent reservoir! Wipe away any spilt rinse agent. Risk of foaming. Follow the manufacturer’s safety instructions and warnings. Rinse agent prevents water spotting after final rinsing (rinsing with rinse agent). When the supply of rinse agent is exhausted, the refill indicator flashes and the fol- lowing appears in the display:... -
Page 60: Trouble-Shooting
12 Trouble-shooting Trouble-shooting You may be able to trouble-shoot the following errors yourself. If not, note down the error message in full and the serial number (SN), which can be found on the identification plate, and call Customer Services. 12.1 Error messages In the event of error messages follow the instructions on the operating panel. -
Page 61: Other Possible Problems
12 Trouble-shooting Display Possible cause Solution F… / E… ▪ Various situations can ▸ Cancel the error message by press- lead to an «F» mes- ing the button. sage. If the error message persists: ▸ Switch the power supply off for about 1 minute. -
Page 62: Unsatisfactory Washing Results
12 Trouble-shooting Problem Possible cause Solution An unpleasant ▪ There could be several ▸ Clean the filter system. smell tends to reasons for this. ▸ Select a more powerful programme. come from the ap- ▸ Refill the salt reservoir with enough pliance. -
Page 63: In The Event Of A Power Failure
12 Trouble-shooting Problem Solution Glassware be- ▸ The glassware is not dishwasher safe. Use glassware that is comes cloudy or dishwasher safe. streaky. The residue cannot be wiped off. There are streaks ▸ Reduce the rinse agent dosage in the user settings (see page and lines on the 48). -
Page 64: Accessories And Spare Parts
13 Accessories and spare parts Accessories and spare parts Please give model designation, model number and type of appliance when ordering parts. «Small» cutlery basket «Large» cutlery basket Rack set for lower basket Set of 4 easy prongs Vario cutlery basket insert set Filter system Racks for upper basket Set of 4 clips for small parts... -
Page 65: Technical Data
14 Technical data Technical data Abmessungen EURO 60 Grossraum Gerätehöhe 821 mm (bis Blende) Gerätehöhe 845–893 mm (inkl. Verstellsockel) Gerätebreite 596 mm Gerätetiefe 572 mm Gerätegewicht 49–56 kg Plumbing in Cold or hot water up to 60 °C: G¾" Permitted pressure of water supply: 0.1–1.0 MPa (1–10 bar) Max. -
Page 66: Product Information In Accordance With Eu Regulation 2019/2017
15 Disposal 14.3 Product information in accordance with EU Regulation 2019/2017 Appliance-specific data is stored in the European Product Database for Energy Labelling (EPREL). To identify the appliance: ▸ scan the QR code on the energy label and follow the link or alternatively ▸... -
Page 67: Index
Index Detergent Adding ............ 36 A messages ............60 Combination .......... 17 Aborting Selecting............ 35 Programme ........... 39 Detergent dispenser......... 10, 36 Acoustic signal ..........48 Display ............... 10 All in 1............17, 35 Operating ............ 36 Activating............ 45 Unlocking ............ 44 Deactivating .......... - Page 68 SteamFinish .......... 16 Regeneration salt Consumption .......... 58 Refilling ............ 56 Hot water connection ........50 Rinse agent Hygiene.............. 16 Adding ............ 59 Dosing ............ 49 Rinse agent reservoir....... 10, 59 RinsePlus............17 Identification plate..........71 Information ..........37, 46 Intensive.............
- Page 69 Index Using for the first time........8 Validity..............2 Vario cutlery basket insert......64 V-ZUG App ............47 V-ZUG-Home............. 47 Activating............ 50 Warranty claim..........65 Water hardness ..........49 Regeneration salt......... 58 Wipe protection ..........17 Activating............ 45 WLAN connection ..........47...
- Page 70 Notes...
-
Page 71: Service & Support
Your repair order Call the free service number 0800 850 850 to contact your nearest V-ZUG service centre. You can arrange an on-site visit by us by phone if you wish. General queries, accessories and service agreement V-ZUG will be happy to help you with any general administrative or technical queries, to accept your orders for accessories and spare parts and to inform you about our pro- gressive service agreements. - Page 72 Open appliance door Load dishes Add detergent Select programme Close appliance door: At end of final drying: programme starts unload dishes 1158560-02 V-ZUG Ltd, Industriestrasse 66, CH-6302 Zug Tel. +41 58 767 67 67 info@vzug.com, www.vzug.com Service Centre: Tel. 0800 850 850...
Need help?
Do you have a question about the AdoraDish V4000 OptiLift and is the answer not in the manual?
Questions and answers