Table of Contents
Advertisement
Quick Links
We advise you to read this manual carefully, which contains all the instructions for maintaining the
appliance's aesthetic and functional qualities. For further information on the product: www.smeg.com
PRECAUTIONS
General safety instructions
Risk of personal injury
• During use the appliance and
its accessible parts become
very hot. Keep children well
away from the appliance.
• The appliance becomes very
hot during use. Make sure that
you never touch the heating
elements inside the oven.
• Protect your hands by wearing
oven gloves when moving food
inside the oven.
• Never try to put out a fire or
flames with water: Turn off the
appliance and smother the
flames with a fire blanket or
91477A388/A
3
3
7
8
8
8
8
8
8
9
9
9
9
9
10
10
11
11
11
11
other appropriate cover.
• This appliance may only be
used by children aged 8 years
and over, and by people of
reduced physical, sensory or
mental capacity, or lacking in
experience in the use of
electrical appliances, provided
that they are supervised or
have been given instructions on
the safe use of the appliance
and of the hazards associated
with it.
• Children must not play with the
appliance.
• Keep children under the age of
eight at a safe distance unless
12
12
13
14
16
17
18
18
18
19
19
20
21
21
22
22
25
26
PRECAUTIONS - 3
Advertisement
Table of Contents

Related Manuals for Smeg Classic CS6CMXA2


Summary of Contents for Smeg Classic CS6CMXA2
-
Page 1: Table Of Contents
Instructions for the installer Preliminary operations We advise you to read this manual carefully, which contains all the instructions for maintaining the appliance’s aesthetic and functional qualities. For further information on the product: www.smeg.com PRECAUTIONS General safety instructions other appropriate cover. - Page 2 they are constantly supervised. containers. • Keep children under the age of • Do not insert pointed metal 8 away from the appliance objects (cutlery or utensils) into when it is in use. the slots in the appliance. • Cleaning and maintenance •...
- Page 3 • Always wear personal when the residual heat protective equipment (PPE) indicator lights are still on. before carrying out any work • Supervise children carefully as on the appliance (installation, they cannot readily see the maintenance, positioning or residual heat indication. After moving).
- Page 4 oven. interfere with the hot air circulation inside the oven. • Do not use the open door to rest pans or trays on the internal glass pane. • Cooking vessels or griddle plates should be placed inside • Never leave the appliance the perimeter of the hob.
-
Page 5: Installation
nickel- or chromium-plating). • Position the appliance into the • Do not use abrasive or cabinet cut-out with the help of corrosive detergents (e.g. a second person. scouring powders, stain • Check that the carcase has the removers and metallic required openings. -
Page 6: Appliance Purpose
avoid possible hazards. be kept in mind that the appliance may be equipped with an updated version of the • Allow the appliance to be system, and as such, all that appears on the disconnected after installation, display may differ from those in the manual. via an accessible plug or a Manufacturer’s liability switch in the case of a fixed... -
Page 7: To Save Energy
of European standard EN 60350-1. light sources. To save energy • Only preheat the appliance if the recipe requires you to do so. • Unless otherwise indicated on the package, defrost frozen foods before placing them in the oven. • When cooking several types of food it is •... -
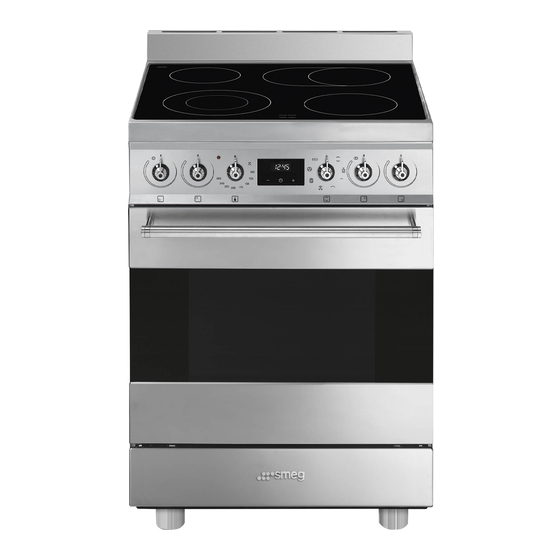
Page 8: Hob
5 Door 7 Storage compartment 6 Fan Frame shelf Outside diameter Power consumption Inside diameter Power consumption Zone (mm) (W)* (mm) (W)* 1200 1800 2200 oval plate 2200 1400 * power levels are indicative and can vary according to the pan used or the settings made. Control panel 1 Hob cooking zone knobs to indicate that the temperature set inside the... -
Page 9: Other Parts
5 Function knob Deep tray The oven’s various functions are suitable for different cooking modes. After selecting the required function, set the cooking temperature using the temperature knob. Other parts Shelves Useful for collecting fat from foods placed on The appliance features shelves to position trays the rack above and for cooking pies, pizzas, and racks at different heights. -
Page 10: Using The Accessories
shelves. Using the storage compartment • Remove and wash all the appliance (where present) accessories (see chapter "CLEANING AND MAINTENANCE"). See General safety instructions. First heating 1. Set a cooking time of at least one hour (see The storage compartment is in the bottom of the paragraph "Using the oven"). -
Page 11: Using The Oven
To adjust the power of the double rough base. heating plate, turn the knob to the required If hob and oven are position between low and high. being used at the same time, To go back to using just the single central plate, under certain conditions turn the knob to and then turn it back to a... -
Page 12: Digital Programmer
GRILL Digital programmer Produces excellent grilling and gratinating results. When used at the end of cooking, gives a uniform browning to dishes. FAN WITH GRILL Allows optimal grilling, even for thick slices of meat. Perfect for larger cuts of meat. TURBO Decrease key Allows quick cooking on multiple... - Page 13 current time (for example, the cooking end appear, alternating with the time shown is 18:30). current time. 6. Press the key to set the cooking 3. Use the increase and decrease end time. (for example, 19:30). keys to set the required minutes of cooking. 4.
-
Page 14: Cooking Advice
• Use a meat thermometer when roasting 2. Use the increase and decrease meat, or simply press on the roast with a keys to set the required minutes. spoon. If it is hard, it is ready; if not, it needs 3. -
Page 15: Cooking Information Table
Advice for defrosting and proving this way, the liquid from the defrosting food drains away from the food. • Place frozen foods without their packaging in a lidless container on the first shelf of the • The most delicate parts can be covered with oven. -
Page 16: Cleaning And Maintenance
Weight Temp. Time Food Function Shelf (Kg) (°C) (minutes) Tart CIRCULAIRE 35 - 40 Ricotta cake CIRCULAIRE 160 - 170 55 - 60 Jam tarts TURBO/CIRCULAIRE 20 - 25 Paradise CIRCULAIRE 55 - 60 cake Profiteroles TURBO/CIRCULAIRE 80 - 90 Sponge CIRCULAIRE 150 - 160... -
Page 17: Knobs
bases of pans, especially aluminium ones, 2. Grasp the door on both sides with both rubbing on the surface, and due to the use of hands, lift it forming an angle of around 30° unsuitable detergents. They are difficult to and remove it. -
Page 18: Cleaning The Oven Cavity
4. Then remove the inner glass pane from the 8. Reinsert the intermediate glass unit and front profile. reposition the inner glass. 5. Remove the intermediate glass unit by lifting 9. Be sure to fit the 4 pins of the inner glass well it upwards. -
Page 19: Vapor Clean (On Some Models Only)
Removing racks/trays support frames • During the assisted cleaning cycle, wash the self-cleaning panels (where fitted), which Removing the rack/tray support frames enables were previously removed, separately in the sides to be cleaned more easily. warm water and a small amount of To remove the rack/tray support frames: detergent. -
Page 20: Installation
Replacing the internal light bulb 4. Slide out and remove the light bulb. Power voltage Danger of electrocution • Unplug the appliance. • Wear protective gloves. 1. Completely remove all accessories from inside the oven. 2. Remove the rack/tray support frames. 3. - Page 21 Appliance dimensions If a hood is installed above the appliance, refer to the hood instructions manual to make sure the correct clearance is left. Appliance overall dimensions Position of electrical connection Levelling the appliance 600 mm 600 mm See General safety instructions. min.
- Page 22 Assembling the upstand 3. Assemble the fastening bracket. The upstand must always be positioned and 4. Align the base of the hook on the fastening secured correctly on the appliance. bracket with the base of the slot on the wall 1.
-
Page 23: Electrical Connection
7. Move the bracket onto the wall and mark 220-240 V 3~ the position of the holes to be drilled in the 4 x 2.5 mm ² wall. four-core cable 220-240 V 1N~ 3 x 4 mm ² three-core cable 380-415 V 2N~ 4 x 2.5 mm ²... -
Page 24: Instructions For The Installer
2. Gently rotate the plate and remove it from its please explain to the user how to use it seat. correctly. 3. Proceed with installation of the power supply cable. It is recommended to slacken off the cable clamp screw before installing the power supply cable.
Need help?
Do you have a question about the Classic CS6CMXA2 and is the answer not in the manual?
Questions and answers