Table of Contents
Advertisement
Quick Links
1. INSTRUCTIONS FOR USE ..................................................................................................... 4
2. SAFETY PRECAUTIONS ........................................................................................................ 6
3. ENVIRONMENTAL CARE ....................................................................................................... 8
3.1 Our environmental care .................................................................................................................................. 8
3.2 Your environmental care ................................................................................................................................. 8
4. GET TO KNOW YOUR APPLIANCE ....................................................................................... 9
4.1 Description of the controls on the front panel ............................................................................................... 10
5. AVAILABLE ACCESSORIES ................................................................................................. 11
5.1 Using the rack or tray .................................................................................................................................... 12
5.2 Using the support rack .................................................................................................................................. 12
5.3 Using the rotisserie rod (on some models only) ............................................................................................ 12
6. USING THE COOKING HOB ................................................................................................. 13
6.1 Layout of the cooking zones ......................................................................................................................... 13
6.2 Saucepans suitable for use in induction cooking .......................................................................................... 14
6.3 Limiting the cooking duration ........................................................................................................................ 14
6.4 Protection from hob overheating ................................................................................................................... 14
6.5 Advice on energy-saving ............................................................................................................................... 14
6.6 Power levels .................................................................................................................................................. 15
6.7 Saucepan recognition ................................................................................................................................... 15
6.8 Residual heat ................................................................................................................................................ 15
6.9 Heating accelerator ....................................................................................................................................... 15
6.10 Booster function .......................................................................................................................................... 16
6.11 Power management .................................................................................................................................... 16
6.12 Control lock ................................................................................................................................................. 16
7. USING THE OVEN ................................................................................................................ 17
7.1 Before using the appliance ........................................................................................................................... 17
7.2 Oven runners ................................................................................................................................................ 17
7.3 Storage compartment (on some models only) .............................................................................................. 17
7.4 Cooling fan system (on some models only) .................................................................................................. 17
7.5 Internal light .................................................................................................................................................. 17
7.6 General warnings and advice for use ........................................................................................................... 18
7.7 Electronic programmer .................................................................................................................................. 19
8. COOKING WITH THE OVEN ................................................................................................ 21
8.1 Cooking advice and instructions ................................................................................................................... 23
8.2 Cooking operation information table ............................................................................................................. 24
9. CLEANING AND MAINTENANCE ......................................................................................... 25
9.1 Cleaning stainless steel ................................................................................................................................ 25
9.2 Ordinary daily cleaning ................................................................................................................................. 25
9.3 Food stains or residues ................................................................................................................................. 25
9.4 Cleaning the glass ceramic hob .................................................................................................................... 26
9.5 Weekly cleaning ............................................................................................................................................ 26
9.6 Cleaning the oven ......................................................................................................................................... 27
9.7 Pyrolysis: automatic oven cleaning ............................................................................................................... 28
10. EXTRAORDINARY MAINTENANCE .................................................................................. 30
10.1 Replacing the light bulb ............................................................................................................................... 30
10.2 Removing the door ...................................................................................................................................... 30
10.3 Removing the door seal (not on pyrolitic models) ....................................................................................... 31
10.4 Removing the internal glass panels ............................................................................................................ 31
11. INSTALLATION .................................................................................................................. 32
11.1 Installing in kitchen units ............................................................................................................................. 32
11.2 Electrical connection ................................................................................................................................... 33
11.3 Positioning the skirt (on some models only) ................................................................................................ 34
11.4 Positioning and levelling the appliance ....................................................................................................... 34
INSTRUCTIONS FOR THE USER: these instructions contain user recommendations, a
description of the controls and the correct procedures for cleaning and maintenance of the
appliance.
INSTRUCTIONS FOR THE INSTALLER: these are intended for the qualified technician who must
install the appliance, set it functioning and carry out an inspection test.
@
Further information about the products can be found at www.smeg.com
Contents
3
Advertisement
Table of Contents

Related Manuals for Smeg CP60IX


Summary of Contents for Smeg CP60IX
-
Page 1: Table Of Contents
INSTRUCTIONS FOR THE INSTALLER: these are intended for the qualified technician who must install the appliance, set it functioning and carry out an inspection test. Further information about the products can be found at www.smeg.com Contents... -
Page 2: Instructions For Use
General instructions 1. INSTRUCTIONS FOR USE This manual is an integral part of the appliance. It must be kept in its entirety and in an accessible place for the whole working life of the appliance. We recommend reading this manual and all the information it contains carefully before using the appliance. -
Page 3: General Instructions
General instructions Do not rest any weight or sit on the open door of the appliance. Excessive weight may jeopardise its stability. The appliance becomes very hot during use. Suitable heat-proof gloves should be worn for all operations. Do not use the hob if pyrolysis (where present) is taking place inside the oven. The glass ceramic surface is highly resistant to impacts. -
Page 4: Safety Precautions
General instructions 2. SAFETY PRECAUTIONS Consult the installation instructions for safety standards on electrical or gas appliances and for ventilation functions. In your interests and for your safety the law requires that the installation and servicing of all electrical and gas appliances be carried out by qualified personnel in accordance with the standards in force. - Page 5 General instructions This appliance may be used by children from the age of 8 and by people of reduced physical and mental ability or lacking in experience and knowledge, provided they are supervised or instructed on the safe use of the appliance and if they understand the associated risks. Do not allow children to play with the appliance.
-
Page 6: Environmental Care
Instructions for disposal 3. ENVIRONMENTAL CARE 3.1 Our environmental care Pursuant to Directives 2002/95/EC, 2002/96/EC, 2003/108/EC, relating to the reduction of the use of hazardous substances in electrical and electronic appliances, as well as to the disposal of refuse, the crossed out bin symbol on the appliance indicates that the product, at the end of its useful life, must be collected separately from other refuse. -
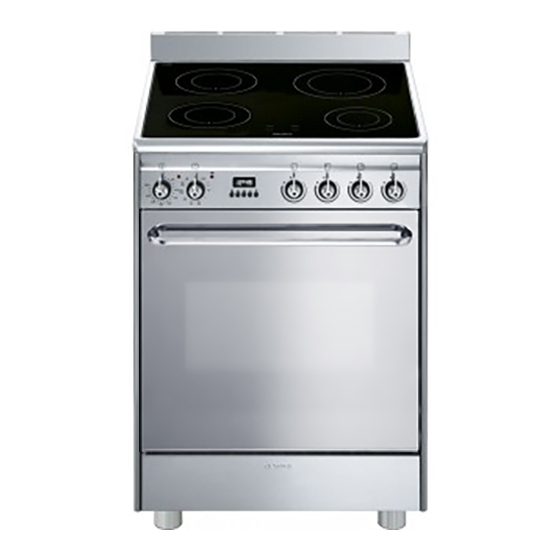
Page 7: Get To Know Your Appliance
Instructions for the user 4. GET TO KNOW YOUR APPLIANCE Cooking hob Control panel Oven seal Oven light (double on some models) Door sensor (on some models only) Rack/tray support frame/guide Roof liner (on some models only) Door... -
Page 8: Description Of The Controls On The Front Panel
Instructions for the user 4.1 Description of the controls on the front panel 4.1.1 Temperature selection knob The cooking temperature is selected by turning the knob clockwise to the required setting, between 50° and 280°C. When the knob is turned, the light starts flashing to signal the oven is preheating. When the selected temperature is reached, a sound signal will sound and the light will stop flashing and remain lit. -
Page 9: Available Accessories
Instructions for the user 5. AVAILABLE ACCESSORIES NOTE: Some models are not provided with all accessories. Rack: useful for holding cooking containers. Oven tray: useful for collecting fat from foods placed on the rack above. Rotisserie frame: useful for supporting the rotisserie rod. -
Page 10: Using The Rack Or Tray
Instructions for the user 5.1 Using the rack or tray The racks and trays are equipped with a mechanical safety lock which prevents them from being taken out accidentally. To insert the rack or tray correctly, check that the lock is facing downwards (as shown in the figure at the side). -
Page 11: Using The Cooking Hob
Instructions for the user 6. USING THE COOKING HOB On first connection to the electrical mains, an operating check will be carried out automatically and all the indicator lights will come on for a few seconds. After use, turn off the hot plates used returning the appropriate knob to the “O” position. Never rely solely on the cookware detector. -
Page 12: Saucepans Suitable For Use In Induction Cooking
6.2 Saucepans suitable for use in induction cooking The containers used on the induction cooking surface must be made of metal, with magnetic properties and a sufficiently large base. Use only saucepans with bases suitable for induction hot plates. Suitable containers •... -
Page 13: Power Levels
Instructions for the user 6.6 Power levels The power in the cooking zone can be adjusted to various levels. The table shows the levels suitable for various types of cooking. Power level 1 - 2 3 - 4 5 - 6 7 - 8 *See booster function. -
Page 14: Booster Function
6.10 Booster function The booster function allows to activate the cooking zone at maximum power as long as 10 minutes. It can be used to bring a large quantity of water to a boil rapidly or to broil meat. Turn the knob clockwise to the “P” position for two seconds and then release; the symbol appear on the display. -
Page 15: Using The Oven
Instructions for the user 7. USING THE OVEN 7.1 Before using the appliance • Remove any labels (apart from the technical data plate) from trays, dripping pans and the cooking compartment. • Remove any protective film from the outside or inside of the appliance, including from accessories such as trays, dripping pans, the pizza plate or the base cover. -
Page 16: General Warnings And Advice For Use
Instructions for the user 7.6 General warnings and advice for use All cooking operations must be carried out with the door closed. The dissipation of heat may cause hazards. During cooking, do not cover the bottom of the oven with aluminium or tin foil and do not place pans or oven trays on it as this may damage the enamel coating. -
Page 17: Electronic Programmer
Instructions for the user 7.7 Electronic programmer 7.7.1 Setting the time On the first use, or after a power failure, keys together, and at the same time press the the setting by one minute for each pressure. Press either of the value modification keys to display the current time. 7.7.2 Using the timer Warning: the timer does not stop the cooking operation. - Page 18 Instructions for the user 7.7.5 Automatic cooking Automatic cooking is the function which allows a cooking operation to be started at a set time and then ended after a specific length of time set by the user. Having selected a function, press and hold ;...
-
Page 19: Cooking With The Oven
Instructions for the user 8. COOKING WITH THE OVEN ECO: Using the grill and the lower heating element in combination is particularly suitable for cooking on a single runner only, as it provides low energy consumption. STATIC: As the heat comes from above and below at the same time, this system is particularly suitable for certain types of food. - Page 20 Instructions for the user CIRCULAR: The combination of the fan and the circular element (incorporated in the rear of the oven) allows to cook different foods on several levels, as long as they need the same temperatures and same type of cooking. Hot air circulation ensures instant and uniform distribution of heat.
-
Page 21: Cooking Advice And Instructions
Instructions for the user 8.1 Cooking advice and instructions 8.1.1 General advice • We recommend preheating the oven before putting the food in. Place the food in the oven only once the cooking light is lit with a steady light. •... -
Page 22: Cooking Operation Information Table
8.2 Cooking operation information table Types of food Weight Function FIRST COURSES Lasagne 3 kg Oven-baked pasta MEAT Roast veal 1 Kg Pork loin 1 Kg Shoulder of pork 1 Kg Roast rabbit 1 Kg Turkey breast 1 Kg Roast neck of pork 1 Kg Roast chicken 1 Kg... -
Page 23: Cleaning And Maintenance
Instructions for the user 9. CLEANING AND MAINTENANCE Do not use steam jets for cleaning the appliance. The steam could reach the electronics, damaging them and causing short-circuits. CAUTION: For your safety, you are advised to wear protective gloves while performing any cleaning or extraordinary maintenance. -
Page 24: Cleaning The Glass Ceramic Hob
Instructions for the user 9.4 Cleaning the glass ceramic hob The glass ceramic hob should be regularly cleaned, preferably after every use, once the symbol has disappeared from all displays. Smudges from aluminium-based pans can be easily cleaned off with a cloth dampened in vinegar. -
Page 25: Cleaning The Oven
Instructions for the user 9.6 Cleaning the oven For the best oven upkeep, clean it regularly after having allowed it to cool. • Take out all removable parts. • Clean the oven racks with hot water and non-abrasive detergent. Rinse and dry. •... -
Page 26: Pyrolysis: Automatic Oven Cleaning
9.7 Pyrolysis: automatic oven cleaning Pyrolysis is an automatic high-temperature cleaning procedure which causes dirt to dissolve. Thanks to this process, it is possible to clean the inside of the oven with great ease. During the first automatic cleaning cycle, unpleasant odours may occur due to the normal evaporation of oil y manufacturing substances. - Page 27 Instructions for the user 9.7.2 Setting the cleaning cycle Turn the function selection knob to to select the cleaning cycle. While holding down key , press keys to set the duration of the cycle. The setting varies between a minimum of 1h 30m and a maximum of 3h 00m. Two minutes after the cleaning cycle (Pyrolysis) starts, a locking device will be tripped, preventing the door being opened.
-
Page 28: Extraordinary Maintenance
10. EXTRAORDINARY MAINTENANCE The oven requires periodic minor maintenance or replacement of parts subject to wear, such as gaskets, light bulbs, etc. Specific instructions for each operation of this kind are given below. Before any intervention that requires access to live parts, disconnect the appliance from the power supply. -
Page 29: Removing The Door Seal (Not On Pyrolitic Models)
Instructions for the installer 10.3 Removing the door seal (not on pyrolitic models) To permit thorough cleaning of the oven, the door seal may be removed. There are fasteners on all four sides to attach it to the edge of the oven. -
Page 30: Installation
11. INSTALLATION 11.1 Installing in kitchen units Veneers, adhesives or plastic coatings on adjacent furniture should be temperature-resistant (no less than 90°C). If they are not sufficiently temperature-resistant, they may warp over time. The appliance must be installed by a qualified technician and according to the standards in force. Depending on the type of installation, this appliance belongs to class 2, subclass 1 (Fig. -
Page 31: Electrical Connection
Instructions for the installer 11.2 Electrical connection Make sure the voltage and the cross-section of the power supply line match the specifications indicated on the identification plate positioned on the appliance. Do not remove this plate for any reason. A copy of the plate is attached to the instructions. -
Page 32: Positioning The Skirt (On Some Models Only)
• Use H05V2V2-F cables resistant to at least 90°C. • The values indicated above refer to the cross-section of the internal conductor. • The tightening torque of the screws of the terminal supply wires must be 1.5 - 2 Nm. •...
Need help?
Do you have a question about the CP60IX and is the answer not in the manual?
Questions and answers