Table of Contents

Advertisement

1. INSTRUCTIONS FOR USE .................................................................................................. 40
2. SAFETY PRECAUTIONS ...................................................................................................... 42
3. ENVIRONMENTAL CARE .................................................................................................... 44
3.1 Our environmental care ................................................................................................................................ 44
3.2 Your environmental care ............................................................................................................................... 44
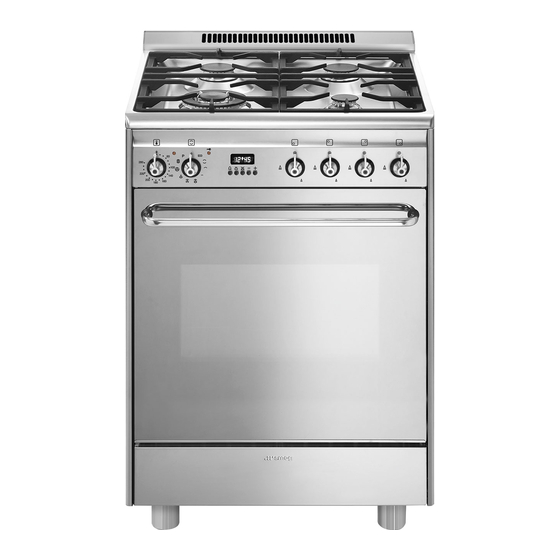
4. GET TO KNOW YOUR APPLIANCE ..................................................................................... 45
4.1 Description of the controls on the front panel ............................................................................................... 46
5. AVAILABLE ACCESSORIES ................................................................................................. 47
5.1 Using the reduction racks ............................................................................................................................. 47
5.2 Using the rack or tray .................................................................................................................................... 48
5.3 Using the support rack .................................................................................................................................. 48
5.4 Using the rotisserie rod (on some models only) ............................................................................................ 48
6. USE OF THE COOKING HOB ............................................................................................... 49
6.1 General warnings and advice ....................................................................................................................... 49
6.2 Lighting the hob burners ............................................................................................................................... 49
6.3 Practical hints for using the hob burners ....................................................................................................... 49
6.4 Pan diameters ............................................................................................................................................... 50
6.5 Glass lid (on some models only) ................................................................................................................... 50
7. USING THE OVEN ................................................................................................................ 51
7.1 Before using the appliance ........................................................................................................................... 51
7.2 Oven runners ................................................................................................................................................ 51
7.3 Storage compartment (on some models only) .............................................................................................. 51
7.4 Cooling fan system (on some models only) .................................................................................................. 51
7.5 Internal light .................................................................................................................................................. 51
7.6 Warnings and general advice for usage ....................................................................................................... 52
7.7 Electronic programmer .................................................................................................................................. 53
8. COOKING WITH THE OVEN ................................................................................................ 55
8.1 Cooking advice and instructions ................................................................................................................... 57
8.2 Cooking process information table ................................................................................................................ 58
9. CLEANING AND MAINTENANCE ......................................................................................... 59
9.1 Cleaning stainless steel ................................................................................................................................ 59
9.2 Ordinary daily cleaning ................................................................................................................................. 59
9.3 Food stains or residues ................................................................................................................................. 59
9.4 Cleaning the cooking hob parts .................................................................................................................... 59
9.5 Cleaning the oven ......................................................................................................................................... 61
9.6 Pyrolysis: automatic oven cleaning ............................................................................................................... 62
10. EXTRAORDINARY MAINTENANCE .................................................................................. 64
10.1 Replacing the light bulb ............................................................................................................................... 64
10.2 Removing the door ...................................................................................................................................... 64
10.3 Removing the door seal (not on pyrolitic models) ....................................................................................... 65
10.4 Removing the internal glass panels ............................................................................................................ 65
11. INSTALLATION .................................................................................................................. 66
11.1 Installing in kitchen units ............................................................................................................................ 66
11.2 Room ventilation and combustion extraction .............................................................................................. 67
11.3 Gas connection ........................................................................................................................................... 68
11.4 Electrical connection ................................................................................................................................... 70
11.5 Positioning the skirt (on some models only) ................................................................................................ 71
11.6 Positioning and levelling the appliance ....................................................................................................... 71
12. ADAPTATION TO DIFFERENT TYPES OF GAS .............................................................. 72
12.1 Replacement of nozzles on the hob ............................................................................................................ 72
12.2 Arrangement of burners .............................................................................................................................. 72
12.3 Burner and nozzle characteristics table ...................................................................................................... 73
12.4 Final operations .......................................................................................................................................... 74
IINSTRUCTIONS FOR THE USER: these instructions contain user recommendations, a
description of the controls and the correct procedures for cleaning and maintenance of the
appliance.
INSTRUCTIONS FOR THE INSTALLER: these are intended for the qualified technician who must
install the appliance, set it functioning and carry out an inspection test.
@
Further information about the products can be found at www.smeg.com
Contents
39

Advertisement

Table of Contents
loading

Summary of Contents for Smeg CP60X8

  • Page 1: Table Of Contents

    INSTRUCTIONS FOR THE INSTALLER: these are intended for the qualified technician who must install the appliance, set it functioning and carry out an inspection test. Further information about the products can be found at www.smeg.com Contents...
  • Page 2: Instructions For Use

    General instructions 1. INSTRUCTIONS FOR USE This manual is an integral part of the appliance. It must be kept in its entirety and in an accessible place for the whole working life of the appliance. We advise to carefully read this manual and all the instructions therein before using the appliance.
  • Page 3: General Instructions

    General instructions The appliance becomes very hot during use. Suitable heat-proof gloves should be worn for all operations. Do not use the hob if pyrolysis is taking place inside the oven (if present). If you intend to go away for a prolonged period of time, close the mains gas tap or the gas cylinder tap. Take care that no objects are stuck in the door of the oven.
  • Page 4: Safety Precautions

    General instructions 2. SAFETY PRECAUTIONS Consult the installation instructions for safety standards on electrical or gas appliances and for ventilation functions. In your interests and for your safety the law requires that the installation and servicing of all electrical and gas appliances be carried out by qualified personnel in accordance with the regulations in force.
  • Page 5 General instructions Be aware of how rapidly the cooking zones heat up. Do not place empty saucepans on the heat. Danger of overheating. Fat and oil can catch fire if they overheat. You are therefore recommended not to leave the appliance while preparing foods containing oil or fat.
  • Page 6: Environmental Care

    Instructions for disposal 3. ENVIRONMENTAL CARE 3.1 Our environmental care Pursuant to Directives 2002/95/EC, 2002/96/EC, 2003/108/EC, relating to the reduction of the use of hazardous substances in electrical and electronic appliances, as well as to the disposal of refuse, the crossed out bin symbol on the appliance indicates that the product, at the end of its useful life, must be collected separately from other refuse.
  • Page 7: Get To Know Your Appliance

    Instructions for the user 4. GET TO KNOW YOUR APPLIANCE Cooking hob Control panel Oven seal Oven light (double on some models) Door sensor (on some models only) Frame/Guide supporting racks/ Trays Roof liner (on some models only) Door...
  • Page 8: Description Of The Controls On The Front Panel

    Instructions for the user 4.1 Description of the controls on the front panel 4.1.1 Temperature selection knob The cooking temperature is selected by turning the knob clockwise to the desired setting, between 50° and 280°C. When the knob is turned, the light starts flashing to signal the oven is preheating. When the selected temperature is reached, an audible signal will sound and the light stops flashing but remains lit.
  • Page 9: Available Accessories

    Instructions for the user 5. AVAILABLE ACCESSORIES NOTE: Some models are not provided with all accessories. Reduction rack: useful when using small pans. Rack: useful for holding cooking containers. Oven tray: useful for collecting fat from foods placed on the rack above.
  • Page 10: Using The Rack Or Tray

    Instructions for the user 5.2 Using the rack or tray The racks and trays are equipped with a mechanical safety lock which prevents them from being taken out accidentally. To insert the rack or tray correctly, check that the lock is facing downwards (as shown in the figure at the side).
  • Page 11: Use Of The Cooking Hob

    Instructions for the user 6. USE OF THE COOKING HOB 6.1 General warnings and advice Before lighting the hob burners, make sure that the flame-spreader crowns are correctly positioned with the respective burner caps. Before lighting the burners lift the glass lid (where present); before closing it again, turn off all the burners and wait for them to cool.
  • Page 12: Pan Diameters

    6.4 Pan diameters Burner Auxiliary Semi-rapid Rapid Ultra-rapid To prevent damage to the appliance or adjacent units, all pans or griddles must be placed inside the perimeter of the hob. Make sure never to come into contact with the lid glass with pots or pans that are still hot. The glass could crack and break with the heat.
  • Page 13: Using The Oven

    Instructions for the user 7. USING THE OVEN 7.1 Before using the appliance • Remove any labels (apart from the technical data plate) from trays, dripping pans and the cooking compartment. • Remove any protective film from the outside or inside of the appliance, including from accessories such as trays, dripping pans, the pizza plate or the base cover.
  • Page 14: Warnings And General Advice For Usage

    Instructions for the user 7.6 Warnings and general advice for usage All cooking operations must be carried out with the door closed. The dissipation of heat may cause a hazard. During cooking, do not cover the bottom of the oven with aluminium or tin foil and do not place pans or oven trays on it as this may damage the enamel coating.
  • Page 15: Electronic Programmer

    Instructions for the user 7.7 Electronic programmer 7.7.1 Setting the time On the first use, or after a power failure, buttons together, and at the same time press the decrease the setting by one minute for each pressure. Press either of the value modification keys to display the current time. 7.7.2 Using the timer Warning: the timer does not stop the cooking process.
  • Page 16 7.7.5 Automatic cooking Automatic cooking is the function which allows a cooking operation to be started at a set time and then ended after a specific length of time set by the user. Having selected a function, press and hold hold and simultaneously use Press...
  • Page 17: Cooking With The Oven

    Instructions for the user 8. COOKING WITH THE OVEN ECO: Using the grill and the lower heating element in combination is particularly suitable for cooking on a single runner only, as it provides low energy consumption. STATIC: As the heat comes from above and below at the same time, this system is particularly suitable for certain types of food.
  • Page 18 Instructions for the user CIRCULAR: The combination of the fan and the circular element (incorporated in the rear of the oven) allows to cook different foods on several levels, as long as they need the same temperatures and cooking time. Hot air circulation ensures instant and uniform distribution of heat.
  • Page 19: Cooking Advice And Instructions

    Instructions for the user 8.1 Cooking advice and instructions 8.1.1 General advice • We recommend preheating the oven before putting the food in. Place the food in the oven only once the cooking light is lit with a steady light. •...
  • Page 20: Cooking Process Information Table

    8.2 Cooking process information table Types of food Weight FIRST COURSES Lasagne 3 Kg Oven-baked pasta MEAT Roast veal 1 Kg Pork loin 1 Kg Shoulder of pork 1 Kg Roast rabbit 1 Kg Turkey breast 1 Kg Roast neck of pork 1 Kg Roast chicken 1 Kg...
  • Page 21: Cleaning And Maintenance

    Instructions for the user 9. CLEANING AND MAINTENANCE Do not use steam jets for cleaning the appliance. The steam could reach the electronics, damaging them and causing short-circuits. WARNING: For your safety, you are advised to wear protective gloves while performing any cleaning or extraordinary maintenance.
  • Page 22 Instructions for the user 9.4.2 Racks Remove the racks and clean them with lukewarm water and non-abrasive detergent, making sure to remove any encrustations. Dry them thoroughly and return them to the hob. Continuous contact between the racks and the flame can cause modifications to the enamel over time in those parts exposed to heat.
  • Page 23: Cleaning The Oven

    Instructions for the user 9.5 Cleaning the oven For the best oven upkeep, clean it regularly after having allowed it to cool. • Take out all removable parts. • Clean the oven racks with hot water and non-abrasive detergent. Rinse and dry. •...
  • Page 24: Pyrolysis: Automatic Oven Cleaning

    9.6 Pyrolysis: automatic oven cleaning Pyrolysis is an automatic high-temperature cleaning procedure which causes dirt to dissolve. Thanks to this process, it is possible to clean the inside of the oven with great ease. During the first automatic cleaning cycle, unpleasant smells may occur due to the normal evaporation of oily manufacturing substances.
  • Page 25 Instructions for the user 9.6.2 Setting the cleaning cycle Turn the function selection knob to to select the cleaning cycle. Two minutes after the cleaning cycle (Pyrolysis) starts an interlock device which prevents opening of the door will be tripped. The appropriate light will switch on to indicate that the locking device has been activated.
  • Page 26: Extraordinary Maintenance

    10. EXTRAORDINARY MAINTENANCE The oven requires periodic minor maintenance or replacement of parts subject to wear, such as gaskets, light bulbs, etc. Specific instructions for each operation of this kind are given below. Before any intervention that requires access to live parts, disconnect the appliance from the power supply.
  • Page 27: Removing The Door Seal (Not On Pyrolitic Models)

    Instructions for the user 10.3 Removing the door seal (not on pyrolitic models) To permit thorough cleaning of the oven, the door seal may be removed. There are fasteners on all four sides to attach it to the edge of the oven.
  • Page 28: Installation

    11. INSTALLATION 11.1 Installing in kitchen units Veneers, adhesives or plastic coatings on adjacent furniture should be temperature-resistant (no less than 90°C). If they are not sufficiently temperature-resistant, they may warp over time. The appliance must be installed by a qualified technician and according to the standards in force. Depending on the type of installation, this appliance belongs to class 2, subclass1 (Fig.
  • Page 29: Room Ventilation And Combustion Extraction

    Instructions for the installer 11.2 Room ventilation and combustion extraction The room containing the appliance should have an air supply in accordance with the standards in force. The room where the appliance is installed must have enough air flow as required for the regular combustion of gas and by the necessary air exchange of the same room.
  • Page 30: Gas Connection

    11.3 Gas connection At the end of the installation, check for any leaks with a soapy solution, never with a flame. The tightening torque between connections that incorporate a gasket must be between 10 and 15 Nm. After carrying out any operation on the appliance, check the gas connections are properly tightened. If the appliance is fuelled by liquid gas, use a standards-compliant pressure regulator and connect to the gas cylinder in accordance with the regulations in force.
  • Page 31 Instructions for the installer Make the connection to the gas mains using a rubber hose whose specifications comply with the current regulations (verify that the reference standard is stamped on the hose). Carefully screw the hose connector 3 to the appliance’s gas connector 1 (½”...
  • Page 32: Electrical Connection

    11.4 Electrical connection Make sure the voltage and the cross-section of the power supply line match the specifications indicated on the identification plate positioned on the appliance. Do not remove this plate for any reason. A copy of the plate is attached to the instructions. The appliance must be connected to the electric supply by a qualified technician.
  • Page 33: Positioning The Skirt (On Some Models Only)

    Instructions for the installer 11.5 Positioning the skirt (on some models only) The skirt must always be positioned and secured correctly on the appliance. 1 Unscrew the 2 nuts (B) on the back of the top. 2 Position the skirt above the top, taking care to align the pins (C ) with the holes (D).
  • Page 34: Adaptation To Different Types Of Gas

    12. ADAPTATION TO DIFFERENT TYPES OF GAS73 BEFORE PERFORMING ANY OPERATIONS, SWITCH OFF THE POWER SUPPLY TO THE APPLIANCE. Appliance set for gas: In the case of operation with other types of gas, the burner nozzles must be changed and the minimum flame adjusted on the gas taps.
  • Page 35: Burner And Nozzle Characteristics Table

    12.3 Burner and nozzle characteristics table Rated heating Burner capacity (kW) Auxiliary 1.05 Semi-rapid Rapid Ultra-rapid Rated heating Burner capacity (kW) Auxiliary 1.05 Semi-rapid Rapid Ultra-rapid Instructions for the installer LIQUID GAS - G30/G31 28/37 mbar Nozzle Reduced diameter (1/100 capacity (W) 1600 NATURAL GAS - G20 20 mbar...
  • Page 36: Final Operations

    Instructions for the installer 12.4 Final operations After replacing the nozzles, reposition the flame-spreader crowns, the burner caps and the racks. Following adjustment to a gas other than the one originally set in the factory, replace the gas setting label fixed to the appliance with the one corresponding to the new gas. The label is inserted inside the nozzle pack (where present).

This manual is also suitable for:

Cp60x9Gp61x8

Table of Contents